Quantcast
Channel: Gian and Sheila – Adrenaline Romance
Viewing all 334 articles
Browse latest View live

Kabang Falls and Mt. Kan-Irag: All in One Adventure

$
0
0

done

The best thing about the island of Cebu is that it has everything. It has a bustling metropolis, remarkable cultural and historical sites, rich natural resources, and untouched natural wonders, and all these are definitely within easy reach.

Two of these natural wonders are the beautiful, awesome waterfalls of Kabang Falls and the lofty, imposing Mt. Kan-Irag. Individually, they can be reached in an hour from the city. Technically speaking, these wonders are actually within Cebu City! These two wonders are in close proximity so much so that hikers can reach Mt. Kan-Irag from Kabang Falls in just a few hours. No wonder that the adventure collection of trekking along Kabang River, climbing Kabang Falls, hiking through the meadows of Busay, and camping at the top of Mt. Kan-Irag’s Pedro Calungsod Peak is a favorite among Cebuano mountaineers.

So, last September 16, 2012, Sweetie and I decided to treat her colleagues and friends to a climb to Mt. Kan-Irag starting at Kabang Falls. I was a bit apprehensive at first because no matter how many times I’ve done the traverse, I haven’t memorized the trail (actually, there are many trails to the mountain, but I have a poor sense of direction).  However, seeing genuine excitement, I decided to risk getting lost while taking EWIT’s trail.

From Sunny Hills, Talamban, we headed to Sitio Baugo, our jump-off point in Baranggay Budlaan where we started the trek.

done

It’s a good thing that Baranggay Budlaan’s LGU recognized the need to protect their natural treasure. Along with the APO, the LGU encourages trekkers and mountaineers to preserve this magnificent natural wonder by keeping it clean and free of vandalism and garbage.

done

After a short prayer for safety, security, and blessings, we headed off into the light forest that leads to the base of Budlaan River System.

done

Within just a few minutes of the trek, we can see the splendor of Cebu’s verdant mountains, tucked in secrecy by Mother Nature herself.

done

After 45 minutes of leisurely trekking, we finally arrived at this beautiful pool that is fed by the river. This is the official starting point of the first segment of the adventure: river trekking at Budlaan River System.

done2

After letting the group drink in the beauty of the place, the agony began. To get to Baranggay Budlaan’s best kept treasure, we needed to walk upstream. Doing so involves scrambling over slippery boulders, some of which are the size of small houses.

done

In some sections of the river, you can reach the edge where walking on slightly muddy ground can be a respite after all that hard scrambling.

done

Sweetie and I were leading the team, so we went ahead to scout for possible routes through the river.

done

After huffing and puffing along, the team climbed a huge boulder situated at the edge of a small waterfall. When you get to this area, you’d be glad and assured to know that Kabang Falls is just around the corner.

done

The green pool is really enticing; it’s almost impossible to resist jumping into it during a hot summer day.

done

The nice thing about having an adventuring partner—and sweetheart—is that you begin to fully recognize and accept each other’s significance in achieving your dreams.

done

After awhile, we heard the unmistakable mighty sound of millions of gallons of cascading water. Kabang Falls shyly reveals herself.

done

The main waterfall is actually way above the river. To get to it, trekkers need to climb that immense, cliff-like boulder at the right.

done

Unless you want to get your feet wet, the entrance to this boulder is through this cavelike cavity at the side of the river . . . (no, Sweetie and I weren’t doing something malicious in there)

done

.  . . then you need to climb over a couple of huge, slippery boulders that are crawling with fire ants.

done

Trekkers emerge at the right side of the magnificent Kabang Falls.

done

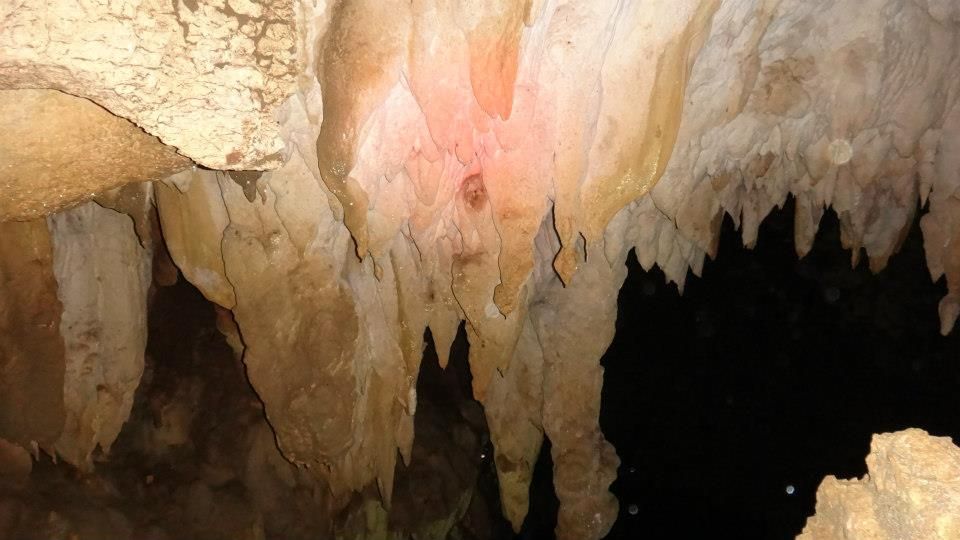
The glory of Kabang Falls. Nothing beats the beauty of nature. Kabang Falls is a classic example of a horsetail waterfall, a waterfall wherein the cascading water still makes contact with the bedrock.

done

It was a bit past noon when we reached the Kabang Falls pool. That only meant one thing: it was lunchtime! Time to take out all that delicious packed meal we cooked or bought from carenderias.

done

Refreshing dip at Kabang Falls! The water here is refreshingly cool. Consider a dip in the cool water as a reward for completing the very first part of the trek.

done

Adrenaline Romance sweethearts in front of one of Cebu’s best kept secrets. This image also gives you an idea of how massive this waterfall is.

done

After that excellent lunch and invigorating dip, the team was ready for the second part of the adventure: a treacherous uphill climb at the side of the waterfall and a trek into the jungle.

done

The team entered light woods that line along the side of the upper part of Budlaan River.

done

Check out that steep embankment at Jody’s left side. A misstep to the left can send a person careening over the edge.

done

Didn’t I tell you that I have a poor sense of direction? Yes, you guessed it right. We got lost. We got stuck in an orchard garden which seemed to be a dead end. Half an hour later, we found the trail and discovered why we didn’t see it in the first place: the head of the trail was completely overgrown with grass. This is a valuable lesson: never underestimate mountains because, like people, they continuously change.

done

To get down to the upper part of Budlaan River from the mountain slope, we have to slide down a—well, a mountain slope.

done

Be careful! That loose dry soil can be quite slippery. This is where a trekking pole and trekking shoes with heel brakes come in handy; they allow you to control your descent.

done

We exited the slope and entered the upper river where we rested a bit.

done

A short while later and after making sure everyone is okay, we proceeded to the mountain opposite of the river. Yes, it was another tough climb.

done

Well, no matter how tough the climb is, if adventure is in your heart, you will always manage a genuine, happy smile even when your heart is about to burst.

done

The opposite mountain features an even thicker jungle.

done

The last main hurdle of the river is this dried-up waterfall. See the moss? That means water still flows down it, probably during rainy season.

done

And yes, it involved climbing it to get to the water source.

done

A short while later, we arrived at the water source. Trekkers can fill their water bottles and take a much-needed rest here. If you wish to camp, you need to get as much water here as possible because this is the last water source along the way.

done

There’s the water source. Don’t worry, the water is extremely clean. It comes from a “tubod,” which means it is pure groundwater. Mind your manners and take a cup or “tabo” to scoop up water and pour it into your water bottle. Do not dip your water bottle here; it might contaminate the water source itself.

done

What a spectacular view! We came all the way down there.

done

After resting for a bit, it’s time to climb again. See how happy we are? Climbing with your adventurous sweetheart is really fun!

done

An hour later, we were out of the jungle and entered the Sirao-Busay highlands. The grassy valley filled with strangely shaped trees, green meadows, and immense flower plantations makes you think that you died and went to heaven.

done

The Sirao-Busay highland valley is dotted with these weird Lord of the Rings trees. We wouldn’t be surprised if J.R. Tolkien got his inspiration here. This is where Gollum led Frodo and Sam to Mordor.

done

Have you ever wondered where the flowers you buy in Carbon, Sto. Niño Church, Colon, etc., came from? Well, they came from here. The cool weather and the fertile mountain soil makes the valley ideal for cultivating flowers.

done

A perfect line of trees and a mountaineer make the perfect adventure scene. Believe it or not, those trees are “naturally” planted, meaning, it was Mother Nature herself who planted them in a straight line!

Climbing up to the trail that leads to the summit of Mt. Kan-Irag

done

Enduring dozens of climbs in one trek can take its toll. Some of our members felt the telltale signs of leg cramps, so we decided to stop on a clearing to rest and to let their bodies replenish their store of ions.

done

An encompassing view of Lapu-lapu City, Mandaue City, and Cebu City opened up in front of us. How magnificent! Can you identify the structures there?

done

As we approached what EWIT calls the Guava Trail (due to the fact that it runs along a guava grove), we battled razor-sharp cogon grass. Scratches from cogon grass blades are very itchy. It’s important to wear leggings and arm protectors here.

done

This is the Guava Trail which leads to the forest at the base of the Mt. Kan-Irag’s peak itself. This area also serves as an alternative campsite to the one at the peak.

done

Within minutes, the team entered the jungle, the start of the assault to the mountain’s summit.

done

Emerging from the forest, the team battled the last hurdle, an immense field of five-foot tall, razor-sharp, itchy cogon grass growing on big chunks of loose, volcanic rock. The shape of the field and the presence of volcanic rocks strongly imply that Mt. Kan-Irag may be a dormant or extinct volcano.

done

After 5 or 6 hours of river trekking, scrambling, hiking, climbing, and battling the elements of nature, we finally reached Pedro Calungsod peak, the rocky summit of Mt. Kan Irag. Here’s a trivia: do you know that the rock that Sweetie and I are sitting on is called a Lover’s Rock? That’s because female mountaineers never fail to say yes to their male partners’ proposals here.

done

A breathtaking view of Cebu City, Babag Range, Cebu’s central highlands, and the Busay-Sirao valley can be enjoyed at the peak.

done

Sweetie screamed, “I’m the Queen of the World!”

done

And everyone was so happy upon reaching the peak! The peak is also flat; that’s why it serves as a campsite for those who wish to have an overnight stay here. Campers may need to bring earth pads, however, because the ground is extremely rocky and, thus, uncomfortable to lie on.

done

Congratulations for a climb well done!

done

At 780 meters, Mt. Kan-Irag is not a particularly high mountain, but the long traverse towards the peak, the razor-sharp cogon grass that covers the entire mountainside, the dangerous volcanic boulders, the raging heat of the sun, and of course, the scenic wonders that mountaineers pass by make every step of the climb worthwhile!

Most photos courtesy of Ronald Ramiso and Prince Christian Toyugan. Thank you for letting us use your photos, sirs!

Suggested Itinerary for a Day Trek:

9:00 AM – Meet up at Sunny Hills, Talamban
9:30 AM – ETD for Baugo (habal2 ride)
10:00 PM – ETA Baugo, ETD for Kabang Falls
11:30 AM – ETA at Kabang Falls, Lunch, Swimming
1:00 PM – Continue Trek
2:30 PM – ETA water source, fill water bottles
3:00 PM – Continue trek through the Busay-Sirao Valley
4:00 PM – ETA at Pedro Calungsod Peak
5:00 PM – ETD Pedro Calungsod Peak
5:45 PM – ETA Ayala Heights Subdivision, ride habal-habal to JY Square
6:30 PM – ETA JY Square, Lahug

Tips:

1. Most Cebu mountaineers know this place because this is their “backyard.” For guideship services, contact Ruel Olaso (09215882345 or 09236651515), Peri Pervida (09284016666 or 09334036408), or Tiki Allado (0922547750). EWIT mountaineers know the many routes to Mt. Kan-Irag very well. Negotiate the fees with them.

2. A Mt. Kan-Irag climb coupled with river trekking is perfect for budget-conscious adventurers. You can actually climb the mountain with a budget of less than P200. The biggest chunk of expenses comes from the habal-habal fare. From Sunny Hills, Talamban to Sitio Baugo, the fare is P25. On the return trip, the habal-habal fare from Ayala Heights to JY Square is P50.

3. A good, strong rope is necessary to safely climb the mountain slope beside Kabang Falls. Your guide will set up the rope for you. The rope is not used to stop a fall but as a handrail; the slope is very slippery and offers very little handholds.

4. Wear waterproof shoes with an aggressive tread. You will need a lot of moisture protection and traction since you will be scrambling over slippery boulders, muddy trails, and lose soil.

5. Improve your balance, especially on the river trekking section of the adventure. A lot of the trail section involves you having the basic skills of a ballerina.

6. Bring salt tablets or beverages that are filled with ions (e.g. Gatorade, coconut water, etc) aside from water. The hot sun, multiple ascents, and sudden descents can make you sweat a lot. When you lose enough ions and salts through your sweat, cramps will occur.

7. Bring energy-rich trail food such as nuts, crackers, bread, and bananas. Don’t underestimate the mountain.

8. The plants in this area are thorny, razor-sharp, and wicked. Protect your arms and legs by wearing arm guards and leggings. A good pair of trekking pants will also help protect your legs.

9. Pack light. You will have to endure a lot of climbs. However, do bring the following:

* Jacket/Raincoat (in case of sudden rain)
* Sun protection (hat/cap/sunblock)

10. You can camp at the peak. On a clear night, the glittering lights of Cebu City compose a spectacular show. Be sure to bring warm clothes if you opt to spend the night there; the mountain can get really chilly.


Terra Manna: Glamping at Its Finest

$
0
0

Sadly, many children nowadays think that fun is all about playing the latest video games and expensive toys or watching movies. For them, adventure is all about going to colossal malls where they could have the time of their lives riding bump cars for 3 minutes. For them, the entire world is encapsulated in the vast network of the Internet.


Gone were the days that we, as children, gleefully ran around vast green fields and scrambled on steep hills. Gone were the days that we explored thick mangrove forests and nearby caverns. Gone were the evenings that we climbed on top of our roofs to wander at the glittering night sky.

These are the long-lost, fun-filled activities that we want to introduce to Alexa May, Sweetie’s daughter. We wanted to show her that the world does not revolve around video games, malls, books, or the Internet. We wanted to let her experience the immense and incomparable fun and excitement that the outdoors can offer. Thus, last November 10 and 11, 2012, Sweetie and I gave Alexa her first taste of outdoor adventure and camping.

Initially, Sweetie and I were concerned that Alexa might not really want a true and outright outdoor experience. After all, there was no way of telling how the child would feel if she’s forced to walk for hours on a trail or climb a mountain with us. So, to introduce Alexa to the world of outdoor adventure, we resorted to glamping, short for glamorous camping. This is a rapidly growing trend that allows people to blend outdoor camping with the comfort and amenities of a hotel or resort. Glamping enables people to experience the outdoors minus the hassles of real camping.

Our glamping adventure started at the world-famous Kawasan Falls in Badian, Cebu. Do you know that our very own Kawasan Falls is considered one of the most beautiful waterfalls in the world?

After a 20-minute brisk trek from the highway, Alexa got her first glimpse of Cebu’s most famous waterfall.

done

That’s the majestic Kawasan Falls that you find in postcards. Cebu Governor Gwen Garcia ordered the structures around the waterfall demolished. Without the ugly artificial structures around it, the waterfall looked so much better.

done

There were too many people at Station 1 where the main waterfall is located. So we decided to move up to Station 2, hoping that there wouldn’t be too many picnickers. Alexa, meanwhile, was having the time of her life. She mentioned that walking across this wooden bridge was one of the highlights of her experience.

done

We saw this small waterfall just beneath Station 2.

This is Station 2 of Kawasan Falls. Yes, there weren’t too many people, which was supposed to be good. However, we learned that we’ll be charged a ridiculously hefty P100 by simply using a flimsy plastic table where we could set up and eat our lunch. The heck with it—we decided to eat our lunch elsewhere.

done

We found the perfect picnic spot just right before and beneath Station 2. The lagoon was a luscious, tempting green pool of cool, mountain-fresh water surrounded by lush vegetation. The riverbed has a gradual slope, which makes this lagoon relatively safer for non-swimmers to enter the lagoon.

done

We found a nice patch of firm, even ground just beside the river. The nice thing about this site is that we didn’t have to pay for any rental fee. If we decided to stay in Stations 1, 2, and 3, we would have paid for tables and cottages. And remember, it’s the same cool, clear, fresh water.

done

Sweetie prepared a filling, yummy lunch with spicy tuna and mushroom spaghetti, fried chicken, deep-fried pork slices, and sliced ham. The spaghetti was an experiment, and it turned out super tasty.

After the meal, Sweetie and her daughter excitedly took a plunge. The cool water of the lagoon was a welcome respite to a hot, humid afternoon.

done

Mother and daughter bonding together. Alexa started to appreciate and enjoy the wonders of nature.

done

Adrenaline Romance sweethearts enjoyed a refreshing dip and a warm hug.

After an hour or two, we packed up and headed back to the highway so we can catch a ride to Terra Manna in Lambug, Badian.

done

When we arrived at the eco-resort of Terra Manna, friendly and accommodating host and front desk officer Jennifer checked us in and showed us around.

done

Here’s our tent, and it’s situated near an open-air hut. Wohoo!

done

After placing our packs inside the tent, Jennifer gave us a nice tour around the resort. This is the well-maintained main camping ground filled with tents that will soon be filled with guests.

done

Very nice and relaxing garden on the way to the resort’s restaurant. Lined here are a Zen fountain, two calesa-inspired wooden benches, and potted plants, all facing the tranquility of Tanon Straight.

done

We waited at Terra Manna’s pleasant open-air restaurant where we took our welcome drinks. Our welcome drinks were three glasses of freshly picked, refreshing, and delicious calamansi juice with a pretty mandala flower arrangement. Lovely!

done

See those genuine smiles? That should be enough to tell you our first impression of Terra Manna.

done

A gorgeous, golden sunset took place when the sun called it a day and nestled in the mountains of Negros.

done

The resort features rows upon rows of organic gardens. That means, the ingredients used in their meals are freshly picked from these gardens. All produce are naturally grown and are absolutely free from toxic pesticides. No wonder why our calamansi juice tasted so good!

done

Here are organic gardens for okra, eggplants, and bananas.

done

We went down to check the resort’s beach, which can be accessed from the Marina Deck. It’s a lounging and viewing platform below the resort that acts as the entrance to a rocky beach.

done

This is an excellent place to relax where you feel your stress literally melt away. The bamboo lounges are so cool, and the pleasant creaking sound that emits from it every time you move blended with the whoosh of crashing waves can definitely lull you to sleep.

done

The beach is very rocky, which is not really surprising because the resort is built above a shoreline cliff. But that’s okay; beaches, like people, have their own unique characteristics.

done

After dinner (leftovers from lunch, actually) around 8PM, a Terra Manna personnel lit a large bonfire. You know, campfires are a no-no in modern mountaineering considering that we have to follow LNT rules. However, I have to admit that there’s nothing more magical and nostalgic than having a glowing, crackling campfire light up the night and warm up your body. Admittedly, having a campfire easily beats any headlamp, lantern, or any other artificial source of lighting.

done

After having our fill with the campfire’s warmth, we laid out a sleeping bag on the grass, brought out some fluffy pillows, and began stargazing. What constellation are you two pointing at?

done

The future family that stargazes together, stays together.

done

We turned in around 10PM so we can take a dip early in the morning. I didn’t know that Sweetie woke up in the middle of the night and sneaked a shot of me. So this is how I look like when I’m asleep.

done

We woke up around 6AM the next day, which dawned cold and gray. It was a great time to go for a swim when the water is still comfortably warm. The beach is definitely rocky, but a few yards from the shore, the seabed becomes sandy.

done

See the sand underneath the water? Loving mom and pretty daughter enjoying a morning swim at Tanon Straight’s warm, clean water.

done

The “Proposal Bench.” Hmmmm . . .

done

There are cottages that can be rented for day tours or overnight stays. That small structure is a shower room. The rest of the area is a huge campground where additional tents may be pitched.

done

After more than an hour of swimming and splashing in the water and going around the resort, we went back, took a fresh-water shower in one of the resort’s restrooms, and went to the open-air restaurant to eat our breakfast.

done

Breakfast is served! Mmmm! That’s a healthy, sumptuous breakfast made with the freshest ingredients.

done

That’s a beautiful mandala flower arrangement. We were supposed to make one of these, but the petals were wet due to the early morning rain. Thus, they wouldn’t float on the water.

done

A serene view of Tanon Straight on an overcast day

done

Since we couldn’t make a mandala flower arrangement due to the drizzle, we decided to explore more of the resort after we finished breakfast. At the other side of the resort is a pathway that leads to verdant gardens. This is also where the resort’s more expensive and exclusive lodges are located.

done

One of the cozy lodges of Terra Manna. Each is equipped with accessories, utilities, and facilities that you can find in typical beachfront resort rooms and hotels.

done

At the end of the path is a sandy beach. We should have taken a dip here. Hehe!

done

Heading back, we stopped by this cute wishing well. Or so we thought . . .

done

..but it turned out to be a large mandala.

done

Here’s a really interesting galleon with intricate Thai-inspired carvings and designs

done

The Lantawan, which overlooks the majestic Tanon Straight. Yes, you can propose here. :) This will be our future proposal site. Hehehe!

done

We look exactly alike, don’t you think?

done

Alexa seemed really happy about the experience. We hope this would trigger Alexa’s spark of interest in outdoor adventure.

done

Then it was time to pack up, check out, and go back home. We surely had a great stay at Terra Manna, and the relatively steep price (we’re cash-strapped adventurers, okay?) is definitely worth it.

done

That’s our ride going back to Badian township. Thank you for taking care of us, Terra Manna.

done

We believe that Terra Manna is the first of its kind in Cebu or even the entire Philippines. Why? Well, consider the main points of the resort

First, there are only very few typical resort rooms. Their rooms are actually camping tents that they set up for their guests. It’s mutually beneficial; the guests get an authentic camping experience and the resort doesn’t need to shell out a massive amount of room maintenance.

Second, having tents for accommodations instead of rooms saves space and, for the resort, operational costs. The tents can be stowed away if there are no guests.

Third, Terra Manna grows its own vegetables and fruits through their organic gardens. Therefore, many items in the menu feature freshly picked ingredients.

Overall, it was a fun-filled, relaxing, value-for-your-money trip. And it was a weekend filled with a lot of cool firsts:

* It was Alexa’s first outdoor and camping trip.
* It was my first resort experience.
* It was our first experience of having someone else set up a tent for us.
* It was our first outdoor and camping trip together with Sweetie’s daughter.
* It was the first time that we didn’t cook for ourselves while outdoors.
* It was the first time we took a dip in Kawasan falls that was not in Stations 1, 2, and 3.

Suggested Itinerary:

Day 1
8:30 AM – meet up at Cebu South Bus Terminal
9:00 AM – ETD Cebu
12:00 PM – ETA Badian, Kawasan Entrance
12:30 PM – Lunch at Kawasan waterfalls
3:00 PM – ETD Kawasan Falls, trek to highway
3:30 PM – ETA highway, arrange habal-habal ride to Terra Manna in Lambug
4:00 PM – ETA Terra Manna, check in, secure belongings in tents, welcome drinks
5:00 PM – tour around the resort
6:00 PM – dinner
8:00 PM – socials, campfire, stargazing
10:00 PM – lights off

Day 2
6:00 AM – wake up
6:30 AM – morning swim
8:00 AM – breakfast
9:00 AM – flower arrangement
10:00 AM – tour resort
11:30 AM – pack up and prepare for checkout
12:00 PM – ETD Terra Manna
12:30 PM – ETA Badian township, wait for Cebu-bound Ceres bus

Tips:

1. For rates, amenities, facilities, tours, services, and other information about the resort, browse through the Terra Manna’s website. You can also check their Facebook page.

2. For convenience and quick check-in, book a stay in Terra Manna a few days ahead of schedule. You can get in touch with them using these contact details. This way, the staff can pitch your tent in advance so that it will be ready when you arrive. Ask the staff to pitch your tent near an open-air hut so you will have a place for siestas and socials.

3. Be sure to book a ride going back to Badian. Jeepneys, tricycles, and habal-habals rarely pass by the gates of Terra Manna. You will pay a minimal fee for the ride.

4. If there are a lot of people in your group (e.g., your family, your friends, etc.), you may want to check in at Terra Manna first so that you can leave your heavy bags. Then avail of the vehicle service to take you to Kawasan Falls. Note that you may have to pay extra because the driver will wait for you. Check the website too if they include the Kawasan tour (or any other tour for that matter) in their packages.

5. Terra Manna’s tents are basically single-skin tents with flysheets that extend all the way to the ground. While this setup provides good protection from the rain, it effectively blocks the cool sea breeze from entering. This makes the interior uncomfortably warm even during the nights. You can alleviate this problem by opening the door flaps all the way but zipping up the screen doors. This allows the breeze to cool down the interior. Additionally, by opening the door flaps, you eliminate the buildup of condensation inside the tent, which is a common problem of single-skin tents.

However, if it’s still too warm for you, ask the staff to provide you an electric fan, which is available for a small fee.

6. If you wish to swim, go to the right side of the restaurant and follow the path until you come to a sandy beach. Following the left path leads you to a rocky beach.

7. Note that if rain came the night before or early morning, you may not be able to avail of the flower arrangement session which is supposedly stipulated in the package. Don’t lose your cool; wet flower petals won’t float on water.

8. Do not avail of tables, chairs, and cottages in Kawasan Falls. These are tourist traps and would unnecessarily drain you of your finances. Simply pick a nice spot between the Stations. Remember, you are enjoying the same water.

9. If you are new to camping, or if you want children to experience the joy of camping, then we recommend glamping at Terra Manna. Personally, it is the best way to introduce the outdoors to people without letting them suffer “outdoor shock.”


Rock Climbing 101: The Basic Gear

$
0
0

done

Okay, it’s definitely official! After your first experience of huffing, puffing, straining, pulling, pushing, and screaming to reach the top of a climbing route in Cantabaco or in a wall climbing facility, you finally admit it: you’re on the verge of becoming a rock climbing addict.

You tell yourself that in the coming weekends, you are going to stare at Death in the face when you scale treacherous limestone cliffs to prove to yourself and the world that you can overcome all kinds of obstacles. After that life-changing weekend, you decide to make rock climbing your own sport and recreational activity to escape the hustle and bustle of the city, to relive yourself of stress, and to meet new friends.

done

However, rock climbing is a journey. Just like all journeys, if you want to get serious, you need to start somewhere. But how? Different climbers suggest a myriad of ways to kick-start the sport: browsing the Internet for rock climbing advice, joining a group of rock climbers, climb regularly in a climbing gym, and so on.

done

In our collective personal opinion, getting your personal rock climbing gear is the best way to start if you wish to get serious in this sport. You may ask, Really? But they told me that I need to get some experience first before buying those gears! Yes, that’s true. But consider the following advantages if you have acquired your own gear:

1. You save money—lots of it. If you don’t have your own gear, you are forced to rent some. If you climb every weekend, you are going to spend a whole lot of money from rentals. That does not include the guide fee, fare, food, overnight stays, and other miscellaneous expenses.

2. You are encouraged—or forced—to climb regularly. Having your own gear encourages you to maximize climbing sessions. You will love the feeling of slipping on your own harness, tying your own rope, and relying on your own quickdraws. Furthermore, buying rock climbing equipment is a considerably large investment, and you wouldn’t want your investment to go to waste. Thus, you would need to make full use of your gear. Obviously, this means you need to climb…a lot!

done

3.  You feel safer. Browse several rock climbing websites and you will encounter the same guideline: purchasing and utilizing used gear is NOT recommended. That’s because you don’t know how the previous owner used and maintained that gear. How sure are you that the core of that used rope is still intact? Are you sure that the webbing of that used harness is not frayed? Used rock climbing gear may be inexpensive and still be tough as nails, but personally, we’d rather be on the safe side. Remember that in rock climbing, your life is at stake. At that high a risk, you would definitely want to own equipment which you are totally sure of.

4. It’s more convenient to climb. If you don’t own your own equipment, you will have to wait for a climber to finish his attempt to scale a route so that you can use his gear. That may mean a long wait before you can finally climb the same route.

5. Your gear is specifically for you. Let’s say you are a smallish lady. What if the smallest available pair of climbing shoes is way bigger than your foot size? What if the available harness is too big for you? What if the right-sized harness for your tiny waist is kiddie sized?

6. It’s more hygienic. Do you really want to wear climbing shoes which is previously worn by someone with a foot infection? What about a harness that is soaked with sweat? Yuck!

Owning your own gear makes perfect sense, right? For us, it does!

Now, which rock climbing gear should you get first? The photo below shows our sport climbing gear.

done

We know what you’re thinking, Hey, wait! That’s a whole lot! Worry not, fellow adventurer, you are not going to get everything. What you want to get are just the essentials: a pair of right-sized rock climbing shoes, a good-fitting climbing harness, and a sazzy chalk bag. And that’s in order!

We’ll start with rock climbing shoes. Rock climbing shoes are footwear that is specifically designed for rock climbing. Did we say “specifically?” Yes, we did. These shoes are not suitable and uncomfortable for walking or hiking. In fact, you should only wear them only at the base of the cliff when you are ready to climb and take them off once you touch the ground.

Typically, these lightweight shoes are constructed to conform very closely to a climber’s feet. Most importantly, they feature sticky rubber soles with extended rubber rands. With the right amount of pressure, the rubber soles allow your foot to “stick” to the wall.

done

We will not go into the details of the construction or kinds of climbing shoes; that will be discussed in another article. However, it is very important that you know how to choose the right climbing shoes. Remember that these footwear are the interface between you and the rock, and the right-fitting shoes are critical to your climbing performance.

* Make sure that the shoe fits you tightly, which means you should choose shoes that are 1 or 1 ½ size smaller than your standard shoe. In fact, you should be able to feel your toes touch the tip of your shoe. Some climbers even prefer their toes to be slightly and comfortably curved.

* Ensure that there isn’t any dead space between your toes and the inside of the shoe. If there is dead space, your footwear would be unable to stay rigid when you put your toes on a tiny foothold.

* Make sure that the heel has a snug fit. The back of the shoe should not pinch the bottom of your Achilles tendon.

The objective is to make the shoes conform to your feet as closely as possible.

done

The next essential rock climbing gear you should buy is your climbing harness. We have two: a lightweight Black Diamond Alpine Bod and a cool Black Diamond Momentum.

done

Your safety depends greatly on your harness. It is your vital link to secure yourself to a climbing rope or an anchor point.

There are many types of harnesses, but what we commonly use is a sit harness. A sit harness basically comprises a waist belt attached to two leg loops. The attachment point is a piece of webbing called a belay loop. Sport climbing harnesses often have gear loops on the waist belt where you can attach quickdraws, cams and other gear. Sit harnesses are quite popular because they offer a huge range of movement while maintaining a superb level of safety. Think of a sit harness as a portable seat when you are climbing.

done

Just like your climbing shoes, you should ensure that your climbing harness has a good fit.

* Just like clothes and pants, harnesses are categorized by sizes: small, medium, large and the in-betweens. When fitting a harness, make sure that the waist belt does not move excessively. If shifting does happen, tighten the straps until the movement ceases. The harness should not be too tight that it digs through your skin. If you feel painful points of pressure, choose another harness.

* After the waist belt is tightened, put your hand through it. Make a fist and try to pull your hand out. If you can’t pull it out, then the fit is right. Also, you shouldn’t be able to move your harness down your hips once the belt is tightened.

* Adjust the leg loop straps until they are snug and comfortable. If you feel strained in keeping yourself outright, adjust the strap that is attached to the waist belt at the back of the loop. Shortening the straps will enable you to sit upright in the harness without your butt protruding.

* Pull the belay loop up as hard as you can to simulate weight. It should feel relatively comfortable and should not “bite” on your groin or legs.

One last piece of advice: make sure your harness has passed safety standards. Check the label if it has passed the Union Internationale des Associations d’ Alpinisme (UIAA 105). If this is not indicated, check if it has been approved by the European Committee for Standardization (EN 1277).

We will discuss more about properly using the harness in another article.

The last piece of essential gear to acquire is the chalk bag. You can go a bit freely here; chalk bags are like fashion statements—rock climbing fashion, that is.

A good-quality chalk bag usually has a stiffened rim to hold them open so it’s easy for you to dip your hands in. It also features a fleece lining to hold chalk dust and to distribute the chalk evenly around your fingers and hands. It may have a cord-and-toggle closure to prevent chalk from spilling when not in use.

Our Karrimor chalk bag has a waterproof cover, a small pocket for holding small items such as jewelry, and an elastic loop to hold an old toothbrush (used to scrub off old chalk from holds).

done

Chalk bags come in different sizes, designs, and colors. Whatever bag you choose, make sure you can get your hand inside the opening.

There you have it, the basic gear for sport climbing. In the next article, we’ll talk about how to use your gear properly.

IMPORTANT NOTE:

You need to know rock climbing is an inherently dangerous sport. Although blogs (including ours), books, tutorial videos, and articles could be a good source of information, you should find a certified climbing instructor to properly coach you through the sport. Please contact Raymund Daculan (0939-1600178), Enie Yonson (0909-4165050), or Willard Elimino (0912-5906112). They are the local guides and certified coaches.We learned our climbing skills under their tutelage . . . and we’re still learning. And please do keep in mind that we are NOT climbing instructors.

For details about Cantabaco itself, click here.


Busay Lut-od Waterfalls and Mt. Babag: Secretive, Mighty, Unforgiving

$
0
0

 photo 603005_10151378026294207_1643497725_n_zpsd489ec80.jpg

If you approach Cebu by boat, if you cross the first Mactan-Mandaue Bridge, or if you stand on the Mactan island coastline facing mainland Cebu, you will probably notice a long mountain range that seems to protect the cityscape before it. This mountain range, which is around 25 kilometers long, is called Babag Range. And on Babag Range, the most conspicuous feature is the array of communication towers that stand on its highest point. That point is called Mt. Babag.

Mt. Babag is one of the most popular yet challenging hiking destinations in Cebu. The backyard of a prestigious bushcrafting group called Camp Red, it is easily accessible from either Sitio Napo at the lowlands of Baranggay Guadalupe or at Veteran’s Drive high up in Upper Busay. Most mountaineers choose the ascent to Mt. Babag from Napo due to the ease of accessibility, low fare, and challenge of the climb.

Mt. Babag’s extreme steepness makes it an ideal mountain for practice climbs to prepare for major climbs. Nestled under her care are Cebu’s secrets; rocky rivers, pristine waterfalls, and dense forests that are carefully tucked away from view. Sharing these natural wonders are small communities of humans who are involved in farming and logging.

Sweetie and her friends have long planned an adventure for their climbing team’s anniversary. That day, January 27, 2013, we were supposed to climb Mt. Kapayas in Catmon. However, uncontrollable circumstances led us to cancel the Mt. Kapayas climb. Instead, we decided to climb the knee-breaking, bone-crunching, body fluid-draining 752 MASL Mt. Babag.

We met around 8:00 AM at the magnificent Guadalupe Church. The solemn sound of mass blended together with the chatter of people outside selling candles and other wares are extremely soothing to the ear and make you happy on an overcast Sunday morning.

done photo SANY0001_zps6c183cdf.jpg

Here’s the group at Angel’s Burger, all ready and packed for a great adventure. Earlier during the week, we told them of a nice waterfall in Guadalupe, which we plan to visit on our way to Mt. Babag’s summit.

done photo SANY0003_zpsa3459668.jpg

Right beside Guadalupe church are a group of habal-habal drivers who are ready to take you to Napo. Mt. Babag is simply so popular that you don’t have to say anything where you want to go! When drivers see you in mountaineering attire, they already know you’re going to Sitio Napo.

done photo SANY0008_zpsb0bb830b.jpg

After 15 minutes on a habal habal, we arrived at Sitio Napo, our jumpoff point, which, we believe is Tomas Osmena territory. Hehe! We bought a few provisions here.

done photo DSC02708_zpsd0267c60.jpg

After a short prayer, we started the trek. Crossing this shallow river, called Sapangdaku, is the first hurdle.

done photo SANY0015_zps1fa6d915.jpg

And they applied makeup. Of course, not! That’s sunscreen. You don’t want your face to be burned to a crisp, do you? Sun protection is important when you’re up in the mountains. That’s because you often won’t feel the sun burning your skin as much as when you’re in the city due to the high altitude, cool air, and cozy canopy.

done photo SANY0020_zps43e5d85a.jpg

After putting on sunscreen, the team started to make their way up. The entrance immediately punches you in the face with a steep climb.

done photo DSC02713_zpsb49e6a86.jpg

The Napo main trail follows rolling terrain, mostly gentle ascents like this, by the edge of a mountain.

done photo DSC02727_zpse9c8e4ce.jpg

The Sapangdaku River flows below the main trail. During rainy season when the water is high, kids usually prowl the river and hunt for various fauna such as crabs, shrimps, and catfish.

done photo SANY0047_zpse42ff84f.jpg
Verdant wooded areas that conceal signs of human habitation dot the area. It’s actually refreshing to know that places like these still exist.

done photo SANY0030_zps9d4d6a49.jpg

Whew! What a sweet rest spot. The sun broke suddenly through the clouds, which means, the temperature began to rise. And being almost at the bottom of Babag Range and sheltered from cool winds on both sides, the temperature becomes uncomfortably hot.

done photo DSC02730_zps72f7092f.jpg

Do you see those communication towers? That’s the summit of Mt. Babag, our destination. It looks so near…

done photo SANY0045_zpsfd094dc6.jpg

The cool weather and the fertile soil make Babag Range an ideal place for planting flowers. Here’s a flower farm up the slope.

done photo DSC02724_zpsdd33d2db.jpg

After an hour of walking, we reached Lower Kahugan Spring. Here, the trail splits into two. The left one is Kahugan Trail, the main route used by farmers to bring their produce to Guadalupe. The right one is Busan Trail, which leads right up to the summit.

done photo DSC02733_zps882e3ade.jpg

That’s the Lower Kahugan Spring which is always trickling with fresh, clear water. Following this river takes you to the lowest tier of the secret Busay Lut-od, the waterfalls I was talking about earlier.

done photo DSC02734_zps12a34e2f.jpg

Locals managed to rig a pipe to bring fresh spring water here. This also serves as our water source. Refreshing spring water tastes better than bottled water. It is also full of mineral salts that are beneficial for the body.

done photo SANY0050_zps0d471a7f.jpg

After filling up our water bottles, we decided to visit Busay Lut-od waterfalls first. To go its third tier, we followed the wider, longer, and easier Kahugan trail, which is actually a gentle but grueling ascent all the way.

done photo DSC02742_zpsb551a9c2.jpg

That’s a charcoal pit. Dried wood is placed inside the pit, lit, and covered with soil. Small openings allow oxygen to go inside the covered pit. Sometime later, the pit is dug, and the resulting charcoal is gathered.

done photo SANY0053_zpse2c59810.jpg

Along the way, we found this zazzy little guy trudging across the trail.

done photo SANY0054_zpsd221f063.jpg

We found the secretive trail that leads to the third tier of Busay Lut-od. Descending here needs extra care because the ground is made up of loose soil. Translation? It’s slippery and you might lose your footing. Consequences? You may fall face down, or you may fall to the side of a deep ravine.

done photo DSC02753_zps3fc403df.jpg

Struggling to stabilize footing becomes a challenge.

done photo DSC02755_zpsee8d0724.jpg

However, don’t worry. The reward at the end of the 5-minute descent is worthwhile. Behold the third tier of the secret Busay Lut-od waterfalls. It didn’t rain for the past few weeks, so the waterfall was relatively “dry.” On rainy days however, this becomes a powerful monster.

done photo SANY0066_zpsd570f825.jpg

Adrenaline Romance sweeties take a customary pose. Yes, you can swim in that lagoon.

done photo DSC02771_zps19366380.jpg

After taking a few photos, it’s time to go back to Kahugan Trail. Going up is a whole lot easier than descending.

done photo SANY0075_zps3179c113.jpg

Going back to Lower Kahugan Spring took around half an hour. After resting and refilling our water bottles, it’s time for the endless assault to Mt. Babag’s summit using the Busan Trail. It’s torture time!

done photo SANY0080_zpsff6d4ecc.jpg

Busan Trail almost does not offer any relaxing descents or level trails. Even if the mountain is only at 752 MASL, the steepness of this trail can definitely make any climb challenging.

done photo SANY0085_zpsbd839f01.jpg

I’ve climbed this mountain a lot of times, but it’s sheer steepness never fails to literally take my breath away and squeeze the sweat out of me. This photo poignantly shows a mountaineer’s dilemma when climbing this powerful mountain.

done photo DSC02773_zpsa18915d9.jpg

That’s Wendell, our cool, camera-shy guide.

done photo DSC02778_zps74c774d5.jpg

Is it still far? No, it’s not. Just 2 more hours of merciless ascent.

done photo DSC02772_zpsa03992e7.jpg

Along the way, we passed by small mountain communities such as these. We admire the strength and perseverance of these people. We climb mountains for recreational purposes, but these people do it every day to make a living.

done photo SANY0087_zps3ea25297.jpg

These LOTR trees make it seem that we’re trekking in Pandora, the fictional world featured in the movie Avatar.

done photo DSC02781_zps4d8ac25b.jpg

Around 12 noon, we stopped by the Roble homestead, a rest stop and a mountaineering landmark in Mt. Babag. This is where mountaineers usually take their lunch and rest before continuing the assault.

done photo SANY0094_zpsd804c885.jpg

The Robles have erected this cool shed for mountaineers and bushcrafters who regularly ply this area. This is where adventurers take their lunch.

done photo DSC02785_zps6ad476ab.jpg

One of the must-trys when climbing Mt. Babag is the sweet taste of young coconuts. They have the best coconuts in the world with really sweet water and very soft, almost gelatin-like meat. You can ask the Robles to get coconuts for you at a reasonable price.

done photo SANY0098_zps7e6d62d2.jpg

Coconuts are full, nutritious meals in themselves. The meat is packed with proteins, and the water is chock full of ions and electrolytes. We call coconuts Mother Nature’s Gatorade. Oh, never mind the cat.

done photo DSC02787_zpse6a597fa.jpg

I guess this is a girl thing…smelling upside-down flowers.

done photo DSC02799_zps414cbeb6.jpg

That’s the summit as seen from the Roble homestead. Yes, it looks deceptively near.

done photo DSC02782_zpsc6132039.jpg

After a half-hour rest, we said goodbye and thanks to the Robles and proceeded up the trail. Now, this was an extremely uncomfortable ascent because the sun was bombarding us with its full power, and there was no shade.

done photo DSC02808_zps152b9f16.jpg

Another highlight of Mt. Babag is traversing this narrow trail. One misstep to the left will send a mountaineer careening down a sloping ravine.

done photo SANY0114_zps40662852.jpg

Mountaineers feel relieved and refreshed when they enter this section of the mountain where the forest is thick and shady.

done photo SANY0119_zps2737352d.jpg

Tucked deep inside this forest is this pipe which continuously channels water. This is the trail’s second water source.

done photo DSC02813_zps0b6ff98e.jpg

Check out that pond behind Sweetie and Faye. That’s the source of the water.

done photo SANY0126_zps3a5a5f6c.jpg

We’re almost there, after almost three hours of grueling ascent with little shade. If you see that house, it means your ordeal is almost over.

done photo SANY0130_zps5fbc9745.jpg

And when mountaineers reach this house, they can finally forget about the world. All they want to do is just to lie down, curl up, take off the shoes, and mercifully slip into a long moment of rest. This photo says it all.

done photo DSC02824_zpscabb0cb7.jpg

After resting for half an hour, it was time to visit the peak. The true peak of Mt. Babag rests inside that tower array. Unfortunately, that is private property, which means, no trespassers allowed. Thus, mountaineers usually settle at a small ledge just beside the tower array.

done photo DSC02825_zpsdf3344fc.jpg

There’s the viewing ledge which offers a breathtaking view of magnificent and progressive Cebu City.

done photo DSC02827_zpsf3ac3c16.jpg

That’s the Queen City of the South in all her elegance. Mactan Island, Olango Island, and the blue mountains of Bohol are clearly visible. From this viewpoint, you can’t help but feel proud that you are a Cebuano.

done photo SANY0139_zpsa7eb5ecb.jpg

After enjoying the view and engaging in the usual photo-taking session, it’s time to descend down the mountain and back to civilization. Going down Mt. Babag is easy because there’s actually a road that leads straight to Veterans’ Drive and Mountain View Resort.

done photo SANY0155_zpsd71f704f.jpg

Along the way, we saw this hill. This is coined Manwel’s Peak (named after Manwel Roble) or One-Bamboo Hill by the bushcrafters of Camp Red. This serves as a campsite. It offers commanding views of the green hills and valleys of Central Cebu.

done photo SANY0153_zps88ac6f6b.jpg

From here, one can also see the imposing Mt. Kan-Irag.

done photo SANY0152_zps2e75dab8.jpg

Congratulations for summiting the mighty Mt. Babag!

 photo DSC02830_zpsf0f6ca2b.jpg

* Technical info courtesy of Sir Jing Lavilles de Egurrola of Camp Red and Warrior Pilgrimage.

Suggested Itinerary for Day Trek

7:00 AM – Assemble at Guadalupe church, breakfast, buy provisions
8:00 AM – ETD Guadalupe Breakfast/buying provisions
8:15 AM – ETA Napo, start trek
9:00 AM – ETA Lower Kahugan Spring, rest and refill from water source
9:15 AM – ETD Lower Kahugan Spring to visit Busay Lut-od Waterfalls
10:00 AM – ETA Busay Lut-od Waterfalls
10:30 AM – ETD Busay Lut-od Waterfalls and back to Lower Kahugan Spring
11:00 AM – ETA Lower Kahugan Spring, rest and refill from water source
11:10 AM – Start assault, head to Roble Homestead
12:3O PM – arrival at Roble Homestead, lunch
1:30 PM – ETD Roble Homestead and continue assault to Mt. Babag via East Ridge Pass
2:30 PM – ETA Summit, rest and rehydrate, take photos
3:15 PM – ETD Summit to Veterans Drive and Mountain View Resort
4:15 PM – ETA Veterans Drive, hire habal-habal
5:00 PM – ETA JY Square

Tips

1. Most Cebu mountaineers know the trails of Mt. Babag. However, we recommend contacting Sir Jing Lavilles de Egurrola (a.k.a. PinoyApache) of Camp Red, the only bushcrafting organization in Cebu. Mt. Babag is Camp Red’s backyard and Sir Jing can definitely show you the secrets of the place. His contact number is 0933-3911627. You can also contact him through email at pinoyapache@yahoo.com or send him a message in Facebook.

2. Climbing Mt. Babag is perfect if you’re tight on the budget but looking for a challenge. Estimated expenses include:

* P10 – habal-habal ride from Guadalupe Church to Napo
* P25 – coconut at Roble Homestead
* P40 – habal habal ride from Mountain View Resort to JY Square

Thus, with less than P200, you can definitely enjoy Mt. Babag.

3. The best time to climb Mt. Babag for day hikes is early morning when the sun is still gentle.

4. Don on good trekking shoes with an aggressive tread. You will need the shoes for traction due to the loose soil that characterizes Babag Ridge.

5. Wear arm guards and leg guards since the plants are vicious.

6. Take salt tablets or beverages that are filled with ions (e.g. Gatorade, coconut water, etc) besides water. The hot sun and the brutally steep ascent can squeeze the fluids off you. When you lose enough ions and salts through your sweat, cramps will occur.

7. Bring energy-rich trail food such as nuts, crackers, bread, and bananas.

8. Note that Mt. Babag is extremely steep, with 60- to 70-degree inclines on some places. Keep a steady stride, and match the rhythm of your breathing to your pace. Don’t hesitate to ask your guide to stop; even the strongest mountaineers’ stamina gets drained here.

9. Pack light but be sure to bring along:

* Jacket/Raincoat (in case of sudden rain)
* Sun protection (hat/cap/sunblock)

10. You can camp at Manwel’s Peak, which is 150 meters away from the summit, if you want. The camp ground can hold around 9 to 12 tents and offer you a great view of Cebu. Alternatively, you can camp at the Chalet, which can accommodate around 20 to 40 tents. Chalet is about a mile away from the summit.


Mt. Kapayas and Lumanoy Cave: An Adventure Up North

$
0
0

done photo 579554_3923481860209_26338469_n_zps0a50e4f2.jpg

Never underestimate a mountain—any mountain. It doesn’t matter if the mountain is less than 1000 MASL, conveniently surrounded by human habitation, or frequently visited. It demands respect, reverence, and care.

An example of such a mountain is Mt. Kapayas, located in Sitio Kampanya, Barangay Kabangkaya in the bowels of Catmon, Northern Cebu.  At 783 MASL and sheltering a couple of mountain villages that are yet to receive the full benefits of modern civilization, Mt. Kapayas is an enticing, relatively unexplored mountain that harbors plenty of secrets and challenges. For a relatively low mountain, it offers mountaineers a good dose of adventure.

So last February 10, 2013, Sweetie and I decided to invite a few friends to climb Mt. Kapayas. I have already summited the mountain twice, and Sweetie accomplished her summit bid once. However, some of our adventurer friends haven’t set foot at the rocky Torre, the peak of Mt. Kapayas; and, well, let’s just say that our adventure stories may have sparked their curiosity and interest. Also, one of our regular adventuring friends, Sir Ronald Ramiso, wasn’t able to summit the last time we’ve been there. So, this was what he called his Mt. Kapayas “redemption” climb.

After a one-and-a-half hour journey, we arrived at Catmon proper. We started really early (we departed Cebu around 5:30 AM) to escape the hot sun and to allow enough time for us to explore the nearby Lumanoy Cave.

done photo SANY0005_2400x1800_zpsc6bf1de3.jpg

First things first, and that involves registration. We proceeded to the Catmon Police Station to register our names for safety.

done photo 534928_3923426298820_2015973478_n_zps547a9d01.jpg

A friendly habal-habal driver told us that the habal-habal station is in Tambisan, a short walk from Catmon proper. So we had our warm-up at 8:00 AM.

done photo 11346_3923426698830_1521241976_n_zps702126ba.jpg

It took us awhile to wait for four habal-habals that would take us to Sitio Kampanya. You’ll know why it took a bit of time to hire them in a few moments.

done photo SANY0017_zpsfc61a31f.jpg

After securing four habal-habals and negotiating the fare, we started our journey to Mt. Kapayas. During the first hour of the trip, the motorcycles travelled through asphalted roads with some sections in terrible disrepair.

done photo SANY0022_zps481aa28b.jpg

The road becomes even worse as we passed by Barangay Agsuwao, the gateway to Sitio Lumanoy. This is where you’ll understand why only very few habal-habal drivers agree to take you to Sitio Lumaony and why they charge large fees. The long road, which is a little more than a dirt path of sorts, is almost impassable. Only the toughest motorcycles are able to traverse the deep mud canals, the rocky ascents and descents, and the whiplashing vegetation. Less powerful motorcycles, multicabs, sedans, and even some 4X4s cannot traverse this length of road. In fact, we had to frequently get off the motorcycles in order for them to traverse certain sections of the road.

done photo SANY0024_zps68ec5ada.jpg

That’s the back end of Mt. Kapayas. The summit is at the other side of that mountain.

done photo SANY0006_2400x1800_zpsb598248c.jpg

After almost two hours of bone-jarring motorcycle ride, we finally arrived at the jump-off point. At last, we could let our bruised butts rest.

done photo 64851_3923433178992_900184444_n_zps661773fa.jpg

Some of us refilled our water bottles at the nearby water source. The fresh, cool water flows directly from a mountain spring.

done photo SANY0010_2400x1800_zps05fdc563.jpg

After a short prayer, it was time to start the trek. Immediately after the jump-off is this steep rise. Don’t worry; after ascending that rise, the path becomes a rolling terrain with gentle ascents and descents.

done photo SANY0033_zpse847ce4b.jpg

Along the way are small settlements of human habitation. We saw these folks looking curiously at us as we approached them.

done photo 222785_3923436419073_1766710316_n_zps33280a10.jpg

Around 30 minutes into the trek, the trail crossed this shallow stream. You can hop across it if you don’t want to get your feet wet, or you can simply wade through it so you can cool off your hot, tired feet.

done photo 73439_3923441339196_2117157089_n_zps097a5001.jpg

That’s a beautiful, clear, clean freshwater stream fed from rainwater and groundwater from the mountain.

done photo SANY0042_zps575cc601.jpg

The trail continued to go up and right smack behind this small house. To our surprise . . . and embarrassment, we stumbled on a celebration. Specifically, it was a traditional “Kurenta Diyas,” the 40th and the last day of mourning over the passing of a loved one.

done photo 11185_3923448499375_2005190948_n_zpsed7b723d.jpg

We were supposed to acquire our guide here then immediately proceed to the summit, but the kind missus who owned the house invited us for a meal. We vehemently declined while stating our original purpose. However, she was also equally persistent that we join the celebration. Thus, we were able to partake of a sumptuous lunch of viands made from farm-fresh ingredients! Delicious! And to think that this was not part of our itinerary!

done photo 531731_3923446419323_343207364_n_zpsb9fa1ba1.jpg

After thanking the kind lady for the lunch and securing a local guide, we started the assault to Mt. Kapayas. But first, we need to pass this small stream which is filled with farm monsters. Can you spot the well-hidden monster here?

done photo 603885_3923449099390_757839528_n_zpsb220f4d6.jpg

Beyond the stream is this grassy hill, the mountain’s shoulder. This also acts as a campsite in case mountaineers wish to stay overnight.

done photo 563159_3923449859409_1926166966_n_zps3d2abae4.jpg

Along the way, we spotted these horses. From our guide, we learned that Barangay Kabangkaya is actually a breeding ground of horses, an immense network of meadows which horses graze around. Rich folks back in the city who are horse lovers buy their animals here.

done photo SANY0020_2400x1800_zpsd5d5c458.jpg

The first segment of the trail to Mt. Kapayas’s summit is open and fully exposed to the sun. The main “obstacle” to contend with at this stage is heatstroke.

done photo SANY0067_zps6898e6e8.jpg

Thankfully, an hour later, we entered a lightly wooded area that protected the team from the full blast of the midday sun.

done photo SANY0070_zps24003024.jpg

After a steep ascent in the wooded area, we emerged at this rocky section of the mountain. During rainy months, this becomes a small corn farm. But during dry season, this becomes just another parched, rocky patch on the mountain.

done photo SANY0078_zps1f3d7952.jpg

There was a farmer’s shelter nearby where we shielded ourselves from the brunt of the sun’s heat.

done photo 554008_3923456259569_1970072972_n_zps6d6e4d55.jpg

After a quarter of an hour of rest for everyone, we continued our assault. Thankfully, the trail went inside a much thicker jungle, which provided much respite from the power of the sun . . .

done photo 6430_3923453939511_828460861_n_zps55db9c28.jpg

. . . but thoroughly punished our feet. The trail was littered with sharp, slippery, and loose rocks. Be careful! Watch your step here to avoid an embarrassing, possibly injurious fall.

done photo 16404_3923451779457_655115511_n_zps94477349.jpg

As we neared Torre, the peak, the trail became even rockier. Fallen trees block the trail, which forced us to duck under them.

done photo DSC03262_zps629aeff7.jpg

The best part of our Mt. Kapayas climb started at the base of Torre’s cliff base. To access the summit, we needed to free solo (i.e., climb without ropes) a 15- to 20-foot rock face that serves as a gateway to a passage that leads to a cliff. Yes, it involves climbing up a vertical rock face!

done photo DSC03227_zps1dbf867e.jpg

With a magnificent backdrop of mountains, the climb was definitely spiritual! Here, you will feel how insignificant you are against Mother Nature. That realization puts you in your rightful place, humbling you. You will realize that there are powers out there that you can’t possibly comprehend, and you are just another insignificant, temporary occupant in this huge, huge world.

done photo 308032_3923467419848_1206844955_n_zps9391c3dc.jpg

Sweetie started her ascent while others waited for their turn below her. Yes, you are looking at the actual verticality of the wall!

done photo 71841_3923463299745_1084447469_n_zps3fd9dfad.jpg

As rock climbers, Sweetie could hardly contain her excitement in scrambling up this cliff. The others were pretty hyped up too! In most mountains in Cebu, the summit can be reached via a simple trek. But in Mt. Kapayas’s case, it can be accessed only by climbing a cliff! Now that’s something different because it adds an element of real danger of falling down to the abyss below.

done photo 556343_3923463419748_314774242_n_zps10e3239e.jpg

I call this section “Kiss the Wall” after its bigger and more popular counterpart in Mt. Guiting-Guiting. Sweetie is holding cracks in the rock that jutted a little bit outward from the main cliff face. See her foot? That is actually resting on the edge of the cliff. This means, climbers will have to lean slightly backward into the abyss.

done photo 5839_3923464419773_871141489_n_zps9f224035.jpg

After safely passing through the Kiss the Wall, you simply need to scramble up this rocky passage to reach Torre.

done photo 582600_3923491660454_809032365_n_zps612df5d7.jpg

The rest of our team emerged from the passage.

done photo DSC03229_zps9a331ba9.jpg

Torre is actually a rocky limestone outcropping on top of Mt. Kapayas. The summit area is small, perhaps just around 30 square meters, which can accommodate only a limited number of people. All around the outcropping are cliffs.

done photo DSC03233_zpsd5f5bab0.jpg

The view from the summit is simply breathtaking. You will never realize how huge and grand Cebu Island is until you have an unobstructed view of it from the clouds.

done photo SANY0102_zpsfc1ee148.jpg

Houses and other man-made structures are just tiny dots on the top of hills. It’s a vividly accurate representation of how small we are in the great arena of nature. That is why we need to give Mother Nature the reverence and respect that are due to her.

done photo SANY0101_zpsa21a22d5.jpg

Sweetie braved a rock outcropping at the very edge of the summit to have a better view of the magnificent landscape below. Look at how high she is. This is what you see on top of a 783 MASL mountain with a sheer drop. But notwithstanding the obvious danger, the spectacular show of nature leaves you breathless, amazed, and refreshed.

done photo 11292_3923478300120_441658049_n_zps488d6d83.jpg

Just below Torre is a ledge where I indulged myself in my own silent sojourn, meditation, and reflection.

done3 photo DSC03253_zps012acdd8.jpg

After half an hour enjoying Torre, we said our farewells to the summit and started our descent so we can continue on to explore the mysterious Lumanoy Cave.

done photo DSC03257_zpsc11c258f.jpg

Sweetie expertly navigated her way down the cliff face. Be careful here! Climbing down is definitely more difficult than climbing up.

done photo SANY0118_zps911b0b1b.jpg

We backtracked and descended the mountain for an hour until we reached the campsite meadow. See that high limestone cliff? Way below that is Lumanoy Cave.

done photo SANY0121_zps7b313b1b.jpg

Turning right from the meadow, we came upon this fallen tree near the pathway to the cave. We rested here for a moment while preparing our headlamps.

done photo 19711_3923497300595_1044911605_n_zps5873b945.jpg

Some of our team members decided to stay by the tree, so we left our packs under their care. The rest of the group walked down the short trail that led to the small mouth of Lumanoy Cave.

done photo DSC03265_zps3095e7b0.jpg

The entrance of Lumanoy Cave is small and dark. However, the feeling of mystery, danger, and adventure is not diminished.

done photo SANY0083_1800x2400_zps8b727153.jpg

The start of the descent immediately involved a near-vertical climb down a rock “tongue.”

done photo 579825_3923497220593_682803177_n_zps2d41558f.jpg

Unspoiled stalagmites hang from the cave’s roof like tattered curtains.

done photo 72660_3923499060639_1891405059_n_zps1ba3ccb0.jpg

Descending carefully into the dark abyss with care. Yes, you need to be extra careful here because . . .

done photo 71475_3923505820808_1066029869_n_zps47ee9297.jpg

. . . at your right is this! At the bottom of that chasm is a pool of dark water whose depth is still yet to be measured.

done photo 11180_3923502500725_980196514_n_zpsba3744a2.jpg

Young speleothems formed after hundreds of years of sediment accumulation. Nature moves in slow, gradual, and mysterious ways.

done photo 404801_3923499740656_1863147463_n_zps22c3a2ed.jpg

We didn’t stay long inside Lumanoy Cave although some of us did want to explore a passageway down the abyss. We have told the habal-habal drivers to pick us up at 3:00 PM. By the time we went inside the cave, it was already close to 3:00 PM. Thus, we exited the cave and headed back to Sitio Kampanya where the drivers patiently waited for us.

done photo DSC03312_zpsf0a79dbc.jpg

Kudos to the brave summiteers of Mt. Kapayas!

done photo 69651_3923483660254_164049498_n_zps56ab0594.jpg

* Special thanks to Sir Ronald Ramiso for some of the excellent photos.

Suggested Itinerary for a Day Trek:

5:30 AM – meetup at Pocherohan/Alberto’s Pizza Mandaue
6:00 AM – ETD Mandaue, going to Catmon
8:30 AM – ETA Catmon Municipal Hall, register at Municipal Hall or police station, negotiate habal-habal ride
9:00 AM – ETD Catmon Proper for Sitio Kampanya, Brgy. Kabangkaya jump-off
10:30 AM – ETA Sitio Kampanya, Brgy. Kabangkaya jump-off
10:45 AM – briefing, refill water, start trek
12:00 PM – ETA Torre (Mt. Kapayas summit)
12:30 PM – lunch at the Torre
1:00 PM – ETD Torre
2:00 PM – ETA Lumanoy Cave, explore cave
2:45 PM – Exit Lumanoy Cave
4:00 PM – ETA Sitio Kampanya jump-off
4:15 PM – ETD Sitio Kampanya
5:30 PM – ETA Highway and back to Cebu

Estimated Budget Per Person
P70 – Ceres Bus Mandaue to Catmon
P70 – Ceres Bus Catmon to Mandaue
P120 – habal habal ride from Catmon to Sitio Kampanya
P120 – habal habal ride from Sitio Kampanya to Catmon
TBC (to be computed, depends on the number of participants) – guide fee

Total Estimated Budget – P550

Tips:

1. A Mt. Kapayas climb is best enjoyed with a small team of 3 to 10 people.

2. For guideship services, please contact Kyno Dumlao (0939-6586473) or Carlo Piezas Genovia (0927-3245456 or 0943-2672587). Please negotiate the rate with them.

3. If you wish to procure a local guide, inform Catmon Vice Manager Iris Ballon of your intention to climb Mt. Kapayas. She will assist in coordinating a local guide in Lumanoy for you. At Sitio Lumanoy, look for Ronald Roiles or Rey to guide you to Torre and Lumanoy Cave.

4. The mountain is located at the Central Northern part of Cebu, which is quite remote. The road to Sitio Kampanya is 20 kilometers from the highway.

5.  The budget for a Mt. Kapayas day trek is relatively high due to the high price of the habal-habal fare. That’s because the road to Sitio Kampanya is almost impassable. During rainy season, the road turns into a canal of mud; and during dry season, an extremely rocky, dusty path. In fact, even certain 4X4 vehicles would be unable to traverse the entire length of the road. The habal-habal is the surest, quickest way to reach the jump-off. Considering that the extremely rough terrain can damage their motorcycles, habal-habal drivers are often reluctant to bring you to Sitio Kampanya. Be ready to disembark and hike at certain points (mostly steep, extremely rocky or muddy roads) to allow the drivers to negotiate the rough terrain.

6. Make sure you negotiate with the habal-habal drivers to either wait for you at Sitio Kampanya or to fetch you there at a certain time. That’s because there are hardly any habal-habal drivers to take you back to Catmon if you depart from Sitio Kampanya. If the drivers are not willing to wait or fetch you, you need to hike to Baranggay Agsuwao, which is more than an hour of trekking from the jump-off. Then, you can take a habal-habal from Baranggay Agsuwaw back to Catmon proper.

7. If you bring a 4-wheeled vehicle, you may have to park your vehicle at Baranggay Agsuwaw (you can give a little tip to a local to watch over your vehicle). Also, this is the farthest point that most habal-habal drivers from the city are willing to take you. Then, you can hike to Sitio Kampanya following the road. The catch here is that it takes 2 hours to reach the jump-off point.

8. Pack light but do bring the following

* water (at least 3 liters)
* trekking attire
* trekking shoes (terrain is rocky)
* umbrella, hat, or sarong (terrain is exposed and hot)
* packed lunch
* trail snack
* helmet (protection for caving)
* headlamp (for caving)
* rain gear (in case of bad weather)
* extra money for emergencies

9. Wear good-quality trekking shoes with an aggressive tread. The trail is quite rocky, and your shoes will definitely need to endure a good beating.

10. Wear arm guards and leg guards to protect yourself from sun and the plants that can scratch your skin.

11. Take salt tablets or beverages that are filled with ions (e.g. Gatorade, coconut water, etc) besides water. The hot sun and the steep ascent can squeeze the fluids off you. When you lose enough ions and salts through your sweat, you will suffer cramps. Remedy cramps by resting for a while and eat salt to replenish the ions you lost.

12. Bring energy-rich trail food such as nuts, crackers, bread, and bananas.

13. You can camp at the meadow at the mountain’s shoulder. The ground is grassy and flat, providing a really comfortable bed.

14. Be sure to watch your footing when you ascend the Torre as it involves a bit of rock climbing. There are numerous handholds and footholds that make the climb relatively easy. Still, be careful of loose holds and slippery ledges.

15. Lumanoy Cave is relatively unexplored. Exercise extreme caution when you enter the cave because to your immediate left from the entrance is a deep, 30-foot chasm that leads to a vast underground pool. The depth of this body of water is not yet ascertained. There are deeper passages in the cave worth exploring, but be sure you bring adequate caving gear and a professional spelunker with you.


Rock Climbing 101: Setting Up to Climb

$
0
0

Okay, you now have your new, shiny gear. In fact, you are actually ready to pump it up the crag. Cool! Now, hold on just a little bit. Do you know how to properly use your brand-new gear? That’s right, let’s prepare your rock climbing gear correctly before you actually scramble up the route.


The proper preparation and use of your gear is extremely crucial to your safety and the safety of your belayer. Your belayer, by the way, is your dependable climbing partner who 1) exerts friction on your climbing rope so that you don’t fall to the ground, 2) feeds you rope when you lead climb so that you can continue climbing, and 3) provides beta (information) if you wish. We’ll discuss more about climbing teams in the next article.

First, lay down all your equipment—harness, shoes, chalk bag, quickdraws (if you’re lead climbing)—below the route you wish to climb. It is advisable to put your equipment, especially your rope, on a tarp, mat, or canvass. The tarp helps prevent dirt and grit from embedding themselves into the rope’s sheath and fibers, which can weaken the rope. Also, avoid stepping on the rope as this works the dirt deeper into the rope.

Uncoil the rope by holding the bulk of it in one hand. Pull one end of the rope, and tie it on one corner of the mat so it will be easy for you to locate the rope’s end. Uncoil the rope by pulling the rest of it and stacking it in a layered coil to avoid tangles.

done

Setting Up the Climber’s Gear

Okay, your rope is now nicely and neatly uncoiled. It’s time to put on your harness. Mine is a Black Diamond Momentum Sit Harness, which is pretty much generic, and the instructions here may apply to similar harness types or models. Just to be certain, check your harness owner’s manual for proper wearing.

Step 1: Put on your harness by slipping the leg loops through your thighs. You may want to loosen up the leg loops so the task will be easier. Ensure that the leg loops are not crossing each other.
Step 2: Wrap the waist belt around your waist, just above your hips and near your belly button. This position is the safest way to wear your harness; your hips act as a stopper, preventing the harness from accidentally slipping off.

Ensure that the belay loop, that thick piece of webbing in front of your harness, is not twisted and is facing front.

done

Step 3: Insert the strap into the buckle and tighten.
Step 4: Once it’s snug and comfy, insert the strap on the other side of the buckle to maintain tightness. Make sure that there should be less than a 2-finger gap in slack between the harness and your belly.

done

Step 5: To secure the strap and to prevent it from slipping out of the buckle, you need to double back it. Double backing means taking the strap out of the buckle then re-winding it through the buckle. This method is not necessary if your harness has an auto double-back assembly.
Step 6: This is a properly double-backed harness. The waistbelt’s strap should overlap one side of the buckle. Secure the extra length of the strap into the sleeve provided for it.

done

Step 7: Do the same process with the leg loops. Make sure it is snug but not too tight that it reduces mobility.
Step 8: Make sure you double-back the strap once you’ve adjusted the loops to a comfortable position.

done

A properly worn harness is snug and comfortable. Straps are doubled back into the buckles and are secured in their sleeves. There shouldn’t be any strap protruding from the harness. The belay loop, leg loops, and the cross-piece (the section that connects the leg loops to the belay loop then to the waist belt) are not twisted.

done

Tying In

Next, it’s time to tie in. We are going to use a figure-8 follow-through, or rewoven-figure 8 knot, the standard knot for rock climbing. This is a quick and convenient stopper knot, which means, it doesn’t come undone even if it is subjected to a load. In fact, it jams even more tightly on itself if you fall.

First, take one end of the rope and measure approximately one meter of it. An easy way to measure it is to take the end of the rope and hold it at arm’s length; 1 meter of rope is approximately from the tip of the rope to your shoulder. This one-meter length of rope is called your working end; the rest is called the standing end. Usually, I add a few extra inches of rope to my working end.

done

Step 1: Take the far end of your working end and form a bight (a bend or curve). Hold the working end and the standing end a few inches below the bight.
Step 2: Twist the bight twice.

done

Step 3: Take the working end and insert it into the loop that was created by the twisting of the bight.
Step 4: You now have a loose figure 8 knot, so called because it forms the Roman numeral 8.

done

Step 5: Insert the working end into the tie-in loops of your harness. Check your harness’s manual on where your tie-in loops are. Mine is at the center of the crosspiece and waist belt. Sweetie’s Black Diamond Alpine Bod only has one tie-in point at the crosspiece, with the rope passing through the crosspiece and directly behind the waistbelt. The figure-8 knot should be an inch or so away from the tie-in loops.
Step 6: Follow the original figure-8 knot in reverse. If you’re unsure of what you’re doing or if you’re confused as to what goes where, simply trace the standing end with the working end.

done

Step 7: That’s a neat and nice figure-8 follow-through knot. Tighten.
Step 8: For safety, lock off the knot by looping the tail end around the extra working end, then around the tail end and inserting it around the loop. Tighten.

done

The complete tie-in knot (figure-8 follow-through and locking knot)

done

Setting Up the Rest of the Climber’s Gear

If you’re lead climbing, clip your quickdraws on the gear loops. Warning! Gear loops are NOT load bearing! They’re only used to secure gear. Thus, NEVER tie in to any of the loops, and don’t clip them as a piece of protection at an anchor point.

done

Clip on your chalk bag around your waist. Make sure it’s not too tight or too loose.

done

Then, lastly, wear your shoes. Make sure the straps and laces are out of the way.

done

Setting Up the Belayer’s Gear

Now, it’s time to prepare the belayer, in this case, my Sweetie. First, she dons her harness properly as described above and takes a locking carabiner and a belay device. In this case, she’s using a Black Diamond ATC XP, a tubular belay device. One of the ATC XP’s sides has ridges to create more friction, which is ideal when belaying a climber.

done

Step 1: Sweetie takes a piece of the rope’s standing end and makes a bight. The bight is threaded into one of the two holes of the belay device.
Step 2: That’s the bight inside the device. Make sure the bight follows the black wire guide under the device.

Usually, the belay device has a diagram etched on its side to ensure the proper orientation of the rope and the device in relation to the climber and the rest of the rope.

done

Step 3: Sweetie takes a locking carabiner and clips it to her belay loop. Then she open’s the carbiner’s gate and clips the biner through loop. Make sure that the carabiner is clipped through the rope loop, not just the wire guide.
Step 4: Sweetie twists the carabiner’s lock to secure and lock the system.

done

She’s now ready to belay the climber. Check the orientation. The rest of the rope feeds to the flared end of the belay device. The climber’s end of the rope is at the non-flared end, as indicated in the diagram.

done

Next, we’ll discuss about climbing safety and communication.

IMPORTANT NOTE:

Rock climbing is an inherently dangerous sport! We can’t emphasize this enough. Although blogs (including ours), books, tutorial videos, and articles could be a good source of information, you should find a certified climbing instructor to properly coach you through the sport. Please contact Raymund Daculan (0939-1600178), Enie Yonson (0909-4165050), or Willard Elimino (0912-5906112) if you wish to try out rock climbing in Cantabaco. They are the local guides and certified coaches.We learned our climbing skills under their tutelage . . . and we’re still learning. And please do keep in mind that we are NOT climbing instructors.


Vertigo Climbing Center: Pump It Up

$
0
0

done

You’re extremely psyched up for this weekend’s outdoor rock climbing trip. You meticulously scheduled your weekend, ate a huge breakfast, stretched your muscles, pumped up on weights, and mentally reviewed your project so you can spend the day making all kinds of ascents. You’ve contacted the guides, and they’ve given you the go ahead to meet them at the crag.


Alas, luck is not on your side! Suddenly, the skies opened up and poured bucket upon endless buckets of water. Or the guides sent you a text that something came up, and they won’t be able to meet you. Or your folks reminded you that you have chores to do for the day. Or you noticed your almost-flat wallet. It seems that your supposedly splendid climbing day went down the drain.

Worry not, fellow climber! There is still a way to have an awesome climbing session without exposing yourself to harsh weather. You can still climb without having to blow a hole in your pocket. You can climb any time of the day, even at night!

You only need to head to Vertigo Climbing Center, located at the 2nd floor of Metrosports in Salinas Drive, Lahug. If Cantabaco is Cebu’s (and perhaps the Philippine’s) premier rock climbing site, then Vertigo Climbing Center is Cebu’s premier wall climbing destination. Yes, there’s a bigger climbing wall up in the Crown Regency Hotel, but it would cost you P600 to climb there!

Sweetie and I went to Vertigo last Sunday. We felt really lazy (yes, we’re normal humans too, and we do feel lethargic at times) in going to the limestone cliffs of Cantabaco, yet, we have this unrelenting urge to climb. We woke up at 10 AM, did our chores, ate breakfast, smooched, cuddled, hugged, etc. until after lunch. We arrived at Metrosports around 3 PM.

done

You need to pay an affordable P130 at the counter before you can proceed to Vertigo. Don’t worry because P130 permits you to climb all you can.

done

Metrosports has a couple of stalls to provide refreshments for hungry and thirsty sports enthusiasts. Here’s a ubiquitous Thirsty! outlet that serves fresh, 100-percent, all-natural fruit juices, shakes, and smoothies.

done

Walk up to the second floor where you can find the Vertigo Climbing Wall. The climbing wall is subdivided into 6 different walls of varying difficulty. The wall nearest to Vertigo’s entrance is the easiest while the one farthest to the entrance is the hardest.

done

Approach the counter at the end of the climbing area, and give your receipt to Plong Plong (the guy pictured here) or Pipang. They are the friendly guardians, guides, and coaches of Vertigo, and they’ll definitely be happy to assist you.

done

Don’t worry if you don’t have climbing shoes, a harness, or a chalk bag. The staff at Vertigo will provide them for you although you may have to pay extra for the rental of climbing shoes.

done

Carefully read the safety rules before you climb, especially if this is your first time. As prominently displayed on the banner, you are responsible for your safety and the safety of your climbing partner. Take all these rules to heart. The Vertigo staff has the right to eject you from the facility if you do something stupid or unsafe.

done

Warm up on these training holds. Put your fingers inside the slots, grip the hold, and try to pull yourself up.

done

For safety, all routes are set up with a top-rope anchor system. Auto-locking Petzl Gri-gri belay devices are used on all routes. Think of the Gri-gri as a car’s seatbelt; if you suddenly lurch forward, the mechanism prevents you from flying off your seat. That’s the same principle with the Gri-gri; if you fall from a climbing route, the Gri-gri automatically locks to prevent you from plunging to the ground.

Note that the ropes used for the permanent, top-rope lines are static ropes, not the dynamic ropes used in rock climbing. Thus, expect the rope to be stiff and painful to handle if you’re the belayer.

done

For added safety, the ground is covered with crash pads (sometimes called bouldering mats) and thick foam pads.

done

After chalking up and stretching, Sweetie prepares to warm up by traversing the first three walls.

done

This is called bouldering, a climbing style in which no ropes are used. Here, power, strength, and dynamics are focused rather than endurance. Risk of injury is minimized by limiting the height of the climb; typically, in bouldering, climbers seldom ascend to more than 3 to 5 meters. If a climber does fall, the crash pad below cushions his or her fall. For further protection, one or several spotters follow the climber as he works on a problem (the term used for a bouldering route). The spotter directs the climber’s body towards the crash pad if the latter falls.

Vertigo does not have a route that is strictly made for bouldering, which is quite disappointing. We hope that in the future, the facility will have a bouldering area.

done

For my warm-up climb, I chose the second hardest route, Wall 5, because it offers sufficient challenge, with 90 percent of the wall positioned in an overhang. I’ve done this route on top rope several times, so this time, I decided to lead climb it.

done

Starting the climb. See that red line? You should not go past that line when bouldering; that’s the safe fall limit. Going past that line requires the proper climbing gear for safety.

done

Now, this lead was really scary because the first hanger to clip the first quickdraw is actually above the red line! There was supposed to be a hanger below the red line, but somehow, it got ripped out years ago. There was another hanger at the right side wall, but it’s still above the red line.

done

Z-clip! Oh, no! Z-clipping happens when the climber clips the rope on the next piece of protection below the last piece of protection rather than above it. This mistake usually happens on hangers that are in close proximity to each other such as in this situation. Thus, rather than acquiring a higher point of protection, the climber, in reality, bypasses the highest protection.

In this case, if I fall, I’ll fall really, really far!

done

I fixed the Z-clip while hanging precariously on a hold. Oh yes, I’ll tell you: fixing a mistake while up there is scary, frustrating, and exhausting!

done

Almost at the top and clipping the rope to the highest piece of protection. See the straight vertical section? That’s the only vertical place in Wall 5.

done

Clipped and ready to move on for the final lurch.

done

I reached the top, but there was actually no chain or ring to clip my anchor draws. In the end, I simply clipped two draws on either side of the chain that held the top-rope pulley.

done

Here’s a second fellow leading Wall 5. He didn’t need to place the draws because I already placed them there. Plong Plong belayed him. Your belayer is crucial to your safety.

done

After several climbs, I decided to try Wall 6, the most challenging wall Vertigo has to offer. Why? Well, the route isn’t just an overhang. It actually consists of two 180-degree roofs! In other words, negotiating these roofs need strength, technique, and stamina while climbing in a supine position!

done

Negotiating the first roof. I discovered that with proper footing, I can hang on with relatively less upper body strength.

done

Pulling up to position myself in tackling the second roof. At this point, I was quaking in adrenaline. This is the first time I’ve ever climbed a roof. The skills and the techniques I’ll gain here will be useful when climbing the Blackfoot or Canta Ba Ako routes in Cantabaco; both involve negotiating a roof.

done

Successfully went over the second roof. Going through the last roof involves campusing, a climbing move that involves only the hands and arms. After securing my hold on a higher grip, I was able to bring my feet up for balance.

done

Surprisingly, the roofs were not the cruxes (the most difficult parts) of the climb. Personally, the crux of Wall 5 was actually at the last vertical section. The holds were mostly awkward slopers, crimpers, and pinches. I wasn’t able to find any jugs or pockets—or I may have missed them entirely.

A few more top rope practices, then I’ll lead climb this route. Next time!

done

Sweetie practiced her technique on Wall 4 which involves a slight slant, followed by a 45-degree overhang then an easy 90 degree section.

done

Sweetie skillfully ascended the 45-degree overhang using techniques that involved less use of strength. Go, go, go, Sweetie! By the way, during this climb, she had a terrible cough.

done

Umph! Umph! Just a little more!

done

From here on, it was an easy ascent. The key to this route is not to waste too much of your time on the incline. This can be done with proper foot placement, body twists, and a little bit of exertion.

done

Sweetie reached the top of the route despite not feeling well for most of the day.

done

The best part in all of this? You can make friends with these awesome, warm, and friendly climbers. True, climbing is an individual sport. But the sport becomes more fun, enjoyable, and inspiring if you’re surrounded with supportive, friendly fellow climbers!

done

Rock on! Climb on! Visit Vertigo Climbing Center now!

Tips:

1. Vertigo Climbing Center is at the second floor of Metrosports Center in Salinas Drive, Lahug. It is situated across Asiatown IT Park. You can call them at (032) 231-5651, (032) 234-4921, or (032) 233-3338. Or you can check out their website.

2. Vertigo Climbing Center is open from 7 days a week. Although Metrosports opens at 6 AM, Vertigo Climbing Center gets manned much later. Here’s their operating schedule

  • Monday to Saturday: 10 AM to 9 PM
  • Sunday: 12 NN to 7 PM

3. Pay P130 at the front desk to climb the walls of Vertigo. The fee includes unlimited hours of climbing and harness and chalk bag rental. You need to pay extra for the climbing shoes); we forgot the rate, but it was about P60 to P80 per session. While they have a lot of harnesses, they are severely lacking in shoes. These are some of the reasons why you should have your own rock climbing shoes.

Note that prices may change without prior notice.

4. Approach Plong Plong, Pipang, and any of the staff in Vertigo. All of them are friendly and professional coaches, and you’re in good hands with them.

5. It is advisable to call Metrosports to check if Vertigo is vacant on the day you intend to climb. At times, the entire wall is booked for a certain amount of time for school PE subjects, corporate events, and team building events. You don’t want to go to Vertigo only to know you can’t climb because the wall is reserved for the entire day.

6. If you wish to climb with fewer people, schedule your climb in the morning or early afternoon. The regular climbers mostly come and train late afternoon or in the evening.

7.  If you want to learn the sport of rock climbing, then we highly recommend climbing the walls of Vertigo. Here, you will learn the basic principles, techniques, and other aspects of rock climbing. Even professional and hardcore climbers regularly climb here to hone their skills and improve their strength and endurance. Training inside an indoor climbing facility relatively safer than in the outdoors considering that you’re in a controlled environment. And, of course, every modern convenience that you need is very accessible.

8. If you need refreshments, you can go down and buy some meals or drinks at the stalls. Alternatively, you can exit Metrosports to find a huge array of eateries and food establishments outside.

9. Always follow your coach’s instructions to maximize your safety and enjoyment.

Constructive Insights on Vertigo:

* Vertigo is Cebu’s premier indoor wall climbing venue, but the climbing routes are severely limited. With the increasing popularity of the sport of climbing in the Philippines, it is time to add more routes. At present, there are only 6 routes. In our collective opinion, it should have 15 to 20 routes of varying difficulties.

* Only Walls 5 and 6 have hangers to clip quickdraws to. That means, they are the only walls that can be lead climbed. We suggest putting hangers on ALL routes (yes, even the easy ones), so climbers can have the option to lead climb whatever route they choose.

* It would be excellent if Vertigo adds up an area specifically made for bouldering. Such area can be divided into problems of various difficulties.

* The wall is quite old, and sadly, it shows. Many of the holds and hangers are loose, swiveling around their securing bolt whenever pressure is applied on them. There are also holes in many parts of the wall. It’s high time that Vertigo does a major renovation and not just a maintenance check.

* We had a friend who wanted to try wall climbing at Vertigo but wasn’t able to do so. Why? Well, she couldn’t tell who are in charge. We suggest Vertigo staff to wear uniforms (T-shirts with the Vertigo logo and the words “Climbing Instructor” or “Climbing Coach” will do) for easier identification.

* Vertigo should buy more rock climbing shoes of different sizes and chalk bags for rent. If we recall, there were just a couple of pairs of shoes in their inventory.


Papa Kit’s Marina and Fishing Lagoon: Fun and Adventure in a Single Setting

$
0
0

done

There’s a remarkable place in Cebu where you can have a variety of adventures in just one venue. It’s a place where each member of the family, from the young toddler to the elderly grandparent, can have a whole day of fun. It’s a place so close to the conveniences of a modern, progressive city yet tucked in a verdant paradise. It’s a place where those who want to enter into the world of adventure can have a first-hand experience of what the world is in a controlled environment.

This place is Papa Kit’s Marina and Fishing Lagoon in Silot Bay, Liloan, Cebu. We consider it more as an adventure camp than a mere “marina” or “fishing lagoon.”

Last Sunday, March 10, Sweetie and I felt (again) too lazy to head out to Cantabaco and other usual haunts. However, as always, we have that quaking need to get that adrenaline rushing through our veins. So after a hearty breakfast of eggs, fried rice, meatloaf, and cappuccino, we decided to spend an afternoon at Papa Kit’s. We’ve heard really good reviews of this place from our good friend and fellow blogger Leylander (My Cebu Photo Blog) and our loved ones who visited there.

After an hour and a half of riding a jeepney, we finally reached the road that leads to Papa Kit’s. Now, take note, this is just a large sign beside the highway; the actual entrance of the resort is farther down the road. The road leading to Papa Kit’s is just before the Liloan Municipal Hall and the San Fernando Rey Parish Church. From Cebu City going to Liloan, the sign is quite visible at the right side of the road, and it’s quite impossible to miss it.

Here’s a tip. If you want to reach Papa Kit’s faster and shave off 30 minutes of your travel time: take a northbound bus and tell the conductor to drop you off in front of this sign.

done

As mentioned earlier, Papa Kit’s is still a little farther down the road. If you don’t want a warm-up hike, you can always ride the shuttle. Don’t worry, it’s free of charge. Clients usually ride the shuttle to go around Papa Kit’s because the area is considerably large. As the vehicle trudges through the trail, you can actually feel a glimpse of your adventure as it passes mangrove areas, fish ponds, grazing areas for horses, restaurants, and other facilities of the resort. Best of all, you can make new friends with your fellow passengers such as these happy Korean tourists.

done

The actual entrance is just a minute from the highway or around 10 minutes of walking. Entrance fee per person is P100, half of which is consumable on food and drinks. This place also serves as a frontline information center for the resort. Don’t worry if you’re driving your own vehicle; there’s ample parking space here. You can simply park your vehicle, pay the entrance fee, then ride the shuttle farther into the resort.

done

One of the first facilities that you come across is this large fishpond. This is Papa Kit’s fishing area. You can rent one of these huts where you can have your fill trying to catch tilapia and milkfish that swim under the waters of that pond. We promised ourselves to try fishing on our next visit.

done

Climbing Wall

Our first adventure, as recommended by the friendly shuttle driver (who tells us to “smel” to the camera), was attempting to reach the anchor of their climbing wall. You’ll know why in a moment. We paid P100 each to climb the wall then geared up for adventure.

done

Seeing climbing walls, cliffs, boulders, and anything that can be climbed makes us feel stoked. So don’t be surprised if we suddenly stop talking in the middle of a conversation. Chances are, Sweetie and I are mesmerized on something we found—a cliff, a climbing wall, a huge boulder field, etc.—that is worth climbing. Anyway, all set to climb!

done

Those are our friendly belayers. Note that unlike other climbing walls, they’re not using Petzl Gri-gris; they are using standard ATCs. Also, note the barrels. That’s where they place the standing ends of the ropes to keep them from dirt. Ingenious!

done

It’s climbing time! That’s me reaching the top of the wall. Papa Kit’s wall is quite easy to ascend because it has really large holds. The holds are mostly jugs and large pinches. In fact, I was able to climb it around six times without falling or hangdogging (i.e., hanging on the rope).

done

You know, we had a very interesting experience. Knowing that we’re going to ascend a climbing wall, we brought our rock climbing shoes and chalk bag. Imagine our surprise when the belayers and the other staff present asked us everything about our equipment. It turned out that they haven’t seen other climbing equipment before other than carabiners, harnesses, and ATCs.

done

Then it was Sweetie’s turn to ascend the wall. This was a bit of a challenge for her since the holds are quite far from each other. She wasn’t able to reach the top, but she will try harder next time, right Sweetie? hehehe

done

Here are a few more of Sweetie’s photos. Isn’t she great? Let’s just say that the Papa Kit’s friendly staff was “interested” in the “peculiar” way we climbed. When we revealed that we are rock climbers, they eagerly engaged in an energetic conversation with us. Do you have all the gears? Have you climbed a cliff? Is it hard to climb a cliff? Where do you usually climb? Have you seen the movie “Vertical Limit”? Can the rock climbing accident in the movie really happen? And so on. Indeed, they were so engrossed in talking with actual rock climbers that they agreed to let us climb more than three times. Of course, we politely declined to give way to other customers.

done

Zip Line

Oh, yes, we did say something about why we chose the climbing wall first? Well, that’s because if we reach the top within three attempts, we are entitled to one free zip! Cool! That’s P200 per regular zip per person worth of savings! Since it was only me who reached the top, we got one free zip line.  We donned on our helmets for safety.

done

The zip line towers on both ends are about 60 feet up in the air.

done

At 800 meters (in reality, it’s 400 meters per zip trip), Papa Kit’s Zip line is touted to be one of the longest zip line in the Cebu island. The line crosses the lagoon and into that small island at the center. There’s a second launch tower in that island with a line that leads back to the main land. According to the staff, Papa Kit’s is planning to put up a watersports facility on that lagoon. We think doing so puts the company at the right direction, and it would be Cebu’s answer to the famous CamSur watersports facility.

done

While the crew set up the lines, we took the opportunity to take a few photos.

done

Heave ho! And off we go to the other island! Woohoo! Being up in the air and moving at high-speed is really exhilarating! At least we now have an infinitesimal sense of how birds feel as they move in the air.

done

After reaching the island tower, we excitedly strapped up for the return trip. We were beaming all over as we asked the attendants to launch us so that we’ll zip together. Can you spot us?

done

“Whoppeeee! I’m freeeeeee!” Sweetie screamed!

done

The zip is over, but the feeling of exhilaration lingered in our system. We tell you, you NEED to try Papa Kit’s Zip line. It’s worth it. Don’t forget to bring a digicam or a video cam to record your zip!

done

Other zip-liners had their share of fun. You can have the regular zip, but for more heat and zest, try out the “superman” zip, which you have to use a special harness. And if your kid wouldn’t try the zip without you, don’t worry. There’s a tandem harness that straps you both together.

done

Two adventures in a row can really take a toll on your tummy. So we headed out to one of Papa Kit’s three restaurants to claim our meal. Huh? You had a free meal? Yes, sort of. Remember, half of the P100 entrance fee is consumable.

done

You can order your meal from this nice lady. We’re not sure though if they charge for corkage for meals bought outside Papa Kit’s.

done

However, you may find out that your P50 consumable amount may not be enough to cover your meal. Sweetie and I had to pay P10 (a small amount really but nevertheless, it was extra expenditure) for two siopaos and two 8-oz. Cokes. We guess P50 isn’t really enough for us. Hehe! Anyway, the siopao is quite big and filling. No problem there even if we did spend a bit extra.

done

Other Adventures and Facilities

You can also try out riding their all-terrain vehicles (ATVs). We haven’t seen any off-road course in Papa Kit’s, just dirt roads and trails for shuttles and people. Either you share the dirt roads with shuttles or there’s an off –road course hidden somewhere.

done

On our way to the lagoon’s pier, we encountered another leisure facility, the Hanging Bridge. The bridge-walkers squealed in terror and delight as the bridge swayed wildly with every step they take. It’s music to the ears.

done

If you’re a birdwatcher, then you should definitely visit Papa Kit’s Aviary. We heard that they have an extensive collection of hawks, kites, and other avians in there. The entrance fee is only P30. We weren’t able to go inside for lack of time, but this will definitely be included in our next Papa Kit’s trip.

done

Wild, free, native chickens and genians (What are these, Sweetie?) patrol the outside of the aviary. Don’t worry, they won’t attack you.

done

You may also find horses like these in Papa Kit’s. That’s one big, healthy horse. It’s chunkier than any of the horses that once roamed the streets of Colon and Sancianko. Suddenly, we imagine we were in the Wild West.

done

As you guessed it, Papa Kit’s also offer horseback riding. Pressed for time, we weren’t able to ride these magnificent animals. But yes, riding horses will surely be in our next Papa Kit’s itinerary.

done

If you decide that one day is not enough for you to experience all the adventures in Papa Kit’s, then you can stay in one of their cozy rooms. They look pretty awesome and welcoming.

done

Checking out the prices of their activities is easy. They’re printed all over big boards. They’re pretty reasonable too in our opinion.

Watercraft Paddling (Canoeing)

We reached the lagoon’s pier around 5:00PM. Sweetie was quite excited to try out rowing.  We haven’t tried kayaking before, and we would like to know how it is to row such a vessel.

done

Unfortunately, Papa Kit’s doesn’t have kayaks. The staff told us that what they had are canoes. Well, as long as they float in water, that’s fine with us. Sweetie and I donned on our life jackets, boarded the small vessel, and started paddling away.

done

Let’s head to deeper water, Sweetie. It was low tide, and if we fall at this point, the water would probably be at waist level.

done

Sweetie steered the canoe from the front while I provided power from the back. Hmmm . . . we definitely have a new outdoor-sport interest.

done

You can row all around the lagoon. Rowing a canoe is a very relaxing experience. Check out the vista; that will definitely calm anyone’s nerves.

done

Yes, you can row right underneath the zip line and take awesome photos of zip-liners. Extensive mangroves line up the lagoon.

done

A couple of Korean tourists (our co-riders in the shuttle) also went kayaking. They enjoyed the whole experience.

done

If you’d rather not paddle, then you can always take a ride at a motorized dinghy. It’s pretty cool, but we’d rather take up the oars. We don’t feel the thrill of cruising around something without doing anything.

done

We think the best time to paddle around the lagoon is late afternoon to avoid the sun’s glare and extreme heat.

done

Magnificent sunset over Cebu.

done

Farewell, Papa Kit’s! We’ll be back for more!

done

Tips:

1. It isn’t difficult to reach Papa Kit’s. Virtually every jeepney, bus, or taxi driver knows where it is. Just for info, it’s located at Silot Bay, Liloan, Cebu. You can call the Papa Kit’s landline at (032) 520-2116 or text/call them at 0922-8075594 or 0922-8838012 on cellphone.

2. You can take a Liloan, Compostela, or Danao bound jeepney to get there. Or you can take any northbound bus for a faster trip since buses don’t stop to pick up passengers often. Prepare to pay P12 to P14 as fare.

3. Papa Kit’s opens at 6:00 AM and closes at 6:00 PM. We recommend going there early morning or in the afternoon to avoid being roasted in the sun, especially if you’re planning to go canoeing. However, if you don’t mind this minor inconvenience at all, then you can definitely try out everything any time.

4. The zip line is Papa Kit’s main attraction. We highly recommend it. But before you do, try your hand at wall climbing first. If you reach the top of the wall within 3 tries, the fee to one regular zip line is waived. You save P200.

5. Be sure to avail of your consumable P50; it’s your right as a customer. However, note that the prices of meals and beverages sold in any of their restaurants are higher than normal, which is a typical setup for a resort. For instance, a siopao costs P40 while an 8-oz. bottle of Coke costs P15. You may need to shell out a little bit so you can have a basic food-and-drink snack.

6. Papa Kit’s is absolutely perfect for kids. Make sure you bring your little ones to Papa Kit’s so they could be introduced to the world of adventuring.

7.  We haven’t tried all facilities in Papa Kit’s, so as of this time, we won’t be able to give you a lot of details, prices, etc. Well, no worries though, because we’ll definitely go back there.


Spring Park Mountain Resort: A Refreshing Treat After a Day of Rock Climbing

$
0
0

done photo DSC04074_zps3d0ad313.jpg

Have you ever experienced a weekend when you had everything perfectly planned? Then out of the blue, here comes a suggestion, an event, or a circumstance that makes that bulb in your head switch on. Then you’d think, Why didn’t I think of that before?

Well, that happened to us last Sunday, March 20. Sweetie and I had been trekking, climbing mountains, trying out new restaurants, and visiting adventure camps and resorts. We haven’t climbed the all-natural, clean limestone cliffs of Cantabaco for two weekends in a row (yes, it’s amazing we didn’t go crazy). We were desperate to punish ourselves, pull up our sinews, strain our muscles, drain our fluids, and scream in frustration so we can reach those anchors high above the ground. So, during the week, we promised ourselves to faithfully devote an entire Sunday of climbing cliffs and, perhaps, start new projects (project is a term for an attempt to reach the top of a new route).

One more special thing: this was the first time we tested our brand-new Nikon Coolpix AW100 Waterproof digicam, which was given by Sir Fred, a very kind-hearted supporter of our passion. The photos, as you can see, turned our very, very well. Thank you so much for this gift, Sir!

We reached the crag around 8 AM, still pretty early, which is actually a good thing. Then we heard soft laughter and conversation in Area 3. It was the group of Sirs Done Tan, Jude, Nino, and Ma’am Maria Iza. Sir Enie was their guide.

 photo DSCN0106_zps16ca7368.jpg

Wasting no time, we climbed several routes. Everyone in this group is a born climber, and all of them did a great job in ascending the crag. And that’s considering that most of them are first-time rock climbers. Bravo! Rock on, guys and gal! We salute you.

 photo Fotor0320230613_zps9abf6407.jpg

A couple of hours before noon, we asked Sir Don if they’re going to climb the entire day. He told us they aren’t. They planned to freshen up at the nearby Spring Park Mountain Resort. Sweetie and I looked at each other and smiled. Yes, we ditched our afternoon climbs to visit a resort which is just a few minutes away from the crag. And visiting Spring Park will also give us a subject for our blog.

done photo DSCN0128_zps00b5db5e.jpg

Spring Park is just right beside the main road to Lutopan if you come from Manipis. Yes, we goofed around as if the road belonged to us.

 photo Fotor0319130458_zpsf012a177.jpg

The first things we noticed at the Spring Park Mountain Resort entrance were the dilapidated sign, the crudely written job ad, and the overgrown vegetation. Hmmm . . . those are not good signs.

 photo DSCN0142_zps8b936ae7.jpg

These are the signs around the resort. Posted right outside the resort are the fees. Okay, we don’t really have anything against posting prices outside the establishment. However, we believe that slapping the numbers right in at the face will potentially turn off customers, especially those who have constrained budgets. I mean, how would you feel if you go inside a restaurant, and before you could even ask someone, the maitre d shoves the prices of their meals? Of course, putting up the “special promo” announcement outside is a good marketing scheme.

Check out the decrepit and hastily made signs. Tsk tsk!

 photo Fotor0319125846_zps9752a55a.jpg

For most of us, it was our first time in Spring Park. We waited for a little while for a member of the staff to approach us. Well, how would you know if there’s a staff manning the resort when no one is in uniform?

 photo DSCN0143_zps2320d5bf.jpg

That’s the parking area. It’s quite big and clean and can park several vehicles at one time. We think there are a few other parking areas a bit farther down the resort, towards the main rooms.

 photo DSCN0212_zps0baa38a3.jpg

We paid for our use of the pool here at P75 per person. Not bad, really. The main office of Spring Park, we believe, is Café Servillano. But check out the photos. No one is there, and the dining area is almost devoid of tables. I also checked out their kitchen (not pictured here), and it was almost empty. That little bar at the bottom left is more akin to a sari-sari store than a bar.

 photo Fotor0319125526_zpsfb65ca3b.jpg

This is a very nice place to have an afternoon coffee or tea. Just imagine sipping your favorite afternoon drink in the midst of a lush garden. The big question is: do they serve THAT favorite afternoon drink?

 photo DSCN0230_zps9b3cd112.jpg

The resort’s game room is pitifully decrepit. It’s almost crumbling, with a single, seemingly non-functional karaoke machine, an old and dirty ping-pong table, and a billiard table that has seen better days.

 photo Fotor0319125750_zpsba97377a.jpg

After paying our entrance fee, we proceeded to Pool 3; yes, the resort has 3 swimming pools. Typical to any resort, the paths are well paved and marked.

 photo DSCN0146_zpse047e7ad.jpg

That’s a nice and shady pathway. The palm trees and overgrown shrubbery provide a satisfying relief from the hot sun. We especially like the contrast between the green and red leaves.

 photo DSCN0220_zps59187dc3.jpg

Everywhere, you can see bushes, trees, grass, and lawns. The resort is relatively well maintained even though we could see the signs of Nature trying to take over. The gardens are actually really pretty and verdant without conveying an overwhelming sense of being too manicured.

 photo Fotor0318190757_zps9c4c17be.jpg

Spring Park has a few features that make the place quite interesting and serene. For instance, a bridge allows you to cross a leaf-strewn pond. There are functional swings which you can sit down on. And in Pool 2, there’s a nice-looking statue of a fish which you can ride so you can imagine yourself being Ariel, the Little Mermaid.

 photo Fotor0318190252_zps69f75042.jpg

The pools of Spring Park. On a hot day like this, it’s impossible to resist jumping in the cool waters. Spring Park has three swimming pools.

 photo Fotor0318185222_zps2c6331b7.jpg

Pool 3 is the largest one with a kiddie pool and slide. This is where we’re going to dip and refresh ourselves after a hot morning of climbing.

 photo DSC04075_zps9ba6a459.jpg

To avoid paying for a cottage, we decided to simply place our groundsheet and earth pad and sit down on the ground, picnic style. No one complained; after all, all of us are outdoorsmen. Eating like this is our way of life, and we love it.

 photo DSC04076_zpse41eb44e.jpg

Each pool is surrounded by cottages for rent like this. They are not uniform in design. Some cottages look like these while others, especially those that surround Pool 3, that look nothing more than tables with roofs.

 photo DSCN0205_zps73c03d52.jpg

Unable to resist the water, Sweetie and I frolicked in the pool. The water in the large pool is only chest high, but it was still fun. Sweetie and I also had fun at the water slide that’s supposed to be intended for kids!

 photo Fotor031818591_zps4699e254.jpg

The children didn’t mind. In fact, they posed for us.

 photo DSCN0185_zpsfe577c54.jpg

After seeing the grownups abandon the kiddie pool for the larger “adult” pool, the kids took turns on the water slide. Apparently, we stole their fun. Hehe!

 photo DSCN0193_zps36d1c556.jpg

This was also a great opportunity to try out the new waterproof camera that we got from a very supportive sponsor. Thanks for the camera, Sir Fred. We know what you’re thinking; why is the background blurry? Well, the water is that murky; they over-chlorinated the pool. There’s nothing wrong with the camera lens.

 photo DSCN0178_zps637cd191.jpg

After a few hours of swimming, we took our lunch of bola-bola, monggo bean soup, lechon manok, and puso (hanging rice). Oh, in case you’re wondering, we were able to use the cottage for free. Why? Well, no one was watching.

 photo DSCN0200_zpsc5426603.jpg

A few hours later, we were ready to go home. But we know that Spring Park offers more than just the pools. Here is the pathway towards the campsite. Yes, you can pitch your tent here.

 photo DSCN0204_zps13ef1d4e.jpg

Near the entrance is a rudimentary children’s playground which consists of a seesaw, a couple of swings, and a playhouse. It’s not what we really consider a playground, and we guess even kids would skip it.

 photo Fotor0321230958_zpsb8080c15.jpg

For big events, they have a function hall. Yes, the inside is dilapidated and full of junk. It’s like they made their function hall into a stockroom when no one is booking it. We wonder if anything works in there.

 photo DSCN0226_zpscb604be6.jpg

These are Spring Park’s rooms. They look outdated, dirty, and in a dire need of repair. We haven’t seen the interior, but we heard horror stories about rats scurrying around the place, moldy beds, dirty bathrooms with no running water, etc.

 photo Fotor0321225135_zps0293a873.jpg

Visit Spring Park Mountain Resort to refresh yourself after a hot day of crimping up the crag.

Tips:

1. For prices, check out the 7th photo in this blog post.

2. For inquiries, contact Spring Park Mountain Resort at (032) 261-9511 or (032) 262-3851. You can visit them in their office at 157 R. Duterte Street, Banawa, Cebu City. If you’re already in Cantabaco, you can call them at (032) 325-2044. For reservations (especially if you’re outside the country and you wish to visit the Cantabaco crag), it is best to e-mail them at springparkresort@yahoo.com then follow them up through e-mail or phone.

3. Sadly, Spring Park is in dire need of improvement. Everywhere we see are structures that have seen better days but are unattended. Bathrooms are dirty, the pools are over-chlorinated, the gardens are not cleaned and trimmed regularly, and unused rooms have become stockrooms. Stray dogs and neighborhood kids roam around, entering the resort from secret paths. You can also see garbage everywhere.

4. Judging from its looks, Spring Park seems to be aimed in catering tourists who want to relax in the mountains rather than in crowded hotels and resorts in the lowlands. Unfortunately, poor marketing, abandonment of responsibility, a lackluster management, and the lack of maintenance took their toll. Now, the main “market” of the resort is only the locals who visit there every weekend to have a swim.

5. We haven’t seen anyone ordering food from their café or using their other facilities. This says a lot about the quality of service and facilities of the resort.

6. If you are a rock climber and you plan to stay for the weekend or several days, we recommend staying at Ma’am Glenda’s bed-and-breakfast rather than booking an expensive room in Spring Park. At Ma’am Glenda’s, you’ll get cheaper, cleaner rooms. Just go to Spring Park to have a dip in their pool. You’ll only pay P75, and you can swim all day. Indeed, we recommend going to Spring Park for day use only.

7. There’s no corkage fee if you bring food inside the resort. We recommend bringing your own meal and drinks; when we went inside their café, their kitchen was empty! Yummy picnic food can be bought in Lutopan, which is just a 5-minute habal-habal ride.

8. You could go glamping here for a minimal fee. There’s a large campsite near Pool 3. So, you can pitch a tent, camp, then swim at one of their pools in the morning. That is pretty cool!

9. Don’t expect staff to show up when you need them to. The resort is severely undermanned, and you can’t tell the staff from regular customers because they don’t wear uniforms. Expect a “serve yourself” scheme after you pay the entrance fee.


Liloan Food Market: A Gastronomic Adventure

$
0
0

Liloan Beach

Take a good look at Adrenaline Romance. Notice something? No? Check out the rightmost tab. Yes, you got it? It says “Food,” right? And what do you see if you hover your mouse? There’s a page that lists our restaurant reviews and recipes.

Trying out new and exquisite cuisines, venturing out to faraway places to taste specialty meals, braving exotic food, and experiencing a different culinary culture is part of the adventures that Sweetie and I are constantly seeking and enjoying. Indeed, sampling a region’s local dishes brings us closer to understand and appreciate the history, culture, character, and soul of a place.

And for our first culinary adventure, we decided to visit the municipality of Liloan as suggested by Sweetie’s pretty, sexy, and sensual friend Kim Curtis. We learned from Kim that Liloan has some sort of food market every weekend. Cebuano folks who are traveling to the northern part of the Cebu Island to enjoy the superb and pristine beaches usually stop by Liloan to shop for delicious delights. And since it’s a food festival of some sort, you can expect prices to be very affordable.

We started our adventure at around 8 AM when Sweetie and I, together with Sweetie’s daughter, Alexa, arrived at our meeting point across the now-burned out Alberto’s Pizza in Mandaue. While waiting, a group of cyclists came to rest. Those were really nice bikes! Someday, when we can afford nice off-road bikes, we’ll go cross-country biking, right, Sweetie?

Liloan Food Market

A few minutes later, Sweetie’s friends Jody, Em-em, Imma, and Imma’s mom, Carmen, came. Excited for our food trip, we boarded a tiny jeep to Liloan. Fare is P14 from Mandaue. Riding a jeepney should be a part of any adventure you wish to undertake; remember, it’s the Philippines’ most popular and primary mode of transportation. Never mind the dust, heat, body odor of the passenger next to you, cramped conditions, and daredevil driving that makes you prematurely pray for your last absolution.

Liloan Food Market

An hour later—and out of the blue, we might add—traffic halted to a standstill. That was a sign that we have arrived at our culinary destination, the Liloan town square. Wondering what’s causing the traffic? We’ll answer that in a few moments.

Liloan Food Market

We waited for our guide near the square. A few minutes after, the beautiful Kim Curtis appeared, blooming and fully packed. Kim proudly led us to the much touted food market in her humble municipality.

P.S. If you want to know Kim’s number . . .

Liloan Food Market

Kim toured us around her beautiful municipality. It’s definitely full of life as people congregate here to have a sampling of the best Cebuano dishes. This is also where you can find gigantic, shady, century-old acacia trees that are very well preserved and protected. The clean and well-maintained municipal hall speaks highly of classic beauty, timeless tradition, and clean governance.

Liloan Food Market

We promised to tell you the cause of the traffic, didn’t we? Well, it’s the weekend food market. At the food market, you can choose meals from food stalls that occupy a hundred meters or so at the side of the highway. Everywhere, you can see grills, fruit stands, coconut carts, and vendors. It’s definitely an exciting, lively scene! There are countless food options that it’s actually difficult to choose which one you should order!

Liloan Food Market

Many people order food to go. However, plenty others eat at tables that each stall provides. Check out these diners enjoying sumptuous meals.

Liloan Food Market

Let’s check out a few foodstuff. Here are fresh, young coconuts for you, a refreshing treat on a hot day like this. Trivia: coconut water contains lots of mineral salts and ions that replenish the salts and ions you lose through sweating. That means less chance of cramps and dehydration. Coconut water is Mother Nature’s Gatorade.

Liloan Food Market

There are fruits to satisfy your sweet tooth. Fruits are better alternatives than chocolates, cakes, candies, and any man-made sweets.

Liloan Food Market

But sometimes, you do want to taste man-made delicacies. Try out this masi, peanut paste inside a soft gelatin-like pastry. Liloan’s masis are the best, and you can buy tons of it from these cute kids.

Liloan Food Market

Raw peanuts make great snacks. They provide over 30 essential nutrients including niacin, folate, vitamin E, fiber, and phosphorus. They contain 25 percent protein. Best of all, they are free of trans fat and sodium.

Liloan Food Market

Skewered camote makes excellent and filling snacks at the beach. Too bad we forgot to buy ginamos, which makes a perfect accompaniment for slightly sweet camote due to counterpoint. By the way, counterpoint in culinary terms is pairing two opposite flavors in the flavor spectrum to provide a pleasant combination. Combinations of sweet and sour food or salty and sweet foods are examples of counterpoint.

Liloan Food Market

Budbud is a Filipino dessert. It is made of sticky rice or millet mixed with freshly grated coconut and boiled in coconut milk. The entire mixture, called suman, is then wrapped in banana leaves and steamed for an hour. Yummy!

Liloan Food Market

Okay, let’s go to the more serious stuff. First, you can find stalls that offer freshly grilled seafood. Unlike in the city where the price of large grilled seafood can practically tear your wallet apart, large-sized seafood here is cheap.

Liloan Food Market

The combination of smoke, heat from the coals, heat from the sun, stink of seafood, and the din of voices proved powerless to overcome the girls’ overwhelming tendency to pose for the camera, no matter what.

Liloan Food Market

We thought we would survive skipping Liloan’s lechon manok, or roasted chicken. After all, lechon manok is almost ubiquitous on the daily table, on picnic tables, on beach mats, and anywhere else. But Kim convinced us to buy one, saying we won’t be disappointed. Good thing we followed her advice. It would be safe to say that Liloan’s lechon manok is undoubtedly the juciest and the tastiest lechon manok we’ve ever tasted.

Liloan Food Market

No one should forget to order a kilo or two of the Philippine’s national dish, the lechon baboy, suckling pig which is stuffed with lemon grass, garlic, onions, ginger, and other vegetables and spices then slowly roasted whole. Cebu does it best due to secret cooking techniques; the meat is delicious even without liver sauce or vinegar and soy sauce, and the skin is exceptionally crispy. It’s no wonder world-renowned chef, food critic, and author Eric Bourdain praised the majestic lechon, saying that it’s “the best pig in the world.”

Liloan Food Market

And of course, no meal at the beach is complete without puso, or hanging rice. Puso is rice that is encased in weaved palm leaves. During the cooking process, the rice absorbs the flavor and some of the pigmentation of the leaves. Personally, we find puso more flavorful than ordinary boiled rice.

Liloan Food Market

There’s always something here for diehard gastronomic adventurers. Let’s start with the ginamos, anchovies floating in extremely strong brine. Foreigners usually cannot taste the smell of ginamos (in fact, we heard that ginamos is not allowed in airplanes) and are utterly disgusted at the mere sight of fish bodies and eyes staring at them from the bowl or plate. Ginamos makes an excellent counterpoint accompaniment for many foodstuff such as boiled bananas, sweet potatoes, and even rice. We daresay, it is a great appetizer!

Liloan Food Market

That’s fresh sea cucumber; we call them bat in Cebuano. The vendor fills that glass with sea cucumber which is then mixed in vinegar, garlic, onions, ginger, salt and pepper. It tastes really good!

Liloan Food Market

Those are Tanduay bottles filled with sea urchin entrails and guts. We call them swaki and they taste marvelous when eaten with puso.

Liloan Food Market

After getting our orders cooked, we proceeded to Baybayon 1, a community near a beach. Lead the way, pretty Kim!

Liloan Beach

Purok Baybayon 1 is just beside the road and a 5-minute ride from the Liloan town square. It’s a lovely, quaint area with lots of brightly colored flowers, a makeshift basketball court, and several small huts. And the best thing of all? Purok Baybayon 1 is located right beside the beach!

Liloan Beach

Well, it’s not even a beach if you’re thinking on the lines of “beach resort.” Our picnic venue is just a table in a patch of sandy private land immediately beside the Liloan coastline. Trees with large canopies provide plenty of shades. We paid the owner P50 for the table.

Liloan Beach

Kim brought her newly-bought tent. Pink is pretty! Hmmm . . . we should have brought a hammock, Sweetie, since there are trees where we can tie our hammock to.

Liloan Beach

We hurriedly prepared the food. Yes, we were already hungry from all that jostling in the food market.

Liloan Beach

Yes, the customary pose before the “battle.” Look at all that yummy food! Mouthwatering, isn’t it? Oh yes, there’s a store just before the beach where we bought bottles of Coke.

Liloan Beach

Attack! Leave no prisoners!

Liloan Beach

While we ate our lunch, we enjoyed the snippets of life here: a fisherman tending to his net, sunburned kids enjoying the water, children selling all kinds of goods, and even an occasional musician who serenades you while you eat your meal. Our country is so rich in life and culture; we just need to realize, appreciate, and take pride in that fact.

Liloan Beach

An old missus passed us by and offered us these luscious green mangoes. Green mangoes are unripe mangoes that are extremely sour. Slice of such mangoes are usually dipped in salt or shrimp paste, called bagoong or hipon, before being eaten.

Liloan Beach

A young man passed our table and offered us these ice candies, fruit juices or purees that are placed in plastic bags and frozen. We’ve never seen such huge ice candies before!

Liloan Beach

The ladies, Sweetie included, said today is Cheat Day. Thus, they cheated on their diets and ate dried meringues and sweet and slimy budbud. I wouldn’t blame them; it’s impossible for a dieter to resist all that delicious food!

Liloan Beach

That’s the northern side of the beach. It’s almost vacant, probably because it is at the border of someone else’s territory. See the seawall?

Liloan Beach

The south side of the beach, however, was teeming with beachgoers. Probably, it’s because most of the makeshift resorts are here. The atmosphere is very quaint and provincial, even if it’s just a hundred meters from the highway.

Liloan Beach

Liloan’s sand is not white but light brown. However, this should not be a deterrent in visiting there. Remember that each beach has its own characteristics. Many of the beaches in El Nido, Palawan, for example, are rocky. But being filled with rocks doesn’t take the magic away. That’s the same with beaches with dark sand.

Liloan Beach

Serene, uplifting, and relaxing. These are what visitors feel whenever they witness the beautiful seascape of Liloan, where the blue sky and sea kiss each other at the horizon.

Liloan Beach

“Our world is always changing,
Constantly re-arranging.
From ocean depths to mountain peaks,
Mother Nature moves and speaks.
While telling stories of our past
She tries to teach us how to last.” – Edith Phinazee

Liloan Beach

Do you know what’s the best thing when embarking on adventurous food trips with the one you love? Well, you get full, you have fun, and you get to cuddle each other in the most adrenaline-filled way possible.

Liloan Beach

After we had our fill, we headed to our next stop, which is the famous Liloan Parola. The heat was extremely oppressive, but that didn’t stop us from visiting Liloan’s most famous landmark. Getting there required hiring a tricycle. We paid P16 per person considering that we rode the tricycle straight from Baybayon 1 to the lighthouse. Normally, a person needs to pay only P8 if he/she rides a tricycle from the town square.

Liloan Lighthouse

The historic lighthouse of Liloan rests a few hundred meters from the sea at Bagacay point. The present Bagacay Point lighthouse was erected in 1904 by the order of Willard Howard Taft, who was the very first Governor General of the Philippines. The structure is 72 feet in height and still functions as, well, a lighthouse.

Liloan Lighthouse

A marker at the side of the Bagacay Point Lighthouse summarizes its history. The parola was declared a National Historical Monument by the National Historical Commission of the Philippines on August 13, 2004.

Liloan Lighthouse

As mentioned earlier, the lighthouse was constructed in 1904, which is stamped at the lighthouse’s entrance. However, there is a much older lighthouse, which Spaniards built in 1857. It rests nearer to the sea and is now in ruins. We weren’t able to take a photo of the older lighthouse because our camera ran out of battery.

Liloan Lighthouse

The lighthouse is eco-friendly and partly runs on solar power. That’s a solar panel array.

Liloan Lighthouse

The view from Bagacay Point is simply spectacular. You can see ships sailing through Camotes Sea towards the northern and eastern parts of the country. Clearly, this is a great place for shipwatchers. Due to the scenic view it offers, Bagacay Point is a favorite venue of photographers, couples on a date, shipwatchers, and locals.

Liloan Lighthouse

We should do this food trip again, guys and gals!

Liloan Lighthouse

Tips:

1. Liloan’s weekend food market occurs during weekends. To have the freshest food available and to avoid crowds and oppressive heat, it is best to arrive at the place early. 9:00AM would be a good rule of the thumb. If you come at noon, there’s a chance that many of the foods will be out of stock.

2. The food sold at Liloan’s weekend is very affordable. In our case, we just spent less than P130 per person for a huge load of food and drinks, including the P50 rented table.

3. Be sure to order the lechon manok, lechon baboy, and the exotic seafood. They are not to be missed.

4. To get to Purok Baybayon 1, just ride a Compostela bound jeepney and ask the driver to stop you at Baybayon 1. He will stop at the junction; just follow the dirt road, and in a couple of minutes, you’ll be at the sea.

5. Don’t expect a white-sand, exotic beach. The Baybayon 1 beach is just a public beach, a piece of brown coastline where locals relax and enjoy the sea. Don’t be demanding of luxuries.

6. Table rental is P50, but take note that on weekends, the tables may be filled up. If that’s the case, you can just spread a picnic mat on the sand. Don’t worry about getting burnt to a crisp because the picnic area is in the shade. Every once in a while, vendors selling all kinds of stuff (we even encountered a young man selling board shorts) may come across your way. Take your pick; all their wares are very affordable.

7. Be sure to prepare a lot of P1 coins. That’s because vagabonds may come to your table and ask for alms. Sometimes, buskers, or public musicians, visit your table to serenade you. Those P1 coins will come in handy.

8. You can go directly from Baybayon 1 to the Liloan Parola without stopping at the town square. Simply flag down a tricycle and negotiate the rate. We paid P16 per person for a one-way trip (normally, you’ll have to ride a tricycle to the town square then ride a second tricycle to get to the lighthouse. In both trips, you need to pay P8 per person per trip). Point to consider: insist to be taken to the foot of the lighthouse. Some drivers ask for extra money to negotiate a gently steep slope leading to the lighthouse. Don’t fall for that trap; a tricycle can easily climb that cemented slope.


Rock Climbing 101: Safety Checks, Communication, and Proper Belaying Technique

$
0
0

Rock climbing safety

Sorry for the slight delay, fellas. It has been a busy couple of weeks at work, and it was a little hard to juggle a few tasks.

Okay, so you now have your rock climbing equipment, and you’re already set up to climb. Now, it’s actually time to climb. Hold on! Before you go up scaling the wall, there’s a major, important process that should be completed, and that’s completely checking for safety. Safety checks in rock climbing are very important and are not meant to be done in short cut. Remember that you are high up on a massive crag, perhaps a hundred feet high. The human body can sustain serious injuries when it falls just around 10 feet high. Now, imagine if you fall 60, 70, 80, or 100 feet high!

Before you can climb, you need a climbing partner; you can’t climb safely without one. Your climbing partner belays you as you climb. Belaying refers to various techniques that enable a person to apply friction on a climbing rope so that a climber who falls does not fall very far. In addition, your belayer is responsible for decreasing friction from the rope, or for providing you with more rope so that you can continue climbing.

My forever climbing partner, of course, is my Sweetie Sheila. She belays very well, and I feel totally safe when I lead climb cliffs and artificial walls.

Rock climbing safety

When we went to Cantabaco last Sunday, March 7, Raymund and Martin, a German climber, were already there. For the day, Raymund and Martin are climbing partners.

Rock climbing safety

Safety Checks

Check the previous Rock Climbing 101 article to know more about putting on a harness, double-backing, tying the figure-8 knot, and preparing the belay system.

Checking if your harness is properly secured is the first step in the safety check procedure. This also applies to your belayer’s harness. Make sure that all buckles are double backed in 3 places—the waist, the left leg, and the right leg. Also, make sure that the belay loop, cross-piece (the webbing that connects the leg loops to the belay loop then to the waist belt), and the leg loops are not twisted.

Rock climbing safety

Now, you are ready to tie in. Tie yourself in using the figure-8 rewoven knot. You can ask your belayer to help you out if you’re still having trouble with the knot. After tying in, let your belayer double-check your tie-in knot.

Rock climbing safety

If you are the belayer, make sure you have set up your gear properly. The carabiner should be securely clipped on the belay loop; the belay loop should not be twisted. The rope should be inserted in the belay loop and looped through the carabiner. Ensure that the carabiner is clipped through the rope bight, not just the wire guide. Check too if the rope is properly oriented. Finally, lock the carabiner gate to ensure the system is inescapable.

Rock climbing safety

It is actually good practice to check each other to ensure safety. Here, Enie, the belayer, checks Raymund’s, the climber, system. Specifically, Enie is verifying if

  • the tie-in knot is done properly,
  • the buckles are double-backed, and
  • the harness is properly adjusted.

Rock climbing safety

Then Raymund checks Enie’s belay system. He makes sure that

  • the carabiner is properly clipped to the belay loop,
  • the rope is properly threaded to the belay device,
  • the rope is properly looped to the carabiner,
  • the rope is properly oriented, and
  • the carabiner gate is locked.

Rock climbing safety

It is even better if there’s a third person to make a last check on both the climber and the belayer. If there are experienced climbers in the area who are free, don’t hesitate to ask them for a third and final check before the actual climb commences. Here, I’m doing a final safety check on Martin.

Rock climbing safety

Basic Commands

The safety and enjoyment of a climb is highly dependent on effective communication between the climber and the belayer. In the sport of rock climbing, we use simple, short commands that are easy to understand and execute. You can use these commands as is, but if the crag is filled with climbers and belayers, make sure you include your belayer’s/climber’s name at the end of the command to avoid confusion (for instance, “Slack, Sweetie” or “Tension, Sweetie”). Also, make sure your voice is loud enough so your belayer/climber can hear you.

Rock climbing safety

If this is your first time rock climbing, you will most probably climb on top-rope wherein the rope is threaded from the climber to an anchor on top of the route then back to the belayer. Basic commands that you will often use in top roping are:

Starting Commands:

  • Climber to Belayer: “On belay?” (means: Am I on belay? Am I secured?)
  • Belayer to Climber: “On belay!” (means: I’m ready. You are already secured, and I’m ready to take your falls)
  • Climber to Belayer: “Climbing!” (means: I’m going to climb now.)
  • Belayer to Climber: “Climb on!” (means: You can go ahead and climb.)

Commands on the Rock Face:

  • Climber to Belayer: “Slack!” (means: Loosen the rope a little bit. It’s too tight here.)
  • Belayer to Climber: “Slacking!” (means: I’m loosening the rope a bit.)
  • Climber to Belayer: “Tension!” or “Take!” (means: Pull the rope tight.)
  • Belayer to Climber: “Taking!” (means: I’m pulling the rope tight.)
  • Climber to Belayer: “Watch me!” (means: Pay attention! I’m going to do a move, and I may fall.)
  • Belayer to Climber: “Go ahead!” (means: I’m ready. Make the move.)
  • Climber to Belayer: “Falling!” (means: I’m going to fall. The belayer must pay close attention; most falls are so sudden that the climber may not have time to shout this command.)
  • Belayer to Climber: “Gotcha!” (means: Don’t worry! I’ve stopped your fall or I’m ready to take your fall.)
  • Climber to Belayer: “Ready to lower!” (means: I’ve reached the anchors or I can’t climb up anymore. You need to lower me down.)
  • Belayer to Climber: “Lowering!” (means: I’m going to lower you down now)
  • Climber to Belayer: “Rock!” (means: Look out below! A piece of rock or equipment is falling, and it might hit you!)
  • Climber or Belayer: “Rope!” (means: I’m pulling down a rope! Stay clear!)

Master these commands, and etch them in your mind.

Preparing the Rope for Top Roping

After the lead climber sets up the top rope, he unties his knot and pulls that end down until the other end comes up. This is done to prevent the second climber from swinging wildly if he or she falls.

Rock climbing safety

Spotting

You are now itching to climb! Yes, we know. But remember, safety first! Don’t underestimate the cliff; a lot of injuries happen on the first few feet of the crag.

At the beginning of a climb or in routes which involve a pendulum fall (the climber swings towards the ground if he falls rather than dropping straight down), a climber may need a spotter. A spotter is a person whose task is to direct the climber’s body to the ground during the fall so that the climber lands on his feet.

To spot, position yourself directly behind and below the climber with knees bent slightly and legs apart. Position your arms up with a slight bend at the elbows. Your palms should be facing out, and your fingers must be pointing upward.

As the climber scrambles up, raise your arms with your palms near his hips or torso. If he falls, quickly grip his hips and steer him towards the ground.

Rock climbing safety

Proper Belaying Technique

It is a great honor to belay someone. That’s because when you are the belayer, the climber actually entrusts his life to you. That is not figuratively speaking; it’s literal! When you belay someone, his or her life is in your hands! That is why Sweetie and I have a very strong bond; we literally entrust each other’s lives when we climb.

As a belayer, you must realize that you have a great responsibility in keeping your climber safe and alive. Thus, it is extremely important that you know how to belay properly. Remember the popular Spiderman quote, “With great power comes great responsibility.” Because a life is at stake here, you have to understand that belaying is serious business.

First and foremost, always be alert. Focus on nothing else but the climber on the line. Forget the world and the people around you. Don’t get distracted by anything and anyone. In this world, the only people who exist are you and your climber. In rock climbing, complacency can be a killer, and a concentration lapse can end everything.

Rock climbing safety

When belaying a climber, make sure the carabiner is not cross-loaded. Cross loading means that the carabiner’s gate or spine is taking the load. This usually happens when the carabiner somehow shifts, and the gate or the spine side of the carabiner ends up crossing the rope or the belay loop where the carabiner’s strength is at its weakest.

Rock climbing safety

Now, why is cross-loading dangerous? Well, a carbabiner is designed to be loaded only along its long axis, specifically at the bends above and below the spine. It is weaker in any other direction of weight and stress. The gate is the weakest part, and if shock loaded under the weight and stress of a falling climber, it might snap off!

From time to time, always check the carabiner if it’s not cross loaded. The photos below show the proper orientation of non-cross-loaded carabiners. Notice that all attachment points are at major axis of the carabiner.

Rock climbing safety

Get into the proper belay stance by putting one of your feet forward to balance yourself against the weight of the climber.

Let us assume you are right-handed like me. Your right hand is called your brake hand while your left hand is called your guide hand. If you’re left-handed, then your dominant hand should be your brake hand.

Step 1: Grip the climber’s end of the rope with your guide hand. Grip the brake end of the rope (the rest of the rope that leads to your coil) with your brake hand. Your brake hand must never leave the rope.
Step 2: As the climber climbs, the rope creates slack. Pull that slack up with your guide hand. Then pull that slack through with your brake hand.

Rock climbing safety

Step 3: Bring your brake hand to your hip. This is the proper locking position, which locks the rope in case the climber falls.
Step 4: Place your guide hand around and above your brake hand and slightly behind the belay device. Some belayers place their guide hand right under the brake hand rather than over their brake hand. This is also a valid and safe technique.

Rock climbing safety

Step 5: Slide your brake hand toward your guide hand. You have just completed a belay cycle. To start another cycle, place your guide hand on the climber’s rope and repeat the entire process.

Rock climbing safety

Let’s check that out again in a closer another angle.

Step 1: Hold the climber’s end of the rope with your guide hand. Grip the standing end of the rope with your brake hand. Remember that in no way should your brake hand leave the rope.
Step 2: The rope slackens as the climber goes up. Pull that slack up with your guide hand. Then pull that slack through the belay device with your brake hand.

Rock climbing safety

Step 3: Lock the rope by bringing your brake hand to your hip.
Step 4: Place your guide hand around and above (or below) your brake hand.

Rock climbing safety

Step 5: Slide your brake hand up toward the guide hand and the belay device. To repeat the cycle, grip the climber’s rope with your guide hand and repeat the process until the climber reaches the top.

Rock climbing safety

What should you do when the climber falls?

Rock climbing safety

Quickly lock the rope (Step 3) to stop the fall. To lock, position your brake hand on or a little behind your hip.

Rock climbing safety

Always concentrate on the climber. Never leave your eyes off him or her. Yes, you can converse with others around you, but your whole concentration should be on your climber.

Spectators, avoid talking to a belayer while he or she is in action to avoid distracting him or her.

Rock climbing safety

Once the climber reaches up the route, it’s time to lower him down. To lower him down, take up all slack and position your brake hand on your hip. Put your guide hand near and behind the belay device.

When he is ready to lower, bend your knees a little so you can counter the climber’s weight. Gently ease up your brake hand on the rope your brake hand to reduce friction. Guide the rope to the belay device with your guide hand. Continue doing so until the climber has safely touched the ground.

Rock climbing safety

The same technique applies when you’re using an auto-locking belay device such as a Petzl Gri-gri. We’ll discuss about using the Gri-gri in a later article.

Rock climbing safety

The coach and the student!

Rock climbing safety

Important Note:
Rock climbing is an inherently dangerous sport. Although blogs (including ours), books, tutorial videos, and articles could be a good source of information, you should find a certified climbing instructor to properly coach you through the sport. Please contact Raymund Daculan (0939-1600178), Enie Yonson (0909-4165050), or Willard Elimino (0912-5906112). They are the local guides and certified coaches. We learned our climbing skills under their tutelage . . . and we’re still learning. And please do keep in mind that we are NOT climbing instructors.

For details about Cantabaco itself, click here.


Bojo River Cruise: An Exciting and Informative Eco Adventure

$
0
0

Bojo River Cruise

Lofty mountains, verdant forests, limestone cliffs, and dark caves aren’t our only playgrounds. Indeed, Sheila and I are summit-to-sea adventurers. When we learn about something—a destination, an activity, an event—that will make our adrenaline surge, something that will make us marvel at Mother Nature’s magic, something that will truly humble us, and something that will let us cherish our closeness with one another, we dive for it.

The Bojo River in Aloguinsan is an example of that something. When we learned that Aloguinsan’s local government has marketed a river cruise after browsing my good friend and fellow blogger Leylander’s entry “Finding Bojo,” we immediately knew we had to try it. After a diligent research on the Net, we figured out that the Bojo River cruise is safe and hassle-free enough to be undertaken by non-outdoorspeople. So, Sweetie and I decided to bring along Alexa; Lei, Alexa’s best friend; and the Duders Lillian, Kristine, Muffins, and Dannea.

We started our trip early at 5:30 AM, April 14, Sunday. After 2 hours of travelling by bus, we reached the progressive port city of Toledo, known mainly for its mining industry. Toledo is also the jump-off point for people heading to San Carlos City in Negros Occidental. For us, it is our gateway to Aloguinsan since there are hardly any buses in the South Bus Terminal that goes directly to Aloguinsan.

This is Toledo’s pier which is just beside the terminal. Behind us is the faint outline of the majestic Kanlaon Volcano.

Bojo River Cruise

Based on our research, we were supposed to board a jeepney to Aloguinsan proper from the Toledo Land Transportation Terminal. While asking around, a kind old, driver offered to drive us all the way to Bojo River at a fair price of P60. Not bad at all! Look at it this way: if we were to go the usual way, we’d pay P35 to reach the Aloguinsan market. From there, we need to ride a habal-habal to Bojo River, which may probably cost P15 to P20. Then there were kids with us. We’d say, we got a pretty good deal.

Bojo River Cruise

An hour or so after, we arrived at the trailhead of Bojo River. As you can see, we’re pretty excited. Notice the Adrenaline Romance shirts? Well, some close friends of ours want to have one. Hehe!

Bojo River Cruise

The Duders themselves were excited despite the summer heat. The short 230-meter hike to the reception area was filled with moments of anticipation.

Bojo River Cruise

The entire riverbank is a natural “museum” thanks to the efforts of Aloguinsan’s hardworking LGU and effective tourism campaign. Along the way, we found lots of signs like these that identify various kinds of flora. One suggestion though: it would be better if the info also includes what the plant is used for or how it shapes Aloguinsan’s local culture rather than just putting in the local name and the scientific name.

Bojo River Cruise

Along the way, we began to get a glimpse of the majesty of this river. Just check out that green water and palm-like mangroves seemingly trying to welcome you. It’s awesome!

Bojo River Cruise

Then we got our first glimpse of Bojo River. That’s just a huge WOW! The serenity of the place simply overwhelmed us.

Bojo River Cruise

After 15 minutes, we arrived at the reception area where we registered our names for the Bojo River cruise.

Bojo River Cruise

A simple tarp eloquently but easily describes the importance of mangroves and river systems to marine creatures.

Bojo River Cruise

A buffet table was prepared for some tourists who purchased an entire tour package. The buffet lunch is part of that package.

Bojo River Cruise

Colorful decorations made from local and natural products provide a very provincial, Cebuano feel. Coconuts decorated with tiny flowers, a fantastic gumamela arrangement for the table’s centerpiece, and a model of a pawikan (green sea turtle) are just a few of the decors that make you feel proud and amazed of Cebuano creativity and ingenuity.

Bojo River Cruise

Sweetie and the kids didn’t have breakfast before we left home, so we took our fill here. Yes, you can bring your own food here without incurring a corkage fee; that was what we did. While we ate our meal, the rest of the Duders put on their makeup…errr…sunblock and prepared for the cruise.

Bojo River Cruise

After paying the fee, Ms. Nonela Villegas from Bojo Aloguinsan Ecotourism Association (BAETAS) briefed us about the tour. From her, we learned that the name “Bojo” is the Spanish term for “river ceiling.” However, in the Visayan dialect, it is pronounced as “bo-ho,” which refers to the “hole” (actually, an inlet) at the end where the river exits the sea. In the past, Cebuano fishermen make their way into the inlet to seek refuge from bad weather. The inlet also hides Cebuano warriors from Spanish and Japanese invaders during the Philippine Revolution and World War 2 respectively. Ms. Nonela also discussed the rules, regulations, and safety precaution that we need to know before embarking on the cruise.

Half of the fee goes to the guides while the other half goes to the LGU.

Bojo River Cruise

The tranquil Bojo River is a very important artery of the municipality. As mentioned before, it is a gateway to the sea where fishermen harvest Mother Nature’s bounty. It is also a source for farmland irrigation, a place where town folks can socialize, and a place where marine life can flourish. In other words, the river is Aloguinsan’s lifeline.

Bojo River Cruise

Once the briefing was over, we were ushered to the staging area where we donned life jackets. Hmmm…Southpeaks makes life jackets? That is so cool!

Bojo River Cruise

Then it was time to board the baroto, a traditional Filipino boat equipped with outriggers for balance. We chose a large baroto because there were kids with us, and we didn’t want them to ride a smaller baroto themselves. Barotos can be paddled, but this one had an engine although the mechanism was not switched on.

Bojo River Cruise

Definitely, everyone was super excited for this cruise.

Bojo River Cruise

The large structure is where guests who paid for an entire package will go for cultural demonstrations. That small floating structure is a raft. It must be pretty cool to float around on one of those while chatting with fisher folks.

Bojo River Cruise

That’s the well-maintained and clean reception area and dock. That’s where we came from, and that’s where we will return after the cruise.

Bojo River Cruise

She’s our wonderful guide, Manang Bella. Aside from being a highly trained BAETAS tour guide, she is one of the many fisher folks who harvest the bounties of the sea. She is an exceptional guide; let us say, she is at par with biology professors that we have in high school or college. Just to give you an idea of how knowledgeable she is, Manang Bella knows the local and scientific names of the different types of mangroves and flora and is very familiar with mangrove biosphere and ecosystem.

Bojo River Cruise

According to Manang, Bojo River along with its riparian zone is a 1.4 kilometer protected nature reserve. Aside from the innumerable species of flora, the river is also home to more than 60 species of birds, 2 of which are migratory.

Bojo River Cruise

The nipa that makes the roof of traditional bahay kubos (Philippine huts) can come from this species of palm-like mangroves. This is just one of the many species of mangroves that line up the Bojo river.

Bojo River Cruise

That’s a magnificent, unspoiled, extensive mangrove forest. Mangroves, by the way, are kinds of medium-height trees and shrubs that grow and adapt to in saline coastal areas, especially in the tropics and subtropics. In other words, they are trees and shrubs that grow by the sea. Ordinary terrestrial trees and plants die when exposed to salt water.

The river cruise is basically a 45-minute relaxing and educational ride along these mangrove forests.

Bojo River Cruise

Each mangrove has its own mini-ecosystem that is very important to the river and the sea. Take a look at these roots, for instance. Fish from the sea swim inland and lay their eggs within the protective “cage” of the roots. Within a few weeks, the eggs hatch. The roots are the temporary sanctuaries of baby fish, which also serve as their storehouse of oxygen and food. In time, the little fish will mature and will leave the sanctuary so they can head out into the sea.

Bojo River Cruise

At first glance, these bubbles look yucky. All the while, we thought that this was dirty. Coupled with fallen leaves, the water seems to be polluted and unfit for swimming.

Bojo River Cruise

But actually, those bubbles are the result of oxygen being produced by the mangrove. Remember your biology class? Plants breathe carbon dioxide expelled by animals and humans. In return, they expel oxygen for animals to breathe. This action oxygenates the river, providing fish (and us) with sufficient oxygen to breathe. The oxygen is expelled from pneumatophores, or the “breathing organs” of the mangrove. The pneumatophores, which look like spikes jutting out of the ground, are specialized roots that also enable the mangrove to extract carbon dioxide from the water.

Those fallen leaves provide a tasty, nutritious treat for fish.

Bojo River Cruise

Keep quiet, and you can even hear the symphony of bird calls. The gentle splashes of oars add a very tranquil and provincial feel to the cruise. This cruise, by the way, takes you a distance of 1.4 kilometers on brackish river water.

Bojo River Cruise

The river’s water is brackish, which is a mix of fresh and salt water. The sediment below the river makes it look green and cloudy. But we assure you the river is squeaky clean. And the water is very cool.

Bojo River Cruise

Bojo is home to a vibrant fishing community. Fishermen’s boats are docked at the shores, ready to go during fishing season. However, due to the river’s protected status, fishermen and locals are not permitted to build any structure in the area.

Bojo River Cruise

See that stair-like rock? That is called an asinan, a natural basin that locals use to produce salt. Bojo was once a producer of salt, but for some reason, the industry was abandoned long ago.

Bojo River Cruise

The Bojo River is full of life. Along the way, we saw fishermen heading out to sea and kids playfully splashing in clean water.

Bojo River Cruise

As we headed further up the river, we saw these shy kids at the shore hunting for freshwater crabs, shellfish, and mollusks.

Bojo River Cruise

We came around this bend and the river became wider. The water also became clearer, which means, we are nearing the mouth of the inlet. Manang Bella said that there were lots of monkeys that used to live in the trees above the cliffs. They were hunted down long ago.

Bojo River Cruise

Along the way, we found this “cave.” Manang Bella explained that this cave is actually man-made. They were blasted long ago by treasure hunters who were searching for the fabled Yamashita’s Gold, a war loot allegedly stolen by Japanese forces during World War 2.

Bojo River Cruise

Rounding the bend, we finally saw the exit that leads to Tañon Strait, the narrow strait between the islands of Negros and Cebu. From this viewpoint, it is not difficult to understand why Bojo River serves as a perfect refuge for fishermen.

Bojo River Cruise

We asked our rowers and guide to stop the boat so we can take postcard-perfect photos. As you can probably see in our faces, we were extremely satisfied about the tour. When we went home, Lei’s parents told us that the little girl couldn’t stop talking about our Bojo River adventure!

Bojo River Cruise

A kayaker ventured towards the exit. At this point, the water became a little bit rougher, which means that the sea is starting to “take over” the river.

Bojo River Cruise

Going through the gateway to Tañon Strait. Those are tourists and fishermen standing by at the mouth of the river. Passing through the inlet gave us a profound sense of humility and awe. We had a glimpse of the vast sea in front of us and the towering cliffs that surrounded us. Suddenly, we felt utterly ashamed of the notion of self-importance that we, humans, instilled upon ourselves. It is one of those moments when we’re simply mesmerized and humbled by Nature’s grandeur, which puts us back to our place in this world.

Bojo River Cruise

The open sea of Tañon Strait greeted us as we passed by the inlet. What a beautiful sea! Tañon Strait is an important marine wildlife reserve that serves as the resting, feeding, and breeding grounds of toothed whales, porpoises, dolphins, sea turtles, manta rays, and many other marine organisms.

Bojo River Cruise

Massive rock outcroppings jut out from the sea. Distinct moss lines indicate the height of the water during high tide.

Bojo River Cruise

Dannea and us have waterproof cameras, so why not take photos underwater? We found a whole new world under the sea. These are rocks encrusted with corals.

Bojo River Cruise

Just check out those beautiful corals! None are dead (gray or white) due to the environmental protection law that governs the area.

Bojo River Cruise

Find Dory, Martin and Nemo. Hehe! Corals are actually very delicate. They are actually invertebrates that protect themselves with a hard layer of calcium carbonate to form an exoskeleton. Corals are very important in marine ecosystems. They serve as sanctuaries for fish and other marine creatures and are lifelines in the marine biosphere.

Unfortunately, coral reefs all over the world such as this one are under stress. Human threats include coral mining, urban runoff, reclamations, organic and inorganic pollution, overfishing, and digging of canals. Other broader threats include increase of sea temperature, increase of sea level, and changes in the sea’s ocean acidification, which are all linked with greenhouse gas emissions.

It is alarming to know that according to the Earth Institute Center for Environmental Sustainability, 16 percent of the world’s coral reefs are already dead.

Bojo River Cruise

That sand mesa is just around 10 feet below us. But notice those rays of light and the bluer shade at the right side of the photo? That’s what locals call a cantil, or cliff. In other words, that’s the edge of a deep, deep abyss.

Bojo River Cruise

Numerous fish swim around the inlet. If you notice, most of them are a bit grown-up. They stay near the mouth of the river so when the right time comes, they simply head out to the sea.

Bojo River Cruise

After we had our fill of Tañon Strait, we headed back to the inlet. Then the guide announced that we can take a dip here. No one hesitated and everyone jumped in the clear, cool, waist-to-chest-deep water. And yes, we had a whole lot of fun! When Sweetie told Lei not to jump into the water because she was not wearing her bathing suit, Lei remarked, “I don’t care. I want to have fun!”

Bojo River Cruise

Look at how beautiful the water is. It’s not difficult to see why even the most beachphobic individual cannot resist jumping into the water.

Bojo River Cruise

A small baroto pulling a kayak came by. I asked the rower if I can try the vessel. We’re giddy to try out kayaking one of these days.

Bojo River Cruise

Sweetie with our expert guides and rowers. We salute you!

Bojo River Cruise

On our way back to the reception area, we spotted this nice boardwalk. We decided to give it a try.

Bojo River Cruise

The boardwalk is 400 meters long and runs alongside the riverbank, cutting through a mangrove forest. For us, it’s a wonder of engineering. Just imagine a long causeway all made of bamboo! Along the way are signs that identify species of mangroves and terrestrial plants. Awesome!

Bojo River Cruise

At the end of the boardwalk are 165 steps that are carefully carved on a hill. These steps lead to an airy viewing area at the hilltop.

Bojo River Cruise

On the way up, we were treated to an encompassing view of Bojo River down below! That’s an awesome sight!

Bojo River Cruise

After a short uphill trek, we reached the viewing deck which is a simple structure of wood and nipa. We should have brought some snacks here.

Bojo River Cruise

The viewing deck offers a commanding view of the surrounding hills, valleys, and farmlands. Alexa and Lei enjoyed the echoes of their shouts as well as the scenery here.

Bojo River Cruise

Tourists can buy locally made souvenirs to remind them of their Bojo River cruise and adventure.

Bojo River Cruise

Locally prepared and delicious meals await the guests. Unfortunately, they were not for us.

Bojo River Cruise

A group photo before heading to our next destination, a side trip to Hidden Beach, to have a cool, refreshing dip. The friendly BAETAS personnel gave Alexa and Lei free leis (garlands) made from local flowers.

Bojo River Cruise

We’ll definitely come back to this place and explore other hidden wonders of Aloguinsan.

* Some underwater photos courtesy of Dannea Moneva.

Suggested Itinerary:

5:30 AM – meet up, Cebu South Bus Terminal
6:00 AM – ETD Cebu, going to Toledo
8:00 AM – ETA Toledo Land Transportation Terminal, last-minute shopping, look for jeep to Aloguinsan
8:30 AM – ETD Toledo, going to Aloguinsan
9:15 AM – ETA Bojo River trailhead, Aloguinsan
9:30 AM – register at reception center, breakfast, picture taking
10:00 AM – start river cruise
11:15 AM – finish river cruise, hike to viewing deck
12:15 PM – back to reception area, prepare to depart
12:30 PM – back on trailhead, negotiate for habal-habal ride to Hidden Beach
1:00 PM – arrival at Hidden Beach, lunch
1:30 PM – swimming and enjoying the beach
3:00 PM – ETD Hidden Beach, hike to highway
3:20 PM – ETA Highway, ride passing jeep to Toledo
4:30 PM – ETA Toledo Land Transportation Terminal, board jeep for South Bus Terminal
5:00 PM – ETD Toledo Land Transportation Terminal
7:00 PM – ETA Cebu South Bus Terminal

Estimated Budget per Person (excluding food and extras):

P 70 – non-aircon bus fare from South Bus Terminal to Toledo Land Transportation Terminal (there are also V-hires to Toledo if you wish to travel in an air-conditioned vehicle. Fare is P100, and you can ride on one of these vans at the Citilink Terminal)
P 60 – jeepney fare from Toledo Land Transportation Terminal to Bojo River trailhead *
P 300 – guided river cruise
P 35 – habal habal to Hidden Beach **
P 35 – jeepney fare from Hidden Beach trailhead to Toledo Land Transportation Terminal
P 70 – non-aircon bus fare from Toledo Land Transportation Terminal to Cebu South Bus Terminal (V-hire is P100)

Total Estimated Budget (including our lunch, snacks and drinks) – P 700

* if you can’t find a jeepney that will head straight to the Bojo trailhead, you can ride a jeepney to Aloguinisan proper (P35) then negotiate for a habal-habal ride to Bojo River trailhead (around P30 as per the advice of our jeepney driver)

** if you can’t find a habal-habal that goes directly to Hidden Beach, you can ride a habal-habal to Poblacion (P15). From there, you can ride another habal-habal (P15) to take you to Hidden Beach.

Tips:

1. The Aloguinsan River tour is heavily dependent on the tides. It is impossible to sail through the river during low tide. Thus, you should contact the Aloguinsan Tourism Council beforehand to check on the tide during your day of cruising. We made the mistake of not calling them, actually. We were fortunate that when we got there, the tide was already rising.

To contact the Aloguinsan Municipal Tourism Office, use these contact details

* Phone number: (6332) 469-9312
* Fax: (6332) 469-9034
* Cell phone: 0905-9133055 (Rudney Carcuevas, head of BEATAS)
* E-mail: nonela.villegas@aloguinsan.gov.ph

2. We availed just the river tour. However, BAETAS also offers packaged rates. As far as our research is concerned, these are the rates:

30 to 50 people – P450 per head
20 to 30 people – P480 per head
16 to 20 people – P500 per head
11 to 15 people – P530 per head
6 to 10 people – P550 per head
5 people – P800 per head

* The package includes a comprehensive lecture on mangroves, ecology, and wildlife; a traditional send-off ritual which is performed by a village medicine man (mananambal); a buffet lunch; a river cruise, and a mat-weaving demonstration.

For more information, check out the Aloguinsan Tourism website at www.aloguinsan.gov.ph

3. The Bojo River cruise can be done in one day. However, it may take more than that if you plant to explore all of Aloguinsan. Now, remember that Aloguinsan is a 4th class municipality, thus, do not expect hotels and inns. Contact the Aloguinsan Homestay Association (ALOHA) at (6332) 469-5604.

4. It is highly recommended that you bring the following:

  • Snorkeling mask or swimming goggles (the underwater seascape at the inlet is to die for)
  • Underwater camera (to take great scenes of underwater scenery)

5. Never throw garbage into the river. Not even organic food. Remember that the Bojo River is a protected area. Aside from harming the environment, you’d be slapped a criminal case if you disobey the law.

6. You don’t need any special adventuring equipment for the river cruise. However, you do want to bring the following:

  • water (at least 1 liter)
  • trekking sandals or sturdy shoes (terrain is rocky)
  • umbrella, hat, or sarong
  • sunblock
  • packed lunch
  • snacks
  • rain gear (in case of bad weather)
  • swimwear (if you plan to dip at the mouth of the river)
  • extra clothes
  • extra money for emergencies

7. Listen to the guides. The cruise is more fun and educational if you listen to them.


Hidden Beach: White-Sand Treasure of Aloguinsan

$
0
0

Hidden Beach Aloguinsan

One cannot begin to associate celebrating and enjoying Philippine summers without going to—or even thinking of—beaches. Indeed, summer in the Philippines is not complete without frolicking in crystal-clear seawater, playing on the sand, having a picnic of puso and barbecue under the shade of a hut or coconut tree, snorkeling above coral reefs, or even taking a walk along the seashore.

You may actually have glimpses of these beaches in postcards, magazines, travel websites, and TV shows. But if you notice, many of these featured beaches also feature immaculately maintained gardens, massive hotel and resort buildings in the background, relaxing beach lounges, carefully trimmed palm trees, and uniformed staff bringing drinks and coconuts with little paper umbrellas.

While these kinds of beaches may appeal to the ordinary tourist, these leave much to be desired for the adrenaline-seeking adventurer. Thus, while an ordinary tourist enjoys all those convenience, pampering, and ultramodern facilities, the adventurer finds himself or herself asking: where are the boundless white sand shores? Where is the azure, aquamarine water? Where are the tropical fishes that nibble at your feet? Where is all that serenity offered by a place devoid of people, buildings, and monumental costs? In other words, where can I find real Philippine beach paradise?

Worry not. The Cebu Province consists of 167 islands, all blessed with some of the finest beaches in the world, each with its own unique characteristic. And in the municipality of Aloguinsan, Hidden Beach is considered by locals and visitors alike as one of place’s best tropical paradises. It is humble yet teeming with the grandeur of nature. It has the natural gifts that are present in postcard perfect, world-class resorts without the presence of modern conveniences. Put in another way, it is the epitome of pure, simple, classic beaches in Cebu.

We visited Hidden Beach after we had our river cruise in Aloguinsan. Sweetie and I decided to end our April 14, 2013 weekend with a refreshing dip at one of Aloguinsan’s treasures. After a 20-minute habal-habal ride from the Bojo River trailhead, we saw this sign beside the highway. Hidden Beach, here we come!

You may want to buy your softdrinks and snacks at the store across the sign. Products and supplies are way cheaper when bought outside the resort.

Hidden Beach Aloguinsan

A short but bumpy ride after, we arrived at the entrance of Hidden Beach. We guess that it named aptly so because the resort is hidden behind a thick grove of trees.

Hidden Beach Aloguinsan

Welcome to Hidden Beach. The trees, which offer plenty of shade, made us really feel welcomed. Well, who wouldn’t? At this time, midday, the sun’s heat at was simply oppressive.

Hidden Beach Aloguinsan

A large, shady, open parking space for guests who have vehicles

Hidden Beach Aloguinsan

After everyone was accounted for, we headed to the fenced entrance of Hidden Beach.

Hidden Beach Aloguinsan

Very provincial entrance sign. Check out the roughly drawn sketches of a hut and boat. “If you avail AND any facilities”?  And that should be valued customers. Hehehehe!

Hidden Beach Aloguinsan

To ensure that guests won’t forget the fees, signs, both tasteful and less than mediocre, are posted on the gate. You’re not getting anywhere without paying the fee. But at least, the rates are very affordable.

Hidden Beach Aloguinsan

After paying the entrance fee (we didn’t pay for a cottage or table since we just agreed to simply sit down at a shady part of the beach), we proceeded to the shore. For a public beach, Hidden Beach’s surroundings are beautifully manicured. Not overly manicured like in overly classy resorts, the beach’s gardens are quite pleasant and refreshing, a “warm-up” refreshment for the real thing.

Hidden Beach Aloguinsan

On our way towards the shore, we saw the vast and blue expanse of Tañon Strait. Wow!

Hidden Beach Aloguinsan

A stone arc serves as the gateway to the shore.

Hidden Beach Aloguinsan

There are plenty of large canopied trees that can provide plenty of shade. That’s why we didn’t spend extra for cottages and tables. That’s an example of an airy P250 cottage, which provides an encompassing view of Tañon Strait. Look at all those shady palm trees!

Hidden Beach Aloguinsan

Plenty of greens just in front of the shoreline offer plenty of shade. The ground is relatively flat so that it would be easy for people to simply lay down their picnic mats.

Hidden Beach Aloguinsan

Grilling and barbecuing foodstuffs to perfection is a staple activity in any beach outing. Hidden Beach provides several grilling stations for this purpose. You have to buy your own supply of coal though.

Hidden Beach Aloguinsan

Mmmm! Can we have some, sir? The fragrant, smoky smell can definitely make your mouth water.

Hidden Beach Aloguinsan

Lunchtime! The others bought lechon manok and rice. Sweetie and I, ever the thrifty couple, brought something home-made: deep fried salted pork slices and sautéed mushrooms. We were so excited to take a refreshing dip that eating lunch just took less than 10 minutes!

Hidden Beach Aloguinsan

Then it was time to take a dive in! But first, don’t forget to wear your bathing suit or swimming trunk. And don’t forget to slop on sunblock with an SPF rating of at least 35.

That’s one of the tables for rent at P150.

Hidden Beach Aloguinsan

The kids were the first to dive in!

Hidden Beach Aloguinsan

Alexa and best friend Lei enjoyed the water so much that they hardly went out of the beach until we announced it a day. At the end of the day, both girls were definitely tanned.

Hidden Beach Aloguinsan

Sweetie and I bonded with the little girls on a perfect summer afternoon.

Hidden Beach Aloguinsan

Underwater shots from our new camera! Pretty cool! Sorry we can’t open our eyes underwater.

Hidden Beach Aloguinsan

A nice head-on view of the beach. Notice that unlike other beaches, there are no structures on the shoreline itself. All the cottages and tables are nestled under shade of coconut trees. The absence of structures on the shoreline makes the beach look neat and clean.

Hidden Beach Aloguinsan

Locals and visitors are thoroughly enjoying the cool water and warm sand. Check out that little girl who buried herself in the sand.

Hidden Beach Aloguinsan

Farther down south are some large rock outcroppings. We’re pretty sure that locals hunt for crabs and shellfish here during the night. Also, notice the absence of ugly seawalls that usually demarcate private and commercial beach-side properties. Unsightly seawalls are commonly seen in the beaches of Mactan Island.

Hidden Beach Aloguinsan

Here’s the northern side of the beach, facing Pinamungajan and Toledo. That is a clean and lovely coastline. Again, there are no unsightly, man-made seawalls to obstruct the long, sandy shore. In our own opinion, beaches shouldn’t have any seawalls.

Palm trees beside the shore offer natural “umbrellas” if bathers need respite from the sun’s heat.

Hidden Beach Aloguinsan

A shoreline of clean, unspoiled, fine, white sand is one of Hidden Beach’s treasures. It’s so comfortable to just bury your feet in the sand or spread a beach towel and lie on it. It’s definitely paradise here. Locals said that the sand in Hidden Beach is “original.” This means that Hidden Beach’s sand is not extracted and hauled from some other place such as Bohol or Leyte. Do you know that the white sand in many high-end beach resorts are actually hauled from some other place? Yes, the shores in such establishments do look nice but at the painful cost of environmental damage at the place where the sand was quarried. Furthermore, by covering the place “artificially” with sand, the ecosystem that originally thrives in that area is severely harmed or even destroyed.

Hidden Beach Aloguinsan

Lei tried to build a sand castle. Or is it something else, Lei? The fine, easy-to-sculpt sand here provides children with a natural “toy” that beats any toy in the department store.

Hidden Beach Aloguinsan

This cool outrigger vessel, a motorized banca, transports scuba-diving enthusiasts to Tañon Strait’s numerous, protected, and well-preserved dive sites.

Hidden Beach Aloguinsan

That’s the vast, serene expanse of Tañon Strait, which separates the islands of Negros and Cebu. Just look at that! That isn’t ordinary water; it’s an enchanting, glowing, liquid lapis lazuli! This is why tourists and locals alike can’t get enough of Philippine beaches; our beaches are simply magical. That is also why we should protect our shores and marine resources; remember that our incredibly beautiful marine resources are major tourist come-ons.

Hidden Beach Aloguinsan

Tañon Strait is very abundant in marine resources. These fishing boats are a testament to the richness of the sea’s bounties.

Hidden Beach Aloguinsan

It was a fine day to have a swim. It was a Sunday, but the beach wasn’t crowded at all. Could it be that because it’s well-hidden as its name implies? Hidden Beach, for us, is an adventurer’s sanctuary.

Hidden Beach Aloguinsan

The Duders, all writers, were my ex-officemates. We’re still really great friends, and we surely enjoy each other’s company, especially in adventures like these. For Kristine and Dannea, this is their first time going on an adventure with Team Sweetie.

Hidden Beach Aloguinsan

A washed-up merman? Nope, I’m just practicing a modeling pose for a coming pictorial.

Hidden Beach Aloguinsan

That’s Sweetie with the rest of the Duders. Since all of us have long, stressful jobs (just imagine sitting in front of your computer, brainstorming for ideas to write, writing them, making sure that keywords are strategically placed, and editing them 8 hours a day for 5 days a week), we surely need much-deserved breaks like this every weekend.

Hidden Beach Aloguinsan

No adventure—be it rock climbing, mountaineering, beacheneering, caving, wall climbing, kayaking, river cruising, etc.—is complete without bonding with my Sweetie.

Hidden Beach Aloguinsan

One of the goals I have forever tried to accomplish is to take perfectly timed jump shots. I was never successful in any of my shots until now. Dannea shared to me a fail-proof technique. These jump shots look great, don’t they?

Hidden Beach Aloguinsan

Around 3 PM, we had our fill of tranquil Hidden Beach. We hiked back to the highway for 20 minutes. We were back under the mercy of the scorching sun. It was one of those times where we wished we brought an umbrella.

Hidden Beach Aloguinsan

After reaching the highway (and a liter of sweat later) and waiting for 10 minutes, we boarded a passing jeepney that was headed for Toledo.

Hidden Beach Aloguinsan

Finally, we boarded a bus that will take us back to Cebu. Everyone, even the hyperactive kids, were spent and tired. But, definitely, we were all smiles, exceptionally happy for taking part in an adventure-filled weekend.

Hidden Beach Aloguinsan

Congratulations to Alexa, Lei, and the Duders (Dannea, Kristine, Muffins, and Lillian)! Let’s have more adventures.

Hidden Beach Aloguinsan

Suggested Itinerary

* If you want to include the Bojo River Tour in your Aloguinsan adventure, you may use the itinerary in the previous post.

* For a whole-day, stand-alone beach picnic, you may want to consider this itinerary:

5:30 AM – meet up, Cebu South Bus Terminal
6:00 AM – ETD Cebu, going to Toledo
8:00 AM – ETA Toledo Land Transportation Terminal, last-minute shopping, look for jeep to Aloguinsan
8:30 AM – ETD Toledo, going to Aloguinsan
9:15 AM – ETA Sitio Bonbon, Aloguinsan, short hike to Hidden Beach
9:35 AM – ETA Hidden Beach
10:00 AM – swimming and enjoying the beach
12:00 PM – lunch
12:15 PM – swimming and enjoying the beach
3:00 PM – ETD Hidden Beach, hike to highway
3:20 PM – ETA Highway, ride passing jeep to Toledo
4:30 PM – ETA Toledo Land Transportation Terminal, board jeep for South Bus Terminal
5:00 PM – ETD Toledo Land Transportation Terminal
7:00 PM – ETA Cebu South Bus Terminal

Estimated Budget per Person (excluding food and extras):

P 70 – non-aircon bus fare from South Bus Terminal to Toledo Land Transportation Terminal (there are also V-hires to Toledo if you wish to travel in an air-conditioned vehicle. Fare is P100, and you can ride on one of these vans at the Citilink Terminal)
P 60 – jeepney fare from Toledo Land Transportation Terminal to Bojo River trailhead *
P 10 – entrance fee
P TBD (to be determined) – table or cottage rental, if opted. The price depends on what kind of “accommodation” you want
P 35 – jeepney fare from Hidden Beach trailhead to Toledo Land Transportation Terminal
P 70 – non-aircon bus fare from Toledo Land Transportation Terminal to Cebu South Bus Terminal (V-hire is P100)

Total Estimated Budget per person (including our lunch, snacks and drinks) – P 500 (that is, if you’re going with a group, opt to rent accommodations, and divide the rate evenly with your group)

Tips

1. For reservations and information, you can get in touch with Ate Baby at 0922-5577390.

2. If you’re coming from Toledo, the Hidden Beach sign will be at the right side of the road. Just tell the driver to drop you off at the crossing of Hidden Beach.

3. We recommend bringing your own lunch packs, buying your meal in town beforehand, or buying the ingredients beforehand and cooking them right at the beach. That’s because there aren’t any carenderias or restaurants in the area. Not even an in-house resort restaurant.

4. Ate Baby said that her staff can cook meals for you for a minimal fee. However, this is somewhat a misnomer. It means that they will cook the ingredients you brought with you. You can also ask Ate Baby to have their staff purchase food for you from the town proper. Of course, this will entail an extra fee.

5. When grilling food, use the grilling stations, which are located all around the shaded part of the beach . We encountered a group that grilled their barbecues right on the grass near a main pathway. Their action is not only detrimental to the environment but also poses a danger to passersby. That is truly bad etiquette.

6. The resort has meager facilities. There is only one store full of overpriced merchandise (another reason it’s better to buy everything you need outside the resort) that has a karaoke machine. Comfort rooms are shared.

7. For overnight stays, there are huts that are available for rent at P500. But if you have a penchant for adventure (and if you’re trying to save money), why not pitch a tent at the beach?

8. Hidden Beach has ample parking space, so you don’t need to worry about finding a parking space for your vehicle.

9. There are designated garbage disposal areas around the beach, which are actually piles of garbage that will be burned up later. We highly recommend not throwing your garbage on these piles since we don’t know how they dispose of trash other than incineration. It is better to bring your garbage with you and dispose of it in proper trash receptacles when you reach Toledo or Cebu City on your way back.

10. A few stray dogs may find their way to your picnic area, table, or cottage. Be sure to cover your food tightly in Tupperware, Lock and Lock, or similar containers. Do not rely on putting food on plastic bags and hanging them. These dogs have a penchant of reaching the bags and ripping them out to get the food inside.

11. Bring the following:

  • trekking sandals or flip-flops
  • hat or sarong
  • umbrella
  • sunblock
  • packed lunch
  • snacks
  • water/juice/soda
  • swimwear
  • extra clothes
  • extra money for emergencies
  • waterproof bag or pouch for your gadgets
  • anything you need for a day at the beach

Puerto Princesa Palawan Anniversary Adventure: A Teaser

$
0
0

Palawan Puerto Princesa Adventure

What is our best adventure of all? It’s being in love with each other day by day. It has been almost one year since we whispered “I love you” on top of Osmeña Peak, and we’re still going as strong and wild as ever. We have fully supported each other to achieve our individual and collective goals; inspired each other to become better people; helped each other in our daily chores; stood by with each other to conquer adversities and problems; and, of course, explored and enjoyed the world together.

One year of love, success, and adventure is something that is worth celebrating.  And there’s no better way to celebrate such special occasion than to visit the last frontier of the Philippines: Palawan. This virgin, paradise province actually consists of around 1,780 islands and islets with rocky coves, mangrove forests, and white-sand beaches that dot over 2,000 kilometers of coastline. The center of the main island features an immense backbone of verdant mountains, craggy hills, and karst topography surrounded by thick forests, mighty rivers, and vast valleys. Palawan’s fauna, many of which still remains unidentified, stays hidden in the many crevices of the province.

After a few months of careful research (this adventure needed to be very special for both of us), and through the help of Faye, Sweetie’s office mate, Sweetie and I decided to visit and tour Puerto Princesa, the capital of Palawan and the largest city in the island province. Today, with the official declaration of the amazing Puerto Princesa Underground River as one of the New 7 Wonders of the World, Puerto Princesa has become a world-renowned tourist city.

It was a long, jittery wait for four months; but the “moment of adventure” finally came on April 27, 2013, Saturday.  For three days, Sweetie and I experienced our best backpacking adventure ever. Here are some snippets of our anniversary trip.

For me, it was my first airplane ride for more than a decade. Thus, being several miles up in the sky is definitely an adventure for me.

Palawan Puerto Princesa Adventure

Our first day comprised of an adventure around the beautiful, green, and clean city of Puerto Princesa. We have never seen a highly urbanized city as neat, tidy, and sustainable as the province’s capital.

Puerto Princesa City

We visited the Palawan Special Battalion World War 2 Museum. The museum gave us a glimpse of a soldier’s life during the most widespread global war and the deadliest conflict in the history of humankind. Furthermore, as a model builder of World War 2 miniature tanks, planes, and dioramas, I found this place a treasure trove of information during that era.

Palawan Special Battalion World War 2 Museum Puerto Princesa

Crocodiles are such deadly and amazing reptiles as we read in books or watched in the National Geographic channel. During our vacation, we had a chance to actually see these creatures live at the Palawan Wildlife and Conservation Center formerly called the Crocodile Farming Institute.

Palawan Wildlife and Conservation Center Puerto Princesa

After the exhilarating experience of facing dangerous crocodiles face-to-face, we relaxed at the Rancho Sta. Monica, known to the locals as Mitra’s Ranch, formerly the residence of the late Filipino statesman Ramon Mitra, which overlooked Honda Bay.

Mitra's Ranch Puerto Princesa

These tours can certainly make backpackers hungry. So, we headed to Baker’s Hill, a themed-park restaurant complex, probably the first of its kind in the Philippines. Walking along the cobblestone pathways of Baker’s Hill feels as if we were walking in an old European town.

Baker's Hill Puerto Princesa

Then, we tried our hand at the complex ancient art of weaving beautiful place mats, bags, and other products at Binatuan Creations.

Binatuan Creations Puerto Princesa

We also headed out to the Immaculate Conception Cathedral and the historic Plaza Cuartel, an old garrison where 150 American POWs were massacred by Japanese soldiers in World War 2.

Plaza Cuartel Puerto Princesa

We arrived at the city’s coastline just in time to witness the majestic sunset in Puerto Princesa’s baywalk where one can rent bikes, take a relaxing afternoon stroll, or enjoy an affordable dinner with a beautiful view of the surrounding mountains and the sea.

Puerto Princesa Baywalk

We ended our first day with a fear-factor meal at the popular Kinabuchs Grill and Bar.

Tamilok Challenge

On Day 2 of our Palawan Anniversary adventure, we explored the world-famous Puerto Princesa Subterranean River, recently declared as one of the Seven Natural Wonders of the World.

Puerto Princesa Underground River

On our way back from the Puerto Princesa Underground River, we stopped by to admire the Elephant Mountain Karst formation, which could very well be the Philippine’s version of US’s Joshua Tree or Thailand’s Krabi when it comes to rock climbing destinations.

Elephant Mountain Karst Formation

We capped our second day with an adrenaline-rush adventure: exploring a cave, climbing up a karst rock formation, and returning back to the jump-off point via zip line all at Ugong Rock Adventures.

Ugong Rock Adventures

On our final day at Puerto Princesa, we had a classic tropical summer treat: island hopping to three of Honda Bay’s islands.

Honda Bay Island Hopping

Capping our last day in Puerto Princesa is a leisurely stroll at one of the affordable but stunning public beaches in the city, Pristine Beach. Best thing of all? The beach is just a 5-minute stroll from our hotel.

Pristine Beach Puerto Princesa

Suggested Itinerary

Okay, as you might have guessed, this is going to be quite a lengthy tale. Thus, we will tell our story in segments. As each segment of our trip is written and published, we will also hyperlink each of our adventures from this page. So stay tuned!

Day 1 Puerto Princesa City Tour

  • Palawan Special Battalion Memorial Museum
  • Palawan Wildlife and Conservation Center
  • Mitra’s Ranch and Baker’s Hill
  • Binuatan Creations
  • Plaza Cuartel and The Immaculate Conception Cathedral
  • The Baywalk
  • The Tamilok Challenge

Day 2 Puerto Princesa Hinterlands and Sabang Beach

  • Puerto Princesa Subterranean River National Park
  • Elephant Karst Mountain and Ugong Rock Adventure

Day 3 Island Hopping

  • Honda Bay
  • Sunset at Pristine Beach

Budget (for 2 Pax)

P 11,000* – Tour promo price which included:

  • 4 days/3 nights accommodation at Kookaburra Hotel (inclusive of hotel-airport-hotel transfers and daily breakfast)
  • City tour
  • Puerto Princesa Subterranean River Tour (inclusive of lunch)
  • Honda Bay Island Hopping (inclusive of lunch)

P 4,200** – Round trip Airfare (Cebu – Puerto Princesa – Cebu)
P 900 – Ugong Cave Rock Adventures
P 5,000 – pocket money

* This was the price of the tour promo that we bought. The price may differ depending on your travel agency, your destinations, tour package inclusions, and other factors.

** This was the price of a promo airfare. Your airfare may differ according to the promo you may have availed.

Tips

1. Tourism in Puerto Princesa and the rest of Palawan is exploding. However, the local government is extremely strict in controlling the tourist influx to protect their natural resources. Thus, be a responsible tourist. Do not litter and smoke in non-smoking areas; the LGU imposes heavy fines and severe punishment for these offenses.

2. To make it worth your while, we recommend not including visiting far-off destinations such as El Nido or Coron. Unless you’ll be staying in Palawan for a week or two, you will spend a huge part of your vacation time traveling. El Nido is 6 to 8 hours away from Puerto Princesa; Coron is even farther. It’s best to visit one place at a time.

3. Needless to say, you don’t want to make your vacation stressful and exhausting. You don’t want to line up for permits, waste time looking for public transportation to take you to your destinations, or spend the night looking for accommodations.

Thus, for first time travelers to Puerto Princesa, we highly recommend booking your tour through a trusted travel agency. Your travel agent can process your permits in advance so you can visit Palawan’s treasures. Having an agent to assist you in your adventure makes everything hassle-free, allowing you to simply and freely enjoy your holiday.

4. Our travel agency was Golden Ticket Travel Services. If you wish to use them, get in touch with them using the contact details below. Of course, you can definitely have your adventures booked by another agency of your choice.

Golden Ticket Travel Services
Mailing address: Cluster 2-4C, UN Gardens Condominium, Cristobal St., Paco, Manila
Phone numbers: +63917-8956913; +63917-8556913; (02) 263-4653
E-mail: goldentickettravel@ymail.com; ilovemygoldenticket@gmail.com
Facebook: http://www.facebook.com/ilovemygoldenticket
Contact Person: Vanessa de la Cruz (Owner)

5. A trip that involves touring Puerto Princesa’s adventure sites and destinations can cost you a lot of time, money, and effort—if you fail to plan it properly. Take time—and we mean, a whole lot of time—to plan out your destinations. We spent a few months planning our itinerary.

6. You can create your own tour without the help of a travel agency. However, you will have to reserve for slots and apply for permits in advance, especially if you want to include the Underground River tour and Honda Bay Island Hopping. Because it was an agency that booked our tours, we didn’t encounter any problem regarding the booking/reservation aspect. But that also means we don’t have any information about self-booking.

7. The rates of major destinations are regulated to avoid overpricing. As of April 2013, these are the rates of the major activities/tourist destinations in Puerto Princesa.

Puerto Princesa Tourist Destination Rates

Note that these rates can change without prior notice. It is best to keep yourself updated by getting in touch with the Puerto Princesa Tourism Office or the Puerto Princesa city government. Unfortunately, their website is down. We were only able to link to the Puerto Princesa Subterranean River website where you can post inquiries, gather information, or perhaps make a booking. We’ll try our best to provide you with the LGU’s contact info.

8. Globe and Smart networks are used all over Puerto Princesa. There’s no Sun Cellular network. If you have a phone which uses the Sun network, then you’ll have to input a certain code to “hitch” your network to Smart.


Puerto Princesa City Tour: Palawan Special Battalion World War 2 Museum

$
0
0

Palawan Special Battalion World War 2 Museum

World War 2 was the biggest, most expensive, most widespread, and deadliest major conflict the world has ever encountered. It spanned 30 different countries and was fought by 100 million people who served on both the Allied and the Axis alliances. The war was marked with mass deaths of civilians; development of new weapons; and concentration of the major participant’s economic, scientific, and industrial capabilities to the war effort. After the war, global social structure and political alignment was forever altered.

The Philippines was a major player in the Pacific Theater of the war. Our country’s strategic location in this part of Asia made the Philippines a ripe plum. For years, our brave fellowmen and their American allies furiously battled the Japanese invaders who once gripped the country in an iron fist. These battles left many remnants that allow us in the present time to have a glimpse of this world-altering war. And in Puerto Princesa, a city rich in history and culture, a lot of these authentic remnants can be seen inside the Palawan Special Battalion World War 2 Museum.

First things first. After checking in at the hotel at around 12 PM, our tour guide, Sir Jhun Salazar, arrived at Kookaburra, the hotel where we stayed. At first, we thought we will be touring the city together with a group in an air-conditioned van. Thus, we were a bit taken aback when we saw his tricycle at the parking area of the hotel. Touring the city in a tricycle turned out to be the right way to go around Puerto Princesa. Cool tricycle design, isn’t it?

Puerto Princesa City Tour

We mentioned in our earlier post that tourism in Puerto Princesa is thriving. Yes, the city’s tourism program and efforts are remarkably successful. You know why? It’s because ordinary people, from drivers to executives, are encouraged to promote the island’s attractions, accommodations, restaurants, tourist sites, activities, and tourism-related products and services. Check out Sir Jhun’s trike. It’s full of stickers that advertise tourism in the city. See that napkin-holder-like contraption? It contains flyers from hotels, restaurants, tourist spots, tourist service providers, tourism-related government agencies, and more.

Puerto Princesa City Tour

The tricycle is the main mode of transportation in Puerto Princesa. Don’t be fooled by its width; it’s just a fixed windshield for the driver. The passenger cab is as small as the ones in Lapu-Lapu City. However, the motorcycles that power them seem to be bigger and more powerful than the ones plying around Cebu City. Perhaps it’s because they travel longer distances; Puerto Princesa, after all, is the second largest city in the Philippines.

We were hoping to see the acclaimed electric tricycles of Puerto Princesa, but we didn’t see any during our stay here.

Look at the streets and sidewalks. They are very neat and tidy! In fact, according to Wild Asia, Puerto Princesa is commended many times as the cleanest and greenest city in the Philippines. The locals truly make the effort of preserving the cleanliness of the city.

Puerto Princesa City Tour

Another thing that caught our attention was Puerto Princesa’s automatic traffic lights. Unlike the ones in the Cebu Province, Puerto Princesa’s traffic lights display countdowns so motorists will know when the light will change. It’s a pretty cool concept, which helps prevent frustrated motorists from guessing whether the traffic lights are being fair or playing favorites.

Puerto Princesa City Tour

On our way to the museum, we passed by the citys’ provincial capitol. Isn’t it beautiful? And unique? We’ve never seen a capitol quite like it; most of the capitols we’ve seen were patterned after American neo-classical, art deco architecture. This one seems to be patterned after Roman architecture that focuses on arches and domes.

A fountain, a plaza, and a bust of Don Pedro Vicente adorn the front of the Puerto Princesa Provincial Capitol.

Puerto Princesa Provincial Capitol

After 10 minutes, we arrived at the Palawan Special Battalion World War 2 Museum, which opened on December 2011. This private museum is owned by Higino “Buddy” Mendoza, a well-known businessman as well as an active officer in the Philippine Coast Guard Auxiliary. He established the museum in memory of his late father, local hero and guerilla Dr. Higinio Mendoza Sr., who was slain by Japanese troops at Canigaran Beach during World War 2. Mr. Mendoza stated that he wanted to put up this memorial museum to “provide a distinctive experience of what we only now usually appreciate in books or other forms of media. It is important for the Palaweños to understand the history of their place as it is a part of what Puerto Princesa and Palawan are today.”

Palawan Special Battalion World War 2 Museum

A monument/marker stood at the entrance. Respect for the Palaweño guerrillas and American soldiers who died to defend our country.

Palawan Special Battalion World War 2 Museum

Immediately after the entrance was this genuine, classic 6th (or is it 7th) Buick Roadmaster sedan. It was like being injected with a needle of nostalgia.

Palawan Special Battalion World War 2 Museum

Sheltered inside the museum is this beautiful, authentic Willys MB Jeep, the workhorse of the US Army during World War 2 and the origin of our own jeepneys. It has complete accessories such as shovels, snow chains, and tow bars. Best of all, it even has a Browning M1919 .30 caliber medium machine gun! Look at that baby!

Palawan Special Battalion World War 2 Museum

Don’t mess with me! Hahaha! It was an exhilarating, nostalgic feeling as I climbed on one of the most venerated vehicle in the world and holding one of the deadliest and most effective machine gun in global arsenal. Oh, don’t worry, it doesn’t fire anymore.

You may also want to borrow a woodland BDU (battle dress uniform) and a bush hat to have a more “authentic” photo. Unfortunately, this kind of BDU and camouflage pattern didn’t exist until the end of the Cold War. Plain olive green BDUs (yes, the one you wore in your ROTC or CAT) would be more authentic.

Palawan Special Battalion World War 2 Museum

Beside the jeep is a 40 millimeter anti-aircraft cannon that was once part of the armament of the US Navy cargo ship Bow Line Knot. Check out the massive size of those barrels and shells.

Palawan Special Battalion World War 2 Museum

A short while later, a large group of tourists came to visit the museum. The guide, equipped with a wireless microphone, was very pleasant and professional. She knows the information by heart like the back of her hand. And do you know another great thing about this tour? There’s 1940s music blaring from the speakers. Yes, very old tunes recorded in poor quality, complete with scratchy static. It added to the nostalgia of the place.

Palawan Special Battalion World War 2 Museum

Old black-and-white and faded photos adorn entire sections of the museum. They provided a glimpse of Palawan during World War 2.

Palawan Special Battalion World War 2 Museum

Two of my favorite World War 2 fighter airplanes, the agile US Air Force’s P-41 Mustang and the dreaded Japanese Mitsubishi Zero.

Palawan Special Battalion World War 2 Museum

Oh, they already had beauty queens in the 1940s? The Philippines is indeed a pageant country!

Palawan Special Battalion World War 2 Museum

This was one of more than 4,000 pairs of shoes that was owned by Imelda Marcos, the wife of the dictator Ferdinand Marcos. So, Imeldefic! However, we can’t see why it was special; it looked like just any ordinary women’s shoes . . .

Palawan Special Battalion World War 2 Museum

Relaxing on an old rocking chair. Yes, you were actually supposed to sit this way on this chair, which is why it has long armrests!

Palawan Special Battalion World War 2 Museum

The main museum is divided into five galleries, each containing relics of the major players of the war: the Americans, British, and Russians, which comprise the allies; and the Germans and Japanese, which comprise the Axis forces. In one gallery, we were awestruck by these massive bombs. To give you an idea of how huge these things are, check out the photo with Sweetie beside one of those bombs. And those shells? Some of them are as long as my forearm!

Palawan Special Battalion World War 2 Museum

This gallery contains a memorial and a wall that lists down the 1,000 Palawan guerillas who resisted the Japanese. These brave men deserve a huge salute.

Palawan Special Battalion World War 2 Museum

Small arms used by American and Filipino soldiers. I’m only familiar with the one on top, the venerable M1 Garand, which was the standard issue rifle of US infantrymen during the war. The clip automatically ejects with a distinctive “ping” sound after the rounds are exhausted.

Palawan Special Battalion World War 2 Museum

That’s an enormous Japanese Type 92 heavy machine gun, which was used by the Imperial Navy. Allies called it the “woodpecker” due to its distinctive woodpecker sound when fired. The Chinese called it the “chicken neck” due to the appearance of its barrel. Funny the names may be, this was one deadly weapon. In many cases, it was even used as an anti-aircraft gun.

Palawan Special Battalion World War 2 Museum

Miniatures of ships and aircraft that were used during World War 2. As you can see, these are not World War 2 relics but modern plastic model kits that are poorly assembled, improperly painted, and evidently disintegrating. Now, you may ask why I have a happy face beside this cabinet and why I’m criticizing the models.

Well, one of my hobbies is making miniatures like these, and seeing miniatures of any kind fills me with excitement; more detailed and accurate miniatures like these, if I might add. I love assembling, detailing, and painting model kits of military vehicles and displaying them. I even build dioramas, or 3-dimensional sceneries, that represent scenes from historic events. My specialty is—you guessed it—World War 2 vehicles, particularly tanks and ships. I’ll show you some photos of my models sometime.

Palawan Special Battalion World War 2 Museum

Aside from weapons, the Palawan Special Battalion World War 2 Museum also contains significant numbers of World War 2 paraphernalia. Check out this old typewriter and the printed documents above it.

Palawan Special Battalion World War 2 Museum

Hello? Is someone there? That’s an old phone and an old sewing machine.

Palawan Special Battalion World War 2 Museum

Several bayonets, knives, sabers, scabbards, musical instruments, coins, helmets, and other paraphernalia. We never thought that bayonets were really that long! Some are more than a foot long!

Palawan Special Battalion World War 2 Museum

Thanks to Western movies, we have this belief that the most furious fighting in World War 2 was between the Germans and the Americans in the European War Theater. But in actuality, the fighting between Germans and the Americans/British can’t compare with the savagery of the battles between the Germans and the Russians (check out the movie “Enemy at the Gates”). Now, we can have a glimpse of the Red Army with these authentic paraphernalia—gas masks, uniforms, and weapons.

Palawan Special Battalion World War 2 Museum

As mentioned earlier, the museum is dedicated to the Palaweño guerillas who fought in the war. Now, we have a glimpse of how these guerillas in far-flung Palawan may have looked like. Despite the primitive implements, our Palaweño freedom fighters must have looked menacing during those times. Check out that beautiful wooden armor that the warrior is wearing.

Palawan Special Battalion World War 2 Museum

Blades, bolos, sabers, and edged weapons were used against guns, explosive shells, and cannons. That fact/comparison attests to the bravery of these warriors.

Palawan Special Battalion World War 2 Museum

More weapons. Check out those 16th-century light cannons. Know that those were the primitive weapons that our brothers used when they fought the mighty Japanese conquerors!

Palawan Special Battalion World War 2 Museum

For students, tourists, teachers, and anyone who are fans of Philippine culture and history during the dark but explosive years of World War 2, visit the Palawan Special Battalion World War 2 Museum now.

Tips

1. The Palawan Special Battalion World War 2 Museum is located at Rizal Avenue Extension, Barangay Bancao-Bancao in Puerto Princesa City. You can reach the museum at (0999) 656-2471. You may also get in touch with them through palww2museum@yahoo.com for inquiries and reservations.

2. The museum is open every day from 8:00 AM to 12:00 PM. The staff goes for a lunch break. Then visiting hours resume at 1:00 PM and ends at 5:00 PM.

3. Entrance fee is P30 per person. Children who are 10-year-old and below can enter the museum free of charge.

4. The museum is equipped with Wi-Fi connection. Just ask the front desk staff for the code. The facility also has a desktop, which you can use at a minimum cost.

5. The staff is very helpful and makes sure you enjoy your stay. They are also very knowledgeable and won’t give you blank stares. They can take you to the five galleries that profile the major players of the war.

6. The museum is not air-conditioned, but there are electric fans and open spaces all around to make the place breezy.

7. You can also head out to the museum’s library. Although small, it contains a substantial amount of books and reading materials about World War 2.

8. After the tour, you can purchase cold drinks, snacks, and souvenir shirts.

9. Unlike other museums, photography is not prohibited. So take photos at your heart’s desire.


Puerto Princesa City Tour: Palawan Wildlife Rescue and Conservation Center

$
0
0

Palawan Wildlife Rescue and Conservation Center

Do you remember the days when you were still a young child? In kindergarten or grade school, your teacher may have asked you what kind of places you want to visit. And we’re sure that one of the places you long to set your feet on is the city zoo. Oh yes, there is nothing more enthralling than seeing mighty lions, scary snakes, huge bears, regal eagles, proud giraffes, funny monkeys, and other animals that we read about in storybooks and fairy tales. And of course, you were also excited to see monster crocodiles that lurk under seemingly calm pools of water.

The allure of deadly, armored crocodiles has stayed with us since our childhood. The last time I saw a live crocodile was in high school when we had a field trip in Cebu Zoo. The croc was not moving at all, and it looked sick.

As time passed, we settled on killer crocodile movies such as Rogue, Black Water, and Primeval where we can see giant crocodiles. Then recently, we read the headlines about Lolong, the longest crocodile that was ever captured, and his sad death.

Finally, we had the chance of seeing live crocodiles during our Palawan Anniversary Adventure. One of the city tour destinations in our list was the 8-acre Palawan Wildlife Rescue and Conservation Center (PWRCC), formerly called, Crocodile Farming Institute. Sir Jhun, knowing that we love trekking, told us that there is a mini-forest inside the facility where we can hike.

From the Palawan Special Battalion World War 2 Museum, we proceeded to the PWRCC, which was a 40-minute ride away from Puerto Princesa City proper. While underway, we were amazed at how virgin this place is and how effective the eco-tourism efforts of the city are implemented. Look at these century-old Narra trees just beside a very busy road.

Palawan Wildlife Rescue and Conservation Center

As we turned left to the National Road leading to Barangay Irawan where the facility is located, we saw this proud sign. “YOU are the reason why we made the impossible possible.” Mayor Hagedorn was right. Before, Palawan was just a mere speck in the Philippine’s tourism radar. Today, the province is poised to take the country’s tourism crown thanks to the supportive locals, massive advertisements of tourist sites, organized tours, affordable accommodation and food, and many other factors.

Palawan Wildlife Rescue and Conservation Center

That’s the National Road to PWRCC. Look at the harmony of nature and urbanization. It’s simply amazing, and this proves that a balance of urban development and eco-preservation is indeed doable. In addition, check out the infrastructure. Palawan has an excellent network of paved highways that makes world-famous tourist sites easy to access even if the sites are far apart from each other.

Palawan Wildlife Rescue and Conservation Center

After a 40-minute ride, we reached the PWRCC. If the facility is part of your tour package’s itinerary, you will most likely arrive here by van. You can also hire a van to get here if you are with a group of family and friends (a regular van here can sit 12 people). If you’re on a budget, or if there are only 2 to 4 in your group, or if you’re travelling alone, you can hire a tricycle from the city to get here. Just haggle with the driver; P150 to P200 is a good benchmark since this place is quite far.

Palawan Wildlife Rescue and Conservation Center

A nicely manicured garden welcomes PWRCC’s visitors. With the help of Japan International Cooperative Agency, PWRCC was established in 1987 as Crocodile Farming Institute. The facility was meant to conserve two species of crocodiles: the saltwater crocodile and the Philippine freshwater crocodile. The facility was also made to provide Palaweños with livelihood, particularly developing products that utilize crocodile meat and hide.

A strong typhoon in 1998 caused severe flooding in the area. This allowed several crocs to escape into a nearby river.

Today, the facility extended its objectives and duties to caring for and preserving endemic and endangered animal species. Thus, its name was changed to Palawan Wildlife Rescue and Conservation Center.

Palawan Wildlife Rescue and Conservation Center

PWRCC always receives a lot of visitors, especially on weekends. Thus, visiting the crocodile facility and the nature park may be done in batches. While waiting for your turn, you can rest in those cool gazebos or grab a bite in their cafeteria. Across the outdoor waiting area is a spacious parking lot filled with tour vans, private vehicles, and tricycles.

Palawan Wildlife Rescue and Conservation Center

A water tower and a large reservoir encircled by an oval road are the most prominent features that are first seen by visitors. We think there used to be a water feature here, but they seemed to have been turned off during our visit.

Palawan Wildlife Rescue and Conservation Center

Help! Can’t . . . get . . . free . . .Hehehe! No, that’s not a real crocodile. That’s just a skillfully painted concrete sculpture of a croc.

Palawan Wildlife Rescue and Conservation Center

That’s the reception center where all guests register and pay the entrance fee. The reception center also houses the laboratories, offices, libraries, and meeting rooms of the facility.

Palawan Wildlife Rescue and Conservation Center

After registering and paying the fee, guests are ushered in the welcome hall where a PWRCC guide give’s the guests a briefing before the tour proper. Immediately, you can see this long, huge, fearsome skeleton of a crocodile. Above it is the armored skin of the crocodile. We wouldn’t be surprised if you’re shocked at the sight of the creature; we never knew crocs could reach such size and length. This one is 17 feet long! That’s longer than a large SUV!

Palawan Wildlife Rescue and Conservation Center

Check out that enormous skull and those sharp conical teeth! According to the guide, the skeleton and skin on display belong to Rio, a 67-year-old saltwater crocodile captured somewhere in Palawan. Rio was thought to have devoured a farmer. He was captured and given proper care in the facility. But the stress of captivity took its toll, and Rio died a couple of years later.

Palawan Wildlife Rescue and Conservation Center

The waters around Palawan also teem with cetaceans such as porpoises, dolphins, and whales. There have been sightings of massive, deep-diving sperm whales off the Palawan shores, particularly in Tubbataha Reef in the West Philippine Sea. Now, check out the lower left of this photo. Yes, that’s the skeletal diagram of a sperm whale. Now, take note of the skull, which is colored red in the diagram.

Palawan Wildlife Rescue and Conservation Center

Sweetie posed at the side of a sperm whale’s skull to give you an idea on just how massive this majestic animal is. After seeing this colossal skull and the terrifying skeleton of Rio, you will suddenly realize that there are bigger powers out there—the powers of nature—people can never comprehend. You will realize that we, people, are not special; and we are simply organisms that are under the mercy of Mother Nature.

Palawan Wildlife Rescue and Conservation Center

After the briefing, the guide leads guests to the crocodile breeding pen at the back of the facility. The conservation center is just an open-air facility with crocodile pens.

Palawan Wildlife Rescue and Conservation Center

When the crocodile reaches 5 years old, such as this 3-foot one, it is harvested for its meat (to be made into crocodile food products) and skin (to be made into belts, wallets, and shoes). Contrary to popular belief, the skin of big, old crocodiles cannot be made into croc-skin products. That’s because the skin becomes extremely tough, hard, and impossible to cut. Big, old crocs, therefore, are used to breed baby crocs, released into the wild, or kept in a zoo.

Palawan Wildlife Rescue and Conservation Center

Dozens of young crocodiles are kept and taken care of in a pen. Be careful! Don’t put your hand in the pen. These crocs, even at a young age, are very aggressive and amazingly strong. With their sharp teeth and extraordinarily strong bite force, one of these animals can chomp off your finger or hand easily.

Palawan Wildlife Rescue and Conservation Center

After touring the breeding pen, we were led to a steel sky bridge in the middle of various pens. Yes, these pens house the big crocs, the ones that can truly kill and eat anything, including a person.

Palawan Wildlife Rescue and Conservation Center

These pens hold adult crocodiles such as these. Each of powerful crocodiles is as long as a car. We felt the hair at the back of our spine stand out at the sight of these powerful, deadly creatures.

Crocodiles hunt and feed by grabbing and holding onto their prey. Thus, through millions of years, they developed sharp for piercing meat and unusually powerful jaw muscles to hold the jaws shut. Strangely enough, the muscles for opening the jaws are very weak; several straps of duct tape can hold the mouth shut.

Palawan Wildlife Rescue and Conservation Center

Take a look at those awesome crocs just below us! And take note, each one is nature’s machine bred for killing! So you have to be careful. If something falls in any of these pens, it will never come out. Can you imagine if those flimsy looking brace or fence fails?

Palawan Wildlife Rescue and Conservation Center

Can you spot the giant croc? That’s Mac-mac, the resident star and the largest crocodile in captivity in the farm. Mac-mac is a monster 17-foot saltwater crocodile. Remember Rio? He’s 17 feet too!

As a huge crocodile, Mac-mac must have a bite force of thousands of pounds of force and sharp conical teeth to hold his prey down. Any prey that tries to escape will tear itself in half.

Palawan Wildlife Rescue and Conservation Center

Here’s another view of Mac-mac. Needless to say, anyone or anything that shares the same cage with him will become his breakfast. It’s reassuring to know that, according to the guide, they feed Mac-mac and the rest of the crocs with cow, pig, or chicken carcasses. Yes, live animals won’t be fed to the monster. Animal rights advocates can then breathe a sigh of relief.

Unfortunately, he didn’t get out of the water so we could shoot a better photo of him. It’s either he just wants to cool down on a hot summer afternoon or is actually hunting. Hunting? Yes, crocodiles hunt by submerging themselves in water, with only their nostrils and eyes jutting out of the water. If an unlucky animal happens to be near the water—to take a drink, for instance—the crocodile lunges, holds on to the prey, and drags it under the water.

Palawan Wildlife Rescue and Conservation Center

Pens that hold Philippine freshwater crocodiles are separated from the ones that hold saltwater crocodiles. An informative data board defines the differences between the two species.

Palawan Wildlife Rescue and Conservation Center

Along the way are aviaries that house indigenous Palawan birds and common birds in the Philippines. The aviaries are quite spacious, giving birds large spaces for flying.

Palawan Wildlife Rescue and Conservation Center

There are several animals other than crocodiles that are kept in PWRCC. Examples of such animals are these Palawan hornbills. They’re truly amazing birds. We love that bony crest above their gigantic beaks.

Palawan Wildlife Rescue and Conservation Center

Information boards such as these provide valuable and entertaining data about the animals in captivity.

Palawan Wildlife Rescue and Conservation Center

The crocodile farm is the facility’s main attraction. However, PWRCC also has a nature park, a 4-hectare wooded area filled with various species of flora. It also houses several interesting animals. Technically, we viewed it more as a zoo than a natural park.

Palawan Wildlife Rescue and Conservation Center

That’s the entrance of the nature park. From here, it is evident that the place is left to grow “wild,” with just human intervention to make the park safe and enjoyable for tourists.

Palawan Wildlife Rescue and Conservation Center

Which way, Sweetie? Yes, there are lots of man-made trails in the park.

Palawan Wildlife Rescue and Conservation Center

No worries. You won’t get lost. Just refer or take a photo of this map to help you navigate around the park. Several auxiliary signs also exist around trail crossings.

Palawan Wildlife Rescue and Conservation Center

You may come across rickety wooden bridges like this one. It’s pretty cool as it creaks every time you step on it.

Palawan Wildlife Rescue and Conservation Center

Large aviaries such as this are established around the park, so are pens for the animals that are indicated in the entrance’s signs. Unfortunately, we haven’t seen a porcupine, wild pig, and other any mammal indicated on the signs at the park’s entrance, so we decided not to take photos of their pens. Perhaps they’re hiding? What we saw are just the avians.

The reptile house is dilapidated and devoid of reptiles except for a small, unmoving python inside a glass cage. You’ve probably seen pythons elsewhere (those mananambals stationed in Cebu’s Carbon have pet pythons).

Palawan Wildlife Rescue and Conservation Center

A splendid white-belied sea eagle sits majestically in his shelter. Look at those wicked, powerful talons and sharp beak. One look and you can see why these magnificent birds of prey are masters of the coastline. Because it lives near the sea, a white-bellied eagle usually feeds on fish and small mammals.

Palawan Wildlife Rescue and Conservation Center

After 45 minutes, we’ve seen enough of the park and walked back toward the exit. As we went along, we admired the beautiful, large-canopied trees that towered over us.

Palawan Wildlife Rescue and Conservation Center

You can buy PWRCC souvenirs in that hut. However, know that buying, smuggling, trading, hunting, collecting, or possessing live wildlife and their by-products is strictly prohibited. Violators are dealt with severely. Even if they look cute or exotic, wildlife should remain in their homes, the wilderness.

Palawan Wildlife Rescue and Conservation Center

On your way out, you can have your photo taken with this friendly bearcat named Ella. Boy, was she heavy! And a little bit smelly too! It belongs to a rare class of viverrids that are indigenous to South and Southeast Asia. Hunting, habitat degradation and loss, wildlife trade, and other man-made holocausts have eliminated many bearcats. Today, these gentle omnivore mammals are listed as “vulnerable” in the conservation status chart. In Malaysia, it is critically endangered.

Palawan Wildlife Rescue and Conservation Center

After your visit at the PWRCC, you can buy a souvenir shirt and have it printed with a logo and a cool caption that you’ve survived your encounter with Palawan’s mighty crocodiles and beautiful wildlife.

Palawan Wildlife Rescue and Conservation Center

Tips

1. The Palawan Wildlife Rescue and Conservation Center can be reached via hired tour van, private vehicle, or tricycle. In the case of the tricycle, you can simply ask any tricycle driver to take you to PWRCC. Remember that this is a 40-minute ride from the town center, so negotiating for a fair price is the norm.

2. The Palawan Wildlife Rescue and Conservation Center is located in Barangay Irawan, Puerto Princesa City. It’s just beside the national road. Most locals know where it is.

You can also contact them at +63(2)9296626.

3. The Palawan Wildlife Rescue and Conservation is open Monday to Friday at 9AM to 12 noon and 1PM to 5PM, and 1PM to 5PM on Saturdays. If you wish to see the crocodiles being fed, go there on Monday and Thursday afternoon.

4. Registration fee is P35.

5. Don’t ever put your hand into the crocodile pens! Not even the baby croc pens. Crocs are attracted to movement, and your hand can definitely be seen as food. You don’t want to go home less a few fingers, do you?

6. Secure everything on you when you visit the crocs in the big pens. Once something falls in the pens, it can’t be retrieved unless someone foolish or brave enough wades into the crocs’ lair.

7. The guided tour ends at the crocodile pens. The rest of the place, including the nature park, is self-guided. Don’t worry, you won’t get lost. The pathways and trails are very clear, and there are signs everywhere.

8. You can have a photo taken with a baby croc (the snout is taped so it couldn’t bite you) and/or a fluffy bearcat. Price for the shoot is P30 for the baby croc and P20 for the bearcat. If you wish to have your photo printed, you would need to pay P200 per photo.

9. Do not give food to the animals even if you see PWRCC staff feeding them. Remember that the staff members are trained personnel, and they follow a proper training schedule. If you feed the animals yourself, you face the risk of being attacked and injured. Worse, you alter their feeding patterns.


Puerto Princesa City Tour: Rancho Sta. Monica and Baker’s Hill

$
0
0

Baker's Hill

Virtually any city in the Philippines has what is colloquially called a “lovers’ lane.” Often, a lover’s lane is a cool, quiet place perched on an area that offers a splendid, encompassing view of a city, a bay, a cove, a forest, or a seascape. It’s a place where friends visit to relax, munch on some snacks, and chat while watching magical sunsets. At night, the place comes to life as dreamy-eyed lovers sit quietly under the stars, whisper sweet nothings, and share gentle kisses.

Rancho Santa Monica

In Puerto Princesa, the most famous lover’s lane is Rancho Santa Monica. It’s quite a mouthful, so people just call the place Mitra’s Ranch. Why? Well, it is the property of the late statesman Ramon Mitra Jr., a pure proud Palaweño.

Rancho Sta. Monica was included in our city tour itinerary. After all the nostalgia in the Palawan Special Battalion World War 2 Museum and the exhilaration in seeing live crocodiles at the Palawan Wildlife Rescue and Conservation Center, we decided to relax a bit at the Rancho Santa Monica. After a 20-minute ride from the PWRCC, we climbed up a hill and arrived at the property’s gate. Check out the text; it’s artfully made through the use of a rope.

Mitra's Ranch

A short drive uphill and we were on the driveway of the late senator Ramon Mitra’s house. The structure looks like the old Casino Filipino in Cebu. Anyway, this seems to be a regular tourist spot as we saw several tourist vans parked here.

Mitra's Ranch

The first thing we did was to sit on the ground. Hehe! Our legs and feet were aching after all that walking. That’s Mitra’s pyramid-shaped mansion behind us. Today, it is the home of Abraham Khalil Mitra, the youngest son of the deceased senator and the present provincial governor of Palawan. Occasionally, the residence owners allow visitors to come inside where they can see memorabilia of the late senator.

There was a mishmash of people here during our visit. That large group on the left of the photo is a religious group having a recollection activity. The one on the right are excited tourists.

Mitra's Ranch

That’s the view from our sitting place. From here, we saw the beautiful cove of Honda Bay, our destination for the third day of our trip. Just in front of us is Rancho Zipline Adventure, the resident adventure feature of the ranch.

Mitra's Ranch

That’s the zipline facility. We didn’t try it because we were a little bit pressed for time. Besides, we were planning to zipline at Ugong Rock the next day after our underground river tour.

Mitra's Ranch

We wouldn’t be surprised if, during the night, couples would race to get under this tree. But any place in the ranch is a perfect dating place. At night, lovers can witness the glittering lights of Puerto Princesa bathed with the ethereal glow of the moon. On a clear night here, the stars would probably look awesome.

Mitra's Ranch

More tables for lovers and visitors. Large canopied trees offer a lot of shade for visitors who wish to relax and have a picnic here.

Mitra's Ranch

Children can have a whole afternoon of fun jumping on this trampoline. Trivia: don’t you know that jumping on a trampoline for an hour or two actually gives you an overall body workout?

Mitra's Ranch

For P200, a visitor can avail of a 15-minute ride on horseback around the facility. Personally, we consider it as a tourist trap, and even the donkey doesn’t seem happy about it. We actually felt sorry for the poor animal.

Mitra's Ranch

A bigger horse for taller and larger people. The fellow doesn’t look happy about this. Or perhaps he’s just tired.

Mitra's Ranch

Baker’s Hill

We didn’t stay long at the Rancho Santa Monica; the place was technically just a viewing deck. And we got really hungry since we have been seeing the city for hours. Sir Jhun had a ready remedy for that, and he took us to Baker’s Hill, which is located 5 minutes away from the Ranch.

Beside that entrance—yes, the first floor of that house—is a nice bakery that sells delicious Palawan delicacies and pastries such as hopia, crinkles, and cakes. You should buy some for pasalubongs (souvenirs for friends and family back home) or for your own consumption.

Baker's Hill

What is Baker’s Hill? At first glance, it looks like an upper-class subdivision. However, upon entering, it’s actually—errrr—we don’t really know how to define it because it’s just a unique place. In fact, we haven’t heard, seen, visited, or read any place like it in Cebu or anywhere else in the Philippines. We’ll just describe this beautiful place as a magical garden theme park bakery and restaurant complex. That’s the best we can do. As what I said, this place is really unique.

See the first photo of this blog entry? That’s the entrance to the bakery. You can actually see staff baking fresh bread and pastries.

Baker's Hill

The landscaping in Baker’s Hill can only be described as superbly enchanting. Just look at that! It’s a land of gardens, flowers, grass, and trees. It’s not difficult to see the immense love and dedication of the staff in preserving the beauty and magic of this place.

Baker's Hill

Upon entering Baker’s Hill, you will see this huge mansion. According to Sir Jhun, this is the owner’s house. The owner first started his business with a simple but classy bakery. Later, however, an idea hit him, and he transformed his entire compound into a theme park.

Baker's Hill

Behind the mansion is a carefully manicured garden with lots of topiaries, flowers, and benches. There’s even a full-sized replica of a calesa. Kids usually line up to have their photos taken riding the calesa.

Baker's Hill

All around the theme park are life-size figures of celebrities, cartoon characters, and self-created caricatures. Let me smell Marilyn Monroe’s armpit. Uhmm…she forgot to wear deodorant. hehehe

Baker's Hill

And there are ferocious animals here, like this tiger, which you need to wrestle. Fortunately, they don’t fight back. And this cool tiger even thanked me for not riding him.

Baker's Hill

There’s another home behind the garden. However, we’re not sure if this is actually a home, restaurant, or gallery. In any case, it’s beautiful. Look at those gorgeous, carefully trimmed topiaries. And these are just few of the hundreds of topiaries in this place! Wow!

Baker's Hill

The pathways are made of cobblestones. Walking along these pathways with manicured gardens and classical “houses” and shops along the side made us feel as if we’re walking in old, romantic English towns that are vividly described in Hans Christian Anderson’s fairy tales. No wonder we saw a lot of children. This place really captures their hearts.

Baker's Hill

That’s one of the several restaurants that dot Baker’s Hill. It’s called Twigs and we wanted to try it out. However, the place was closed when we got there; it may only open during dinner time, we presume, just like Kinabuch. Anyway, we think this is a perfect venue for a romantic dinner. Best of all, it’s Marilyn Monroe herself who will greet guests.

Baker's Hill

Well, we just wanted to have a snack, so we proceeded to a less expensive café called Baker’s kitchen.

Baker's Hill

Yummy! Merienda (snack) foodstuffs fill the counter. Let’s see, there are banana cues, squid balls, camote fries, turon, and tempura. However, there are also exotic (well, at least for us) snacks such as salmon balls, seafood tofu, and some we can’t even describe. Best of all, the prices are very cheap.

Baker's Hill

We were a bit hungry, so we ordered a rather heavy meal of tasty pancit malabon. To wash it down, we ordered these ice-cold, refreshing gulaman drinks. They’re fun to drink, actually. When we got home after our Puerto Princesa tour, Sweetie immediately made her own variation of the drink.

Sir Jhun and his daughter ate banana cues and drank gulaman drinks with us.

Baker's Hill

Baker’s Kitchen’s tables were filled so we decided to head to the main picnic area. Again, check out the verdant garden.

Baker's Hill

That’s the open-air, main picnic area. Heavy wooden tables and chairs warmly welcome would-be diners. There are sunka conkak boards on some tables, allowing you to play a game with your friends while you enjoy your snack.

Baker's Hill

That’s our wonderful driver and tourist guide Sir Jhun and his cute daughter. Sir Jhun is very friendly and helpful. If you want a comprehensive city tour or simply a ride to your hotel, contact him. We’ll give you his contact number later on.

Baker's Hill

One thing we noticed about Palaweños is that they’re very disciplined, especially when it comes to cleanliness and order. It’s not just because of the heavy fines for littering. Businesses and offices actually encourage and help everyone to maintain cleanliness. For example, in Baker’s Hill, each table in the picnic area has a kit that comprises of a spray bottle of water and rag. If you make a mess while eating, you should clean your mess up. You don’t have an excuse because this cleaning kit is provided for you to use.

Baker's Hill

After finishing our meals and cleaning them up, we went to the children’s playground. Of course, we’re a tad too old to ride the swings and seesaws, crawl inside the playhouse, or zip down the slides. However, this is dreamland for little kids. It’s a pretty cool concept. While parents chat with friends over dinner, children, who usually finish dinner first, can stave away boredom by playing here.

Baker's Hill

Shady pathways allow people to explore the various areas of the theme park with ease. The fenced area behind Sweetie is Baker’s Hill’s nursery.

Baker's Hill

These plants look like they’re just ready to be transplanted to their permanent places in the park.

Baker's Hill

There’s also a nice Zen garden where one may relax and recharge positive chi.

Baker's Hill

That’s a nice trellis. See that verdant garden? It’s very pretty, isn’t it? This pathway leads to a small viewing deck and a mini zoo which houses a marvelous, colorful avian that children always encounter in storybooks.

Baker's Hill

A real live peacock in all its splendor! The most regal of the pheasant family, the peacock is best known for its glorious eye-spotted feathers of its tail. Only the males have extravagant tails, and they spread this as a part of courting peahens.

The official seal of Puerto Princesa features a peacock with 66 covert feathers on its tail, representing the 66 baranggays that comprise the city.

Baker's Hill

Here’s another peacock dragging its tail behind him. This must be a pain in the butt. Imagine if you have a tail and you constantly drag it on the ground. And males have to endure this to court a girl!

Baker's Hill

Do you want to know more about the regal peacock? Well, read on!

Baker's Hill

Going around Baker’s Hill can surely be tiring. Good thing that the theme park has lots of benches around where guests can sit down and relax a bit.

Baker's Hill

It’s the heart and our love of adventure that binds us.

Baker's Hill

Tips

1. If you are in a tour group, chances are, Rancho Sta. Monica and Baker’s Hill will be part of your city tour. If you wish to commute, go to Rizal Street in the city and ride an Irawan-bound jeepney. Tell the driver to drop you off at the intersection going to Mitra’s Ranch and Baker’s Hill. Then ride a tricycle to take you up the hill to the said places.

Commuting expense per person

  • Irawan jeepney fare (P8.00)
  • Tricycle to Baker’s Hill (P8.00)
  • Tricycle to Rancho Sta. Monica (P16.00)

Of course, you can simply hire a tricycle, multicab, or van to take you to the two sites.

2. You don’t need to pay entrance fees at both Rancho Sta. Monica and Baker’s Hill. Entrance is free.

3. Rancho Sta. Monica is open every day from 6 AM to 6 PM. Baker’s Hill opens at 9 AM and closes at 6 PM.

4. We couldn’t find any phone number for Rancho Sta. Monica in the Net or elsewhere. After all, it is a high-ranking government official’s home.

You can call the office at Baker’s Hill at (0918)923-5681 or (048)433 -3414.

5. It is best to visit both Rancho Sta. Monica and Baker’s Hill in the afternoon when the sun is not too hot. Try visiting the place at around 3 PM to 5 PM.

6. Rancho Sta. Monica has a zipline facility, a unique one because it actually has 3 stations. For P500 per person, you can zip all 3 stations. Additionally, you can ride a horse for 15 to 20 minutes for P200.

7. Baker’s Hill has a pasalubong center/bakery at the left side of the park’s entrance. You can buy pastries and bread here for pasalubong or for your snacks. Be sure to buy their best-selling hopia and cashew nuts.

8. Always clean after yourself. The city and these facilities have worked hard to keep the place free from litter and garbage. Do your part as a responsible visitor by cleaning after yourself.

9. If you wish to hire a tricycle on your day tour, you may contact Jhun Salazar at (0906)355-0429.


Puerto Princesa City Tour: Binuatan Creations

$
0
0

Binuatan Creations

Weaving is a way to create fabric in which two separate sets of yarn or thread are interlaced at right angles to produce cloth or fabric. Since weaving by hand is not effective and requires immense strength, our ancestors invented the loom, a manually operated device that holds the warp threads steady while filling weft threads are woven through them (we’ll discuss a little bit about warp and weft threads a little later). The weave is the way in which the warp and weft threads interlace with each other.

For thousands of years, the manually operated loom reigned supreme in the art of weaving. However, the use of the device disappeared during the Industrial Revolution in the mid-1700s to mid-1800s, the era of transition when hand-production processes gave way to vastly more efficient machines. Weaving machines, or power looms, can churn out meters upon meters of weaved fabric in a single run, allowing textile manufacturers to create products in bulk at the least amount of time at a low cost. Today, most weaved products that are sold in the market are machine-made.

Traditional weaving, therefore, is a dying industry. However, there are still several places in the world in which such industry continues to be practiced. And in Puerto Princesa, Palawan, you can actually participate in a hands-on experience and demonstration in traditional weaving in Binuatan Creations.

Binuatan Creations

Right after we went through the entrance, we saw the production site. Except for the floor, the factory is constructed out of traditional house-making materials such as nipa and bamboo. The looms are arranged in a neat and organized setting. Entering the factory is like stepping back in time.

Binuatan Creations

It was our first time to see a foot-treadle floor loom. It looked so sophisticated!

Binuatan Creations

Outside Binuatan Creation’s factory, this guy prepared the warp, the longitudinal (or lengthwise) set of yarns or threads that are held tightly on the loom. The yarn must be strong because it is constantly held under high tension. He looped the warp so fast that we actually couldn’t see the how he managed to loop the threads around the nails. And take note: that yarn must be always be stretched tight. It was like watching a street magician perform his trick.

According to one of the workers there, the yarn they use is spun out of fiber from local grass or cashew tree bark.

Binuatan Creations

Most of the weavers here are young women since they have smaller hands. Having smaller hands is an advantage in weaving because they can easily insert the waft through the small space between the two sets of warps. They have been doing this for years, and seeing how fast they weave and operate the loom was just amazing.

Binuatan Creations

Then, we tried our hand on weaving. We tell you, it’s not as easy as it looks. You need excellent eye-and-hand—and foot—coordination as you thread the waft and push the pedals. You need to concentrate because if you make a mistake, you have to pull the waft out. Lastly, you must keep in mind the design you want to create because, unless you want a single color of textile, every waft you place affects the overall design.

That’s us, working on a loom. See the sweat breaking out of us? You now have an idea of how complex and difficult traditional weaving is.

Binuatan Creations

That’s the waft, the thread that is inserted crosswise through the warp. As you can see, the space between the warp is small; that’s why people with small hands are best suited for this kind of work. Even in the old days, women and children were employed to weave due to their small hands. In machine looms, threading is done automatically with a shuttle that passes through the space.

Stepping on one of the foot treadles crosses the warp around the waft, allowing it to stay in place.

Binuatan Creations

The last stage of the weaving process is battening. This involves pressing the portion of the weave that has not been rolled up to the rest of the fabric. To do this, the weaver uses a comb-like part of the loom called a reed to batten, or press, the warp to the rest of the fabric. This has to be done each time a waft thread is inserted.

Binuatan Creations

That’s the final product that Sweetie and I made. Well, actually, we only worked on that multi-colored part. Compare our lousy work with the rest of the fell.

Binuatan Creations

After we tried our hand at weaving and operating the loom, we headed out to Binuatan Creation’s souvenir shop. The floor, as you can see, is made up of carefully polished bamboo, which is why guests are required to take off their footwear before entering the shop. Inside, you can find lots of beautiful weaved products, sculptures, shirts, home decors, and souvenirs. Take your pick: bags, hats, trinkets, place mats, coasters, baskets, wallets, coin purses, envelopes, and other items, all of which are painstakingly handmade. Best of all, they’re affordable.

Binuatan Creations

Sweetie checked out some of their products. Look at those shelves full of textiles and weaved products! There are lots of treasures here.

Binuatan Creations

We bought these three hand-carved tribal-mask refrigerator magnets as souvenirs.

Binuatan Creations

Visit Binuatan Creations now and witness the old tradition of Palawan’s arts and crafts.

Tips

1. See below for Binuatan Creations contact details:

  • Mailing Address: Employees Village, Sta. Monica, Puerto Princesa, Palawan, Philippines, 5300
  • Phone Numbers: +63 (48) 434-1907 or + 63 (48) 433-7630
  • Mobile Number: (0920)542-8548

2. Don’t miss out the opportunity to try the loom. It’s really fantastic, and it lets you feel the art, dedication, and passion of the weavers.

3. Take off your shoes before entering the souvenir shop. The bamboo floor is meticulously polished, and you wouldn’t want their staff’s efforts to go to waste.

4. The souvenir shop is filled up to the roof with all sorts of stuff. If you want to shop for souvenirs, take your time and look into every inch of the displays. You might miss out the perfect bag, basket, wallet, etc., if you hurry.

5. This is one of the places where haggling over a lower price should strike your conscience. The products are already sold at very affordable prices. Considering that the products, which are exceptional in quality, are painstakingly made by hand and the great effort being exerted to create these products, it should be easy for you to see that the workers are living on razor-thin profit margins. Simply pay the price indicated on the tag, and you’ll be helping a working mother, an out-of-school youth, or a volunteer student earn something to buy the food on his or her table.


Puerto Princesa City Tour: Plaza Cuartel and The Baywalk

$
0
0

Plaza Cuartel Puerto Princesa

The Philippines was a major player in the Pacific Theater of World War 2. Thus, it is not really surprising that many remnants of the Great War remain. Dark, bleak remnants that remind us of untold suffering and horrible destruction. Remnants that remind us of the costly sacrifice that our warriors suffered to preserve our freedom.

Earlier, we went to a reliquary of some of these remnants, the Palawan Special Battalion World War 2 Museum. As the sun neared her bedtime, we visited another bastion of World War 2 in Puerto Princesa, the Plaza Cuartel.

Plaza Cuartel Puerto Princesa

Built sometime in the 1940s, Plaza Cuartel once served as a stronghold of American and Filipino soldiers until they were overrun by Japanese invaders. The stronghold, once a haven of our brave warriors, became a prison.

Plaza Cuartel Puerto Princesa

As we entered the Plaza, we immediately saw this menacing, foreboding looking iron gate. Behind it is a story of horror and incalculable suffering.

Plaza Cuartel Puerto Princesa

That is the entrance to a tiny, stuffy, narrow tunnel, which is behind the iron gate. 143 American prisoners were routed and stuffed in this tunnel with virtually no food or water. Then on December 14, 1944, soldiers of the Japanese Imperial Army poured fuel on the prisoners and set them on fire. 11 prisoners narrowly escaped the massacre.

Plaza Cuartel Puerto Princesa

In the middle of the park stood this memorial, which lists down the names of the 143 POWs who were burned alive and the 11 survivors.

Plaza Cuartel Puerto Princesa

The emaciated bust vividly showed us how the starved and abused prisoners must have looked like. We offered a salute for these heroes.

Plaza Cuartel Puerto Princesa

Despite the gloomy history of the place, Plaza Cuartel has become a popular haven for the locals. The plaza is designed as a classic, verdant Pinoy-style park that can be seen in many towns and cities nationwide. Large trees provide cool shade for those who want to seek refuge from the burning tropical sun.

Plaza Cuartel Puerto Princesa

Well-maintained gardens delight the eyes.

Plaza Cuartel Puerto Princesa

You can stroll around Plaza Cuartel easily thanks to these paved pathways. Ooops, don’t step on the grass.

Plaza Cuartel Puerto Princesa

Check out the amazing leaf imprints on the concrete pathways. And notice how clean the park is.

Plaza Cuartel Puerto Princesa

Don’t expect a lot of fun attractions in Plaza Cuartel, although we did have a little bit of fun with this calesa. Remember that this is a memorial and a remnant of a bastion. So even if you did manage to have a bit of fun like we had, please do mind your behavior as this is a place of reflection.

Plaza Cuartel Puerto Princesa

Many plazas have water features, most commonly a fountain that shoots water up in the air. Plaza Cuartel’s main water feature is different; it’s in the form of a cascading waterfall with a bridge in its foreground.

Plaza Cuartel Puerto Princesa

Across Plaza Cuartel is this neo-classical church called the Immaculate Conception Cathedral. It was built in the late 1800s in tribute to the Immaculate Conception of Mary, who is the patron saint of Puerto Princesa.

It is considered to be another tourist spot, but we did not go in; there was a mass going on. And taking photos of everything in the middle of mass would be a bit sacrilegious, don’t you think?

Plaza Cuartel Puerto Princesa

The Baywalk

From Plaza Cuartel, we went on to the last stop of our city tour, the Puerto Princesa Baywalk where locals and tourists can witness beautiful sunsets while relaxing on top of the dikes, jogging around its pathways, chatting with friends, having a drinking spree, or eating dinner. Just look at the place. It’s brimming with activity!

Puerto Princesa Baywalk

For a small fee, you can rent a bike or a bike with side-car. That’s cool! We can see Puerto Princesa’s potential as a green, clean, bicycle-friendly city.

Puerto Princesa Baywalk

If you choose to avail the firefly watching tour, you will ride on these outrigger boats, which will take you across the sea to Iwahig River. Iwahig River is surrounded by thick mangrove forests where fireflies display an enchanting dance of sparkling lights in the night.

However, we didn’t avail of the firefly watching tour. Aside from its hefty sum of P600 per person, it was a full moon that night. Sir Jhun said that it’s best to take the firefly watching tour during a new moon.

Puerto Princesa Baywalk

After a few minutes, Puerto Princesa’s sun began to call it a day. Spectacular sunsets like these never fail to enthrall us. As travelers, mountaineers, adventurers, and climbers, we are grateful to Mother Nature for giving us the opportunities of witnessing stunning sunsets, each different from one another.

Puerto Princesa Baywalk

Sunsets simply uplift the spirit and make you realize that you have just witnessed one of Mother Nature’s beautiful smiles.

Puerto Princesa Baywalk

Friends, families, and lovers shared a peaceful, tender moment as they witnessed a daily natural spectacle.

Puerto Princesa Baywalk

As dusk grows darker, more people come to the esplanade to cool off, take photos, or simply relax in Mother Nature’s splendor.

Puerto Princesa Baywalk

This particular fishing boat was impounded by Puerto Princesa authorities for illegal, harmful fishing practices. The crew of this boat used cyanide to kill and harvest fish, but thanks to the vigilance of Puerto Princesa’s arm of the law and the Philippine National Police, the offenders were arrested.

Puerto Princesa Baywalk

Esplanades such as the Puerto Princesa Baywalk are excellent places where people can have a drink or grab a bite to eat. Thus, enterprising locals set up small food stalls here to serve the populace. Simply walk around until you find a place whose array of mouthwatering delights and ice-cold beverages suits you.

Puerto Princesa Baywalk

Tips

1. Plaza Cuartel, the Immaculate Conception Cathedral, and the Baywalk are public places, so everyone knows how to get there. Take a tricycle at the city proper and tell the driver to take you to any of these places. The fare is usually P8 from the city, a little bit more if you’re farther from the city center.

2. If you’re on a tight budget, then having dinner at any of the food stalls at the Baywalk should be in your itinerary. Food that is sold here—barbecues, snacks, carenderia viands, etc.— is very affordable. You can cap your day with a drink or two with your travel companions at the Baywalk.


The Tamilok Challenge

$
0
0

Tamilok

The famous chef, food critic, and culinary writer Andrew Zimmern once said, “If it looks good, eat it.” Well, that’s how we see exotic food. Sampling foodstuff that is not part of daily meals or restaurant menus is always an exciting adventure. For us, it’s like discovering the history and culture of a place through the taste buds. It’s like revisiting a place’s culinary past. After all, what we deem as exotic, strange, or even shocking foodstuffs are actually viands that our ancestors enjoyed hundreds of years ago.

Palawan, with its unspoiled richness in natural resources, has its own retinue of exotic foods. And the most popular—and for some, the most disgusting—is the tamilok. What is it? Well, it’s a fear-factor food, but we’ll tell you all about it in a few moments.

We went back to the hotel to rest and refresh a bit after our city tour. Then at around 8 PM, we hired a motorcycle to take us to Kinabuchs Grill and Bar, one of the most popular and recommended restaurants in Puerto Princesa.

Tamilok

Kinabuchs is owned by Butch Chase, a former motocross driver now turned restaurateur. He put up a bar counter, placed several pool tables, hung photos and newspaper clippings of his motocross days to recreate a biker-themed resto. However, to make it appealing to Filipinos who are generally not into the motorbike culture, he incorporated locally made bamboo and rattan furniture.

Tamilok

Similar to many Filipino grills, Kinabuchs also has tables arranged outside the roofed structure. Electric lanterns and decorative bulbs make the place glow.

Tamilok

We wanted to try out their sizzling crocodile sisig, but it was a little too expensive for us. So we settled on two dishes. This one is Kinabuchs’ yummy sizzling seafood sisig made up of chunks of fish, squid, and bits of meat and topped with a raw egg.

Tamilok

The other dish we ordered was dinakdakan, which was quite new to us. Slices of pig ears, tongue, and liver are mixed with peppers and other vegetables. The ingredients are then cooked in sticky coconut milk. With a little freshly squeezed kalamansi juice, we tell you, this dish is absolutely dynamite.

Tamilok

After our main course, we ordered tamilok. Now, the restaurant serves two varieties: the buttered tamilok and the slightly more expensive tamilok ceviche, or tamilok eaten raw. At first, Sweetie was reluctant to eat raw tamilok and urged me to order the cooked variety, but I insisted that we try the ceviche. When the order arrived, we smiled with glee and blurted out horrified but excited gasps!

Tamilok

Now, what the heck is tamilok? Well, it’s an invertebrate with a case of identity crisis. Colloquially, it is called a mangrove snake. Technically, it’s called a shipworm. But in scientific taxonomy, it is neither a snake nor a worm. It is actually a mollusk. If you want me to be more precise, then you’d be surprised to know that it is a marine bivalve similar to saltwater clams—yes, like the ones you bake or boil. The difference is that the shipworm has a very long, soft, naked body that is vastly bigger than its shell. The tiny shell is located at the front mouth/face/head of the animal and is used for excavating wood.

Here’s a photo of what tamiloks look like. Credits to the owner of this photo. Ain’t they pretty?

Tamilok

Shaking with both excitement and hesitation, I picked up my first tamilok. Yes, it’s more macho to pick it up by hand rather than twirl it around with a fork. I was half expecting the thing to burrow into my tongue.

Tamilok

Speaking of burrowing, the tamilok’s favorite food and haunt are dead or decaying mangroves. But mangroves aren’t the only victims. Wooden materials that are soaked or immersed in seawater such as wooden docks or the hulls of wooden ships are favorite haunts of tamiloks. In fact, fishermen coined them the termites of the sea.

To harvest tamiloks, a fisherman simply chops the decayed branch or trunk. As more of the wood is exposed, the calcareous tubes where the tamiloks reside are exposed. The tamiloks are then pulled out and harvested or eaten right on the spot!

Check out the extensive damage to a wooden pillar done by a colony of shipworms. Photo courtesy of Wikipedia.

Tamilok

Playing with food? Nope, I just had fun slurping it.

Tamilok

“It tastes pretty okay, Sweetie,” I assured her. So she picked up her first tamilok . . .

Tamilok

And down the hatch it goes. How did Sweetie described the taste? She said it tastes like seawater that is made into jelly with a dash of oyster in it. I agree with her.

Tamilok

The tamilok’s slime and taste may be quite difficult for many diners to swallow. Thus, they dunk the thing in a bowl of vinegar garnished with onions, garlic, and peppers to soften the blow.

Tamilok

Have you ever wondered how this huge, ugly mollusk got its name? Well, this may be urban legend or factual data. Anyway, according to our guide during our Palawan Underground River cruise the next day, Jeron, tamilok is actually a homophone. During World War 2, two American soldiers got stranded in a beach in Palawan. While looking for food, they chanced upon locals harvesting and eating shipworms at the edge of a mangrove forest. One of the Joes, excited at the spectacle, called out to his partner, “Tommy, look!” The locals thought that “Tommy, look!” referred to the shipworm. To this day, the slimy creature-turned-delicacy became known as tamilok.

Tamilok

It may sound disgusting but the tamilok is actually healthy. It is a rich source of vitamin A, iron, calcium, and vitamin B12. If you’re on a diet, the tamilok is for you because it contains only 110 kilocalories.

Finally, the tamilok, like all other mollusks, contain high zinc content, which improves the production of the hormone testosterone. No wonder the tamilok is considered to be a powerful aphrodisiac. So, do you want to feel horny? Then eat some tamilok and let your partner scream in bed with your spectacular performance.

Tamilok

Oh, yeah, we finished a plate! And one more thing, while we were eating tamilok (and having fun while doing so), we noticed a few tourists sitting at the adjacent table.  Their grimaces were priceless!

Tamilok

Tips

1. Kinabuchs is located at Rizal Avenue, Puerto Princesa. You can call them at (048) 434-5194 for reservations and information.

2. Kinabuchs is a recommended food and beverage establishment. As thus, you should make it your destination. They have an extensive menu of grilled food, all of which are delicious. Try the crocodile meat and tell us all about it; we haven’t had a chance to taste it. Finally, you can swig out a cool drink at the bar after a hearty dinner.

3. Now, for the tamilok itself. You can order tamilok ceviche (raw) or cooked. If you can’t stomach the thought of eating a raw, living thing, then go for the latter. However, we highly encourage ordering the raw one to truly have a taste of Palawan.

As of the date and time we ordered, the ceviche is P135 while the cooked variety is P130. Prices may change without notice.

4. At first look, it is truly disgusting; it’s like, well, a huge slimy worm. Keep in your mind that this is not a worm but a mollusk, the same organism as clams, sea snails, and oysters.

5. Soften the blow by dunking the tamilok in the provided vinegar-spice sauce.

6. Tamilok is best eaten as pulutan (finger food) accompanied by beer.


Viewing all 334 articles
Browse latest View live