Quantcast
Channel: Gian and Sheila – Adrenaline Romance
Viewing all 334 articles
Browse latest View live

Love + Adventure = Heart Attack on Magtv NA: Our First TV Appearance

$
0
0

Heart Attack MagTV Na

One fine, cool morning last February 16, 2014, an immaculately white ABS-CBN van pulled over at an empty space right beside the dirt road that led to the pure limestone cliffs of Cantabaco. A handful of curious locals and kids got excited as they saw the van, stamped with the ever-famous ABS-CBN logo, approach the idyllic neighborhood. Yes, they would be seeing a popular movie star!

Well, sorry to disappoint you, folks. It’s just Team Sweetie—just Sweetie and me. You see, a few weeks ago, a representative from the popular local show Magtv NA got in touch with us. She explained that Magtv NA is planning to have a Valentines special; and they would like to feature a unique couple, a couple who loves extreme sports. Of course, we readily agreed to the invitation.

It was Borgie Cabigas, a Magtv NA host and a gym-mate, who recommended us to them. They got a look at this blog and were impressed by our adventures. Thank you so much for this opportunity, Borgie!

Heart Attack MagTV Na
(Photo courtesy of Nei Jamz)

We have never been interviewed in front of a camera before, and, boy, was it an experience! We just felt really lucky to be featured in Magtv NA for Valentines month. After all, Cantabaco, is the place where we first met.

Heart Attack MagTV Na

(Photo courtesy of Cristina Paran)

Enjoy our segment of the show!

For readers who don’t speak or can’t understand Bisaya, here’s a translation of the script:

Borgie: The usual scenario every Valentines Day for couples and lovers is to go on a date to celebrate their love in a romantic place. Let’s get to know a couple who celebrates sweet moments—on top of a cliff?

Gian and Sheila: I’m Sheila and I’m Gian and we love going on dates that give us a “heart attack!”

Borgie: Gian, 40 years old, is a content writer while Sheila, 35 years old, is a web editor (actually a copyeditor). Because they have the same passion in writing, things easily click into place for them. However, their passion becomes even stronger when it comes to cliffs and mountains.

Borgie: Tell us how you first met each other.

Gian: It was through rock climbing. Of all the ladies who went there, it was Sheila who captured my attention (laughs).

Heart Attack MagTV Na
(Photo courtesy of Nei Jamz)

Borgie: So that’s what we call love at first sight?

Gian: (Laughs) Sort of. It’s pretty unique and special that we first met here at the crag.

Borgie: Having the same interest in various outdoor adventures was a big factor in their relationship.

Borgie: Tell me about your first date together.

Sheila: Our first date was inside a cave. We went caving in Camp 7, Minglanilla. I said “yes” to him on top of the highest peak in Cebu, Osmeña Peak.

Borgie: After Sheila said yes to Gian, it was the start of more “heart attack” but romantic adventures.

Sheila: We did whitewater rafting, scuba diving, rapelling…

Gian: Snorkeling…things like that. We went river trekking, following the lay of a river. We went on exploration climbs, or climbing mountains that are yet to be discovered. Ziplining in adventure parks. We also go backpacking to discover less-known and hidden wonders in the Philippines. In fact, we just had our longest backpacking trip, an 835-kilometer trip around the Caraga Region.

Heart Attack MagTV Na

Borgie: A distance of 835 km is like traveling from Bantayan Island to Oslob 4 times. When I talked to them, KaMags, they plan to climb Mt. Kanlaon.

Borgie: KaMags, we are here in Cantabaco, Toledo, known as the premiere rock climbing site in the whole Philippines.

Borgie: Aside from discovering other adventure trails in Cebu, the activities they do together strengthen their 2 year old relationship.

Sheila: Usually, when we do extreme activities, it’s not all the time we’re sweet, pretty, or nice-smelling. There are times that we feel tired. We ask, ‘Why are we here?’ Your real attitude surfaces. That’s when you know the person more.

Gian: For me, engaging in extreme adventures develops trust. Literally, your life is in your partner’s hands.

Borgie: These activities strengthened their relationship; these were instrumental for them to know each other better. In the course of their relationship, they have explored 4 caves, reached no less than 5 peaks, and climbed two crags.

Borgie: If Sheila is an extreme sport, what would she be?

Gian: She would actually be rock climbing. Why? It’s because you need to depend on each other for your life, right? I entrust my life to her.

Sheila: Same here. Rock climbing is a different sport. You can’t do a thing without your partner. In essence, we always do things together.

Borgie: Love indeed has different faces, KaMags. Gian and Sheila have proven that love can be full of “heart attacks.” If there is trust, no trek, rock climbing, or peak is impossible to reach.


Sharing Our Way of Attaining Serenity and Joy: DSD with Friends

$
0
0

Discover Scuba Diving with Friends

We simply love the outdoors, from mountaintops that offer picturesque views of the checkered valleys to the depths of the seas that teem with rarely seen marine life. The joy that we feel whenever we are out there actually heals the bruises and wounds of our soul, be it the stress of work, the fear of the unknown, the devastation of a heartache, the pain of a profound loss, or the sorrow of a shattered dream. We have always sought the refuge of Mother Nature whenever we feel the need to refresh and fill our soul with positive energy.

Furthermore, we are always eager to share our experiences and let other people discover the wonderful healing power of our world. That was what we had in mind when we decided to hold our first invitational Discover Scuba Diving session to a group of friends. The DSD session was held on a sunny Sunday in March 9, 2014 at the beautiful Kontiki Dive Resort.

Our instructor, Jonjie, and I arrived at the resort a full hour before the activity, which was scheduled to start at 9:00 AM. Since Jonjie alone cannot handle six confirmed first-time divers (even if I’m a licensed PADI Open Water diver, I’m still not qualified to guide divers) by himself, he enlisted the help of two friendly fully certified PADI divemasters who will share the load of guiding.

Discover Scuba Diving with Friends

In less than an hour and with four divers (including me) helping, the dive equipment of the participants were set up.

Discover Scuba Diving with Friends

Close to 9AM, the six confirmed participants—Mark Cui, Dannea Moneva, Crisyl Khan, Karl Michael de la Cruz, Jun Rhen Sojon, and Maefe Revilla—arrived. After the usual introductions, Jonjie had them sign a standard waiver.

Discover Scuba Diving with Friends

Jonjie briefed the participants on the rules of scuba diving in Kontiki’s in-house reef—no touching of corals, not to leave any garbage behind, stay close to your diving buddy, etc. Even in a commercialized and popular dive site like Kontiki, safety and proper ethics are still paramount and should always be observed and enforced in scuba diving.

Discover Scuba Diving with Friends

He also taught the participants on some of the principles and what-to-dos in scuba diving such as proper breathing, pressure equalization, mast clearing, basic underwater strokes, and hand signals.

Discover Scuba Diving with Friends

After the briefing, everyone changed into rashguards, swimwear, and wetsuits. Finally, it’s time to dive! Dannea (the lady in green and the blogger behind Toploading for Life) was having wild butterflies in her stomach. We later found out that she has aquaphobia, and she’s bravely taking DSD to punch her phobia in the face. Nice move, Dannea!

Discover Scuba Diving with Friends

Then it was time to enter the water to don on the dive gear. This is advisable for first-timers; on land, the gear is painfully heavy and walking around it is quite dangerous if you don’t know what you’re doing.

Discover Scuba Diving with Friends

Divemasters helped participants put on the dive gear. Are you nervous, Dannea?

Discover Scuba Diving with Friends

After all participants have put on their gear, Jonjie held a final briefing. One divemaster was then assigned to look after two participants. Oh, don’t mind the foggy photo below; our cam misted a little bit.

Discover Scuba Diving with Friends

Their first breath underwater was a very memorable, exhilarating experience for all of them. At last, they know how to breathe like a fish. But most importantly, they felt absolute freedom, the shackles that bound them to fear, doubts, pain, exhaustion, and negativity loosen away.

Discover Scuba Diving with Friends

Are you ready, guys? After the participants signaled that they’re okay, the divemasters started the hour-long tour.

Discover Scuba Diving with Friends

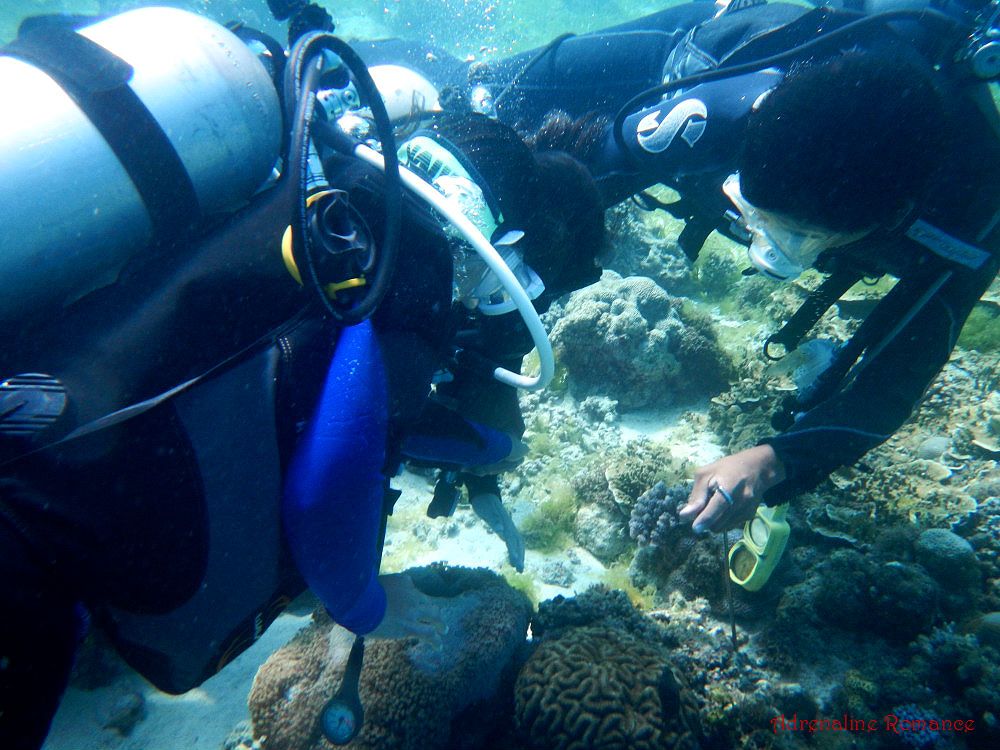
Exploring the vibrant, bustling, alien world under the sea! The participants’ first glimpse of the underwater world was something that will always be in their memories.

Discover Scuba Diving with Friends

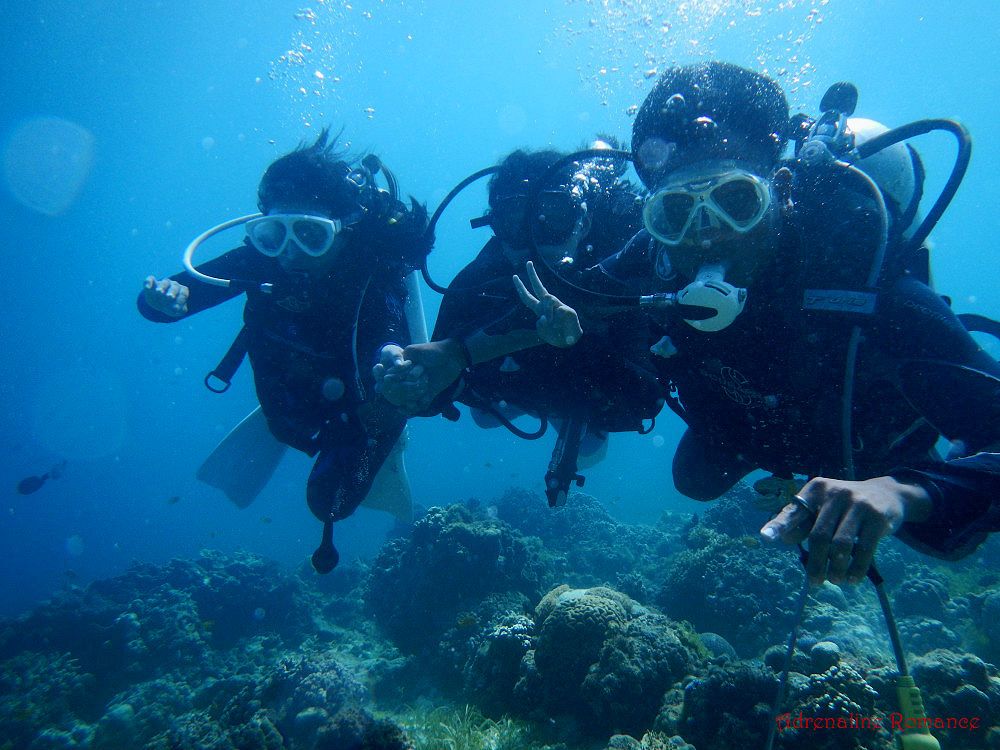
Mike and Crisyl tried to smile for the camera through their regulators. Hehehe! Behind them is the divemaster who constantly watched over and guided them to ensure they were safe and enjoying the experience.

Discover Scuba Diving with Friends

Farther and deeper into the blue they went where they can swim along with the many fish that inhabit the reef. Non-swimmers taking DSD do not need to worry. As you’ve seen in the photo below, divemasters can just hold on to the valves of your tank and provide the propulsion; you just need to relax and enjoy the ride.

Discover Scuba Diving with Friends

However, to fully enjoy the DSD experience, we strongly suggest you swim by yourself but keeping close to your dive buddy and guide/instructor. Doing so gives you greater freedom to explore the area and do the things you want. Just think: you want to take a photo of an interesting anemone but you can’t because your divemaster is dragging you past it!

Discover Scuba Diving with Friends

Are you okay? Jonjie asked Dannea using hand signals since he noticed that Dannea was hyperventilating. Jonjie and his divemaster take extra steps to ensure their guests are okay. Dannea fears the sea, but after the DSD experience, she came to realize that the world under the ocean is a beautiful and mesmerizing one.

Discover Scuba Diving with Friends

While the people thoroughly enjoyed their first diving experience, I took the opportunity to practice close-up underwater photography using a simple digicam (Yeah, I know I need specialized photography equipment and skills to get this right. But I can’t afford them right now). I spotted a beautiful and regal lionfish hiding under a coral. Of course, I was very careful not to touch it or get too close; those pretty spines are poisonous!

Discover Scuba Diving with Friends

Soft corals (types of corals that do not produce a hard exoskeleton) such as these are abundant in Kontiki’s in-house reef. It is very comforting looking at them gracefully swaying to the current.

Discover Scuba Diving with Friends

Hard corals such as these are more abundant than soft, ahematypic corals in reef systems. The soft organs are protected by a hard armor of calcium carbonate. They are very important reef builders.

Discover Scuba Diving with Friends

Corals are home to fish and other marine organisms. They form an important part of a healthy reef system, thus, they should not be damaged or destroyed.

Discover Scuba Diving with Friends

Gliding along! Just check out that beautiful, coral-encrusted rock! Our participants began to learn the importance of preserving and protecting the marine ecosystem.

Discover Scuba Diving with Friends

You can find vastly more organisms and spectacular landscapes in 10 seconds under the sea than in 10 hours in the forest or on a mountain!

Discover Scuba Diving with Friends

When you’re with your buddy or instructor, be careful where you kick! Otherwise, your foot will connect to a really bad place. Hehehe!

Discover Scuba Diving with Friends

Are they holding a prayer meeting under the water? No, not really. The divemaster was just helping them to stand on the seabed.

Discover Scuba Diving with Friends

Whoops! Uncontrolled ascent! Don’t worry, your dive instructor or divemaster can help you get back down on the sea floor.

Discover Scuba Diving with Friends

Dannea enjoyed the experience so much that she made a victory dance—-underwater!

Discover Scuba Diving with Friends

After an hour of exploring the reef, the DSD participants surfaced and swam back to shore. As you can see in the photo below, their smiling faces show it all: they thoroughly enjoyed the experience. In fact, during lunch, a few were already asking Jonjie and us about the details of diver certification.

Discover Scuba Diving with Friends

Well done, guys! Congratulations in taking an immense, exciting first step in conquering your fear of the sea.

Discover Scuba Diving with Friends

Alexa’s First Scuba Diving Experience

As you, dear readers, know, Sweetie and I would take every opportunity to teach Alexa about how the real world, the world described but outside textbooks, websites, libraries, and classrooms. Jonjie was very supportive of practical learning and agreed to sponsor Alexa for her first scuba dive experience.

Since Jonjie had an important engagement after lunch, he assigned a skilled divemaster to guide Alexa around the reef. As you can probably tell in the photo below, Alexa was pretty excited! After all, it’s not every day that 10 year olds can have the opportunity to experience scuba diving.

Discover Scuba Diving with Friends

After a short briefing, it was time for Alexa to have her first breath underwater. She later said that it felt strange due to the fact that the air in the cylinder is really cool to breathe in.

Discover Scuba Diving with Friends

After letting her get used to breathing, our divemaster signaled the start of the fun dive. Sweetie also joined in to accompany her daughter.

Discover Scuba Diving with Friends

Because Alexa has a small, round face and a pert nose, she had a bit of difficulty squeezing her nose to equalize the pressure and to keep the mask on her face. But after the divemaster adjusted her mask, she was okay to go.

This highlights the advantage of having your own equipment that fits and is tailored for you.

Discover Scuba Diving with Friends

Let’s stop for a while, the divemaster signaled. It turned out that Alexa needed to wear a little more weight; she’s a little bit too buoyant. After exchanging weights with our divemaster, everything became smooth sailing. Or smooth floating, to be exact about it.

Discover Scuba Diving with Friends

Here’s Alexa’s first view of a coral colony. We were careful not to touch the corals; in scuba diving, a very important rule to follow is never to touch corals, especially soft bodied ones. The slightest touch can easily cause irreparable damage, which subsequently harms the reef’s ecosystem.

Discover Scuba Diving with Friends

Sweetie felt really comfortable with her O’Neill wetsuit. While diving in warm, shallow tropical waters does not necessitate wearing a wetsuit, we strongly recommend wearing one to protect yourself from abrasions or stings from marine organisms.

Also, since Sweetie and I easily get cold, we wear full wet suits to help keep ourselves comfortably warm. How does a wetsuit work? Well, water that enters the suit gets trapped between the neoprene fabric and the skin. Body heat warms the trapped water, which reduces heat loss.

Discover Scuba Diving with Friends

A soft-bodied anemone, a cute short tentacle plate coral, and a group of fish are all living in perfect harmony. Do not disrupt that harmony.

Discover Scuba Diving with Friends

Here’s another beautiful and wavy anemone! Can you see spot Marlin, Nemo, and a cousin?

Discover Scuba Diving with Friends

Just look at that gorgeous field of corals below the divers! The divemaster was pointing out to Alexa a large bunch of sea anemone.

Discover Scuba Diving with Friends

What are you guys looking at? Our divemaster was pointing at a strange something in this cluster of coral. What is it?

Discover Scuba Diving with Friends

It turned out to be a pretty little Christmas tree worm, a kind of polychaete worm that dwells on corals. The multi-color spiral branches are actually the worm’s respiratory system. Because of their vibrant colors, they usually make great subjects for underwater photography. Saltwater aquarium enthusiasts also collect them to brighten up their aquariums.

Discover Scuba Diving with Friends

Are you having fun, Alexa? We’re pretty sure you had. We headed to deeper water.

Discover Scuba Diving with Friends

Our divemaster took Alexa and Sweetie to the kantil so they could see how deep the kantil is. Later, Alexa said she was half expecting a shark, turtle, whale, or sea monster to come out of the depths.

Discover Scuba Diving with Friends

We came upon a large brain coral jutting out of an algae-covered rock.

Discover Scuba Diving with Friends

Playing hide and seek among the lovely corals? It’s very pretty down there, would you agree?

Discover Scuba Diving with Friends

Mother and daughter bonding together at the bottom of the sea! Now, how cool is that!

Discover Scuba Diving with Friends

On our way back to shore, our divemaster picked up something, fondled it a bit, and released it back. As it fell down back towards the seabed, it produced and left behind a cloud of purple ink.

While marine creatures may be very pretty to look at, we do not encourage touching or handling any organism in the underwater world.

Discover Scuba Diving with Friends

Back on the shore, at last! Thank you, Mr. Divemaster! Alexa truly enjoyed and saw a lot about amazing coral reefs, marine invertebrates, sea creatures, and underwater plants. Just like the guys who attended the DSD session earlier during the day, she started to appreciate the sport of scuba diving. In fact, she even asked her mama if she could go back again with a fresh tank! Hehehe!

Discover Scuba Diving with Friends

Thank you for participating in this session, guys! We hope you had fun. We hope you learned about how beautiful and fragile the marine ecosystem is. But most importantly, we hope that through scuba diving (and other outdoor activities that you may be interested in), you’ll find the serenity, healing, hope, and happiness that your soul is searching for.

Tips

1. Contact us if you wish to try out scuba diving and experience a fun day of scuba diving in the coral gardens of Mactan. You can get in touch with us by:

Please provide us your cellphone number in your messages so we can easily contact you.

2. The PADI Discover Scuba Diving (DSD) program is intended to let you have a taste of scuba diving and see the beauty of the underwater world. It is not a course to acquire a diver certification or license of any kind.

3. The DSD session is held in Kontiki Dive Resort, Datag, Maribago, Lapu Lapu City.

  • Dive will be shore entry, meaning, we won’t be renting a boat to reach the dive site.
  • Don’t worry if you don’t know how to swim. The instructor and the divemasters will make your diving experience fun. Besides, moving in the water while scuba diving is actually easier than swimming!
  • Our dive instructor and guide is Jonjie Deiparine, a very well respected PADI IDC Staff Instructor in the national diving scene. He has trained many top-quality dive instructors, divemasters, specialty divers, etc.

To get to Kontiki Dive Resort, follow the directions below:

  • In Opon/Lapu Lapu City, ride a jeepney going to Soong, Maribago.
  • Ask the driver to drop you off at Julie’s Bakeshop (left side) right before Imperial Palace (or tell the driver to drop you off at Julie’s Bakeshop at Iskina Datag).
  • From Julie’s bakeshop, follow that road and turn right; there are signs that point you to Kontiki or you can ask for directions. Kontiki is at the dead end of that road. You can ride a habal-habal (P20 per head. Convenient but expensive!) or endure a 15-minute hike.

4. The DSD fee is P2,500 per head. This is already a very good deal in terms of scuba diving costs. We promise you, you won’t regret the experience. Your fee covers the following:

  • rental of scuba diving equipment
  • scuba instructor/divemaster fee
  • comprehensive orientation before actual dive
  • 1 hour of fun diving in Kontiki’s fabulous in-house reef
  • free snorkeling (we recommend bringing your own mask and snorkel)
  • free swimming before or after the dive

Please pay the following amounts:

  • 1,500 reservation – a week before your scheduled DSD session. This will be spent for equipment rental, slot reservation, miscellaneous, etc. For the downpayment, we will provide you the account details through Facebook, e-mail, or SMS.
  • 1,000 balance – on the event day. This will be paid to the resort and the dive instructor.

You are definitely welcome to invite your friends too!

5. Minimum age to undertake DSD is 10 years old.

6. Important things to bring:

  • water (at least a liter)
  • rashguard (or tight-fitting dry-fit shirt), board shorts, or cycling shorts.
  • packed lunch, snacks, and beverages. However, there is a restaurant in Kontiki that serves very affordable food (prices comparable to that of A&A Barbecue)
  • waterproof cam (you don’t want to miss taking photos of coral gardens and schools of fish!)
  • extra dry clothes
  • towel
  • extra money
  • life vest (if you don’t know how to swim, or you can rent one)

Mulao River: The Dwelling of Nature’s Guardian Spirits

$
0
0

Mulao River

The Philippines is indeed a mystical country. Each hidden corner or secret nook in the Philippines has its own share of mystery and magic. Snippets of the place’s secrets leak out in the form of whispered local folklore. The most common folklores involve spirits and ethereal beings guarding the most beautiful locations in the country. Trespass, deface, or disrespect the place, and you’ll suffer the spirits’ wrath, so the locals warn.

We had a chance to visit one of these strange places filled with otherworldly energy last March 16, 2014. Thanks to Maam Agnes Quiño Amor, fellow adventurer and tourism officer of Compostela, Cebu LGU, we were able to set foot one of the most scenic, most unusual, and most enchanting rivers in Cebu—the eerie Mulao River.

Our adventure started off at the newly renovated Compostela Municipal Hall. The exterior design is a nice blend of classical and contemporary architecture. With large green areas and statues of important figures at the façade, the Compostela Municipal Hall is a pleasant sight.

Mulao River

Maam Agnes had already arranged our transportation. And it was definitely a privilege for us because transportation was courtesy of Compostela’s tourism office and LGU. Yes, it was our first time being invited by a local government unit.

On our way, to Mulao River, we stopped by Maam Agnes’s auntie’s store to buy something to eat and to change a flat tire.

Mulao River

The mountain road leading to the river have damaged and unrepaired sections. But don’t think of this as something negative. In fact, the relatively rough road that feature an uneven surface and rolling terrain makes it a perfect bike route. In fact, according to Maam Agnes, this particular road is fast becoming a favorite haven for local bikers.

Mulao River

After half an hour, we arrived at Sisoy’s Place, which is simply a combination home-and-store structure, very common in both Philippine lowlands and highlands. If you’re riding a habal-habal, just tell the driver that you want to stop at Sisoy’s Place; practically every habal-habal driver knows where this is. Sisoy’s Place seems to be a popular stopover.

It was also here where you can ask locals who can guide you to the river. Maam Agnes had already arranged the guides before we came, so, no problem there.

Mulao River

After a bit of stretching and nibbling on some junk food, we set off toward the river. The rolling trail traverses through light woods, shrubs, and gentle slopes.

Mulao River

In less than 30 minutes, we saw the beautiful Mulao River, which snakes through the valleys between Central Cebu’s mountains. Mulao River connects both the municipalities of Compostela and Liloan.

Mulao River

On the way to the foot of the river, we came across vast tracts of farmlands that grow various forms of produce—mangoes, corn, coconuts, root crops, and others. Water and minerals from the Mulao River nourishes the soil in nearby areas, making them fertile and rich in nutrients for plants.

Mulao River

In less than an hour, the green grasses, shrubs, and trees gave way to the river. At first glance, Mulao River seems like an ordinary rocky river.

Mulao River

Just like many other rivers, we needed to get a little wet to explore the river. But that was okay. The warm, flowing water felt really good on our hot, tired feet.

Mulao River

As we moved farther downriver, the true nature of Mulao River began to unfold. We crossed great slabs of unusually shaped rock like the one in the photo below. The boulders became larger the farther out we went.

Mulao River

Look at those gigantic boulders! You can easily see how large they are by comparing their sizes to the people beside or on them. These boulders make up the mysterious soul of Mulao River. What makes them so large despite the constant erosion? Why do they have smooth sides? Indeed, they look like enormous aquarium pebbles!

Mulao River

Going downriver means that we had to walk around, climb over, or crawl under these huge rocks. Along the way, we were simply amazed at Nature’s hand in shaping these beautiful rocks.

Mulao River

Just look at how huge that precariously balanced boulder is! It seems that if a small rock or pebble is taken away from that natural “lock” or if given a gentle push, that boulder would topple down.

Mulao River

Those big, tall boulders make perfect launching platforms for these stuntmen! Hehe! Actually, our teenage guides are quite adept at jumping from one boulder to another as they are quite familiar with where to land their feet. Us? Well, let’s just say we stayed on the side of safety.

Mulao River

The farther we headed down river, the larger the boulders became. Check out the photo below and compare the size of the people against those boulders.

Mulao River

Although the river’s mighty flow may have disappeared eons ago, water still rushes through the many narrow channels, streams, and tributaries that flow through the river.

Mulao River

After taking a short break, we went further down river where three of Mulao River’s highlights are located. It was a good thing the weather was a bit cloudy because we would have roasted from both the sun’s heat and the boulder’s ambient heat.

Mulao River

Be careful! One step at a time! And most importantly, according to the guide, we should say, “Tabi! Agi lang mi” (Make way. We’re passing through) as we cross this section. By saying this, we’re asking the permission of the spirits that dwell here to pass by.

If one fails to ask their permission, these spirits might get angry. When that happens, they may strike the trespasser with a mysterious and incurable malady, beset the trespasser with misfortune, or cause the offending person to suffer a gruesome accident.

Mulao River

After a while, we came to the first main highlight of the river, an enormous boulder precariously perched on two slabs of rock. Locals call this huge boulder The Golden Ship. At night, the ship sails out toward the sea—complete with lights and ghost crew—-carrying a cargo of cacao plants. Before dawn strikes, the Golden Ship returns to its permanent perch, waiting for another night of voyage.

Mulao River

As strange as it may sound, the Golden Ship sails along these streams of cascading water.

Mulao River

Fresh, clear, cold spring water from the mountain flow down in rivulets toward the river during summer. When the moon is full, the trickling water magically infused with powerful healing properties. However, guardian spirits strictly prohibit mortals from drinking or collecting the healing fluid.

Mulao River

Rounding off the Golden Boat, we came to the next highlight of Mulao River, a mysterious place called Busong-busong. This place features smooth, strangely shaped rocks with pools of water in between. Locals say that these pools are the true homes of the spirit guardians here. Mortals can take a dip here, but they have to ask the permission of the spirits.

Mulao River

At this particular angle, the landscape of Busong-busong resembles waves. Could it be that at night, an unknown magical power transforms these wave-shaped rocks to water where the Golden Ship can float on?

Mulao River

Busong-busong is as beautiful as it is mysterious. Here, in this serene place, we felt the power and spirit of Mother Nature.

Mulao River

This rock is different from most others. While the immense boulders around it are relatively smooth, this one resembles a wad of paper mache. Another evidence that Mother Nature, indeed, has her own way of creating an unusual thing within an unusual thing.

Mulao River

Sinkholes such as the one in the photo below hold a lot of secrets; perhaps they are gateways to an ethereal dimension. Be careful; some sinkholes are quite deep. Several of them are said to be responsible for mysterious disappearances in the community.

Mulao River

As long as mortals ask permission from the spirits that make this river their home, it’s fine to share such dwelling. The presence of burnt wood indicates the presence of local hunters or bushcrafters seeking crabs or catfish, which end up as a filling meal.

Mulao River

Farther along the river, we found this man-made contraption nestled between a cliff and large rock. Our guides believed that this is the remains of a mine. However, basing on what local history we learned, we believe that this was a hiding place for weary locals who fled away from Japanese soldiers during World War 2.

Mulao River

What a beautiful, unspoilt river scene! We headed in a southward direction towards the municipality of Liloan.

Mulao River

Near the Compostela-Liloan Boulder is this colossal, nearly round boulder that is aptly called Malingin (translated into “round”). Officially, however, this is a marker for Barangay Malingin. How that enormous boulder got there is anyone’s guess.

Mulao River

After taking a few photos of the place, we headed back towards our starting point. Along the way, we saw this pool of glass-smooth water. It’s extremely beautiful, but according to the guides, this pool of water has a dark secret. Local folktales say that the water turned to blood after cruel Japanese soldiers captured hundreds of local residents hiding in the river during World War 2. The civilians were stabbed one by one and were then thrown into the river.

Perhaps, the spirits that forever watch over the mystical Mulao River are the souls of the victims of this massacre.

Mulao River

Bouldering

On our way back, we found this giant rock with an overhung “cave.” Sweetie and I looked at the boulder and then at each other. It’s perfect for bouldering!

Mulao River

Thank goodness we brought our climbing shoes and chalk bags. A few days before the adventure, Maam Agnes mentioned that plenty of gigantic rocks dot the river. We figured out that some may be perfect for bouldering, thus, we brought our gear.

Mulao River

Bouldering is a kind of rock climbing that is done without using ropes, harnesses, quickdraws, cams, or other climbing hardware. The activity takes place on rock faces and boulders that are less than 20 feet tall. Bouldering once originated as a training method for mountaineering and roped climbs. However, as time went by, it evolved into a different climbing discipline altogether.

Because we don’t have a crash pad (a thick foam pad placed at the base of the boulder. It cushions the climber’s feet in case he or she falls from the boulder), we didn’t go all the way up the roof. Rather, for safety, we climbed up and traversed sideways.

Mulao River

For me, bouldering is an excellent way to practice, develop, and improve rock climbing techniques.

Mulao River

Sweetie’s winning form! Sir Juvy of the Compostela tourism office acted as a spotter. In case Sweetie falls, Sir Juvy will direct the fall so that she lands on her feet rather than on her back or head.

Mulao River

While roped rock climbing emphasizes on balance and endurance, bouldering focuses on a climber’s strength, power, and form.

Mulao River

Discovering the potential of Mulao River as a boulderer’s paradise, Maam Agnes tried climbing the boulder. She later said that it’s quite challenging even though the rock face wasn’t high. But she also remarked she had fun, and it’s good exercise.

Mulao River

Then it was Sir Juvy’s turn! He’s got good form.

Mulao River

Maam Agnes’s sister Reynen put up a good, fun fight! She loved bouldering and is looking forward to join us in Cantabaco.

Mulao River

Inspired by crazy people climbing the sacred boulders, our young guides began to try their hand in choosing and ascending rock faces. They truly enjoyed the activity. Hmmm, are we seeing the beginnings of a climbing/bouldering trend here in Mulao? We hope so.

Mulao River

After an hour or so of bouldering, we became really hungry. Our tummies signaled us that it was time to go back and have lunch. We thanked the spirits for keeping us safe and headed back upstream.

Mulao River

Along the way back, we observed patches of algae. Algal blooms such as those patches seen below are rapid increases of the population of algae. The algae “rob” the water of oxygen, suffocating aquatic animals and plants. Algal blooms occur when extra nutrients such as fertilizers and chemicals that are applied to the land for both agricultural and recreational purposes are introduced to the water. In other words, algal blooms are evidences of pollution.

Mulao River

At seeing beauty, serenity, and magic of Mulao River, we strongly believe that it is indeed the realm of Nature’s guardian spirits.

Mulao River

Thank you very much, Maam Agnes, Maam Reynen, Sir Juvy, and the Compostela LGU and Tourism Office for touring us around your natural treasure. Thank you too to the local guides who took care of us, who showed us the way, and who told us the whispered tales of the river. With all the history and mysticism surrounding it, the unique Mulao River is truly a promising eco-tourism and cultural destination.

Mulao River

Tips to follow


Mt. Kanlaon: Visiting the Mountain God (Part 1)

$
0
0

Mt. Kanlaon

Reinhold Messner is a renowned Italian adventurer, mountaineer, and explorer. He is the first person to climb Mt. Everest alone and without supplemental oxygen. He was the first climber in the world to successfully climb all fourteen Eight-Thousanders, mountains that are 8,000 meters above sea level and higher. With his amazing feats, adventurers all over the world consider Mr. Messner to be one of the greatest climbers in history. Yet, the acclaimed mountaineer said, “By climbing mountains, we were not learning how big we were. We are finding out how breakable, how weak, and how full of fear we are.”

That is exactly how we feel every time we climb a mountain. We attempt to reach summits to help us remember how human we are. We climb mountains so that we can meet ourselves, seek answers about why we exist in the first place, how we are connected to the world, and commune with Mother Nature.

One such mountain that could eloquently teach us about these things is the mighty and majestic Mt. Kanlaon in Negros, an active stratovolcano straddled between the provinces of Negros Oriental and Negros Occidental in Negros Island, Philippines. It is considered an ultra-prominent peak and can be seen as a conspicuous feature of Negros from a large part of Western Cebu.

Last March 28 to 30, 2014, we climbed this beautiful mountain. This was my third time to summit Mt. Kanlaon, but it was the first time for Sweetie and team-mates Apol Antenor, John Michael Gonzales, and Valkyrie Dumagan.

We arrived at the port of Toledo very early in the morning of March 28, before daybreak, around 4:30 AM. We didn’t want to miss the first fast craft trip out of Toledo, which, according to our research, supposedly departs at 6:00 AM. Well, we came in too early because the new schedule indicates that the first fast craft trip out of Toledo to San Carlos City is at 7:30AM, not 6:00 AM!

Well, it was a good thing though. The early bird gets the worm, and we got more than that. We were the first ones to get tickets, we had time to eat painit (a very light meal before breakfast) of puto maya (steamed rice cake) and sikwate (Filipino hot chocolate) and breakfast, and we had time to relax.

Mt. Kanlaon

Across Tañon Street is the majestic Mt. Kanlaon, which, like an everlasting god, looks over Central Visayas. At 2,435 meters above sea level, Mt. Kanlaon is the highest mountain/volcano in Central Visayas. It is also one of the most active volcanoes in the Philippines.

Mt. Kanlaon

At 7:00 AM, we boarded our fast craft. Wait, is that it? It’s pretty small; check out the photo below and use the height of the crew member as reference. Amazingly, the small, fast boat can accommodate around a hundred passengers comfortably! We were ushered to the front of the craft, which is air-conditioned and very comfortable. A good omen for the climb, we should say.

Mt. Kanlaon

After an hour of crossing the still waters of Tañon Strait, we reached the port of San Carlos City. The adventure has started!

Mt. Kanlaon

We rode a tricycle to San Carlos City’s Bus Terminal to catch the Ceres bus to Canlaon City at the base of Mt. Kanlaon. However, when we arrived there, there were no buses to Canlaon City. According to the vendors, drivers, conductors, and terminal staff whom we talked to, the buses that normally ply the San Carlos City-to-Canlaon City routes have problems with their franchises. As a result, the route was temporarily halted.

There were still V-hires that ply the San Carlos City-to-Canlaon City route, but they take hours to fill up. There are also jeepneys (they call them Fieras) that ply the said route, but their “appearance” is sporadic.

Thankfully, a few days prior to our scheduled climb, our friends Sir Joel and Sir Jigz informed us of an alternative way: a bus ride to Barangay Bagawines and, after that, another bus ride to Canlaon City.

Mt. Kanlaon

At 9:30 AM, we rode a comfortable, air-conditioned Dumaguete-bound bus that stops by Bagawines.

Mt. Kanlaon

Along the way, we witnessed vast tracts of both newly harvested and newly planted farmland. Corn seems to be the crop of the season as they grow fast and can easily stand the summer heat.

Mt. Kanlaon

Thirty minutes later, we arrived at the crossing of Bagawines, which is the gateway to Canlaon City. As soon as we got off the bus (and perhaps seeing our large mountaineering packs), habal-habal drivers hounded over us and offered to bring us to Canlaon City. The quoted prices, we believe, are too steep—P100 to P150 per person.

Fortunately, a kind tricycle driver agreed to a price of P400 (P80 per person) to bring us to Canlaon City. That was much more reasonable, but the best thing was that we were able to ride in comfort and safety in his big tricycle.

The long ride to Canlaon City was quite pleasant although we secretly pitied our vehicle. The tricycle had to groan and strain to climb the hilly slopes, but we were treated with breathtaking views along the way.

Mt. Kanlaon

We arrived at Canlaon City at exactly 11:30 AM. It was such a surprise; we were walking towards the Canlaon Tourism Office when we spotted the friendly tourism office staff waved at us. It turned out that our contacts—Sir Jigz and Sir Laddie—had already arranged everything for this expedition, from transportation, accommodation, and elements of the climb itself!

We quickly introduced ourselves and had a short briefing with Sir Laddie, Canlaon City Tourism Officer; Sir Steve Bolivar of the elite Canlaon Mountain Tigers Search and Rescue organization; and Sir Eduardo “TBong” Alipar, Mt. Kanlaon guide at the tourism office.

Mt. Kanlaon
(Photo courtesy of John Michael Gonzales)

That’s our duly signed, fully completed climbing permit! Since Mt. Kanlaon sits in a protected natural park, it is actually illegal to climb Mt. Kanlaon without this officially issued climbing permit.

Mt. Kanlaon

An excellent climb always starts with excellent food! We devoured a sumptuous lunch at the nearby, quaint Joring’s Café with our good friend Sir Jigz Santiago, former Mt. Kanlaon head guide and now a kagawad. His partner, April Marcial, an English Communications Specialist at Education E-lamp, joined us a bit later.

Mt. Kanlaon

After a filling lunch, we headed back to the Tourism Office to answer the call of nature, rest, and do last-minute preparations. Sweetie took time to watch a particularly interesting segment of a noontime show while I busied myself looking at photos of other attractions in Canlaon City that are worth a visit.

Mt. Kanlaon

At exactly 1:00 PM, with the sun up high and searing the land, we were geared up and ready to undertake this year’s first major climb. The guy in yellow shirt with the Habagat cap is Sir TBong, a highly skilled mountain guide assigned to us.

Mt. Kanlaon

Habal-habals, which have been previously arranged for us by the tourism office, took us to our jump-off point in the farmlands of Barangay Mapot at the foot of the mountain. It was a good thing that the road was paved and smoothed; a few years ago during my first climb up Mt. Kanlaon, the road to Mapot was terrible. Let’s just say that you will be de-virginized again after that agonizing ride.

Mt. Kanlaon

Huge expanses of rice terraces dominate the plain before a cloud-covered Mt. Kanlaon.

Mt. Kanlaon

Welcome to Mapot Ranger Station, the standard jump-off point for most climbs up Mt. Kanlaon from Canlaon City. We reached the jump-off after 45 minutes of a comfortable ride on a habal-habal.

Mt. Kanlaon

At the jump-off point, two other guides, Sir King Besario who wanted to climb with us after staying for some time in Manila, and Sir Arly Avila, a guide in training, joined us. As usual, we had a last-minute briefing and mumbled a short prayer for safety. Then it was time to climb Mt. Kanlaon!

Mt. Kanlaon

From the very start, the Mapot trail involves a gentle but grueling, nonstop ascent towards the base camp, which is located a few kilometers away. We climbed on soft, mineral-rich soil that was part of a network of farm trails. Compounding the ascent was the fact that it was a very hot, humid, sweltering afternoon, and there was no shade available on the trail.

Mt. Kanlaon

In just fifteen minutes, we were high above our jump-off point, which is a bit right beside that house with the green roof.

Mt. Kanlaon

One of the most prominent features that can be seen is the Bao-bao hill, so named because it is shaped like a turtle’s shell; the English translation for bao is “turtle.” Sir Tbong said that decades ago, Bao-bao was covered with first-growth forest. As years went by, farm fields encroached the hill.

Mt. Kanlaon

The climb was tiresome, but it was also a great opportunity for us to experience snippets of farm life, an important component of which is the small population of very friendly residents. For example, as we passed by this house, the lady of the house (the woman in orange) warmly invited us for a cup of hot sikwate even though she didn’t know us from Adam! Talk about the world-renowned Filipino values of warmth and hospitality! Of course, we politely declined.

Mt. Kanlaon

Cows freely roam around the fields; this one was blocking the trail before I took the photo.

Mt. Kanlaon

Farm terraces are prominent at the hills and slopes around the lower part of Mt. Kanlaon. Terracing is a technique wherein a series of successively receding platforms or flat surfaces are cut into an inclined piece of land, such as the slope of a hill or mountain. Resembling giant steps, terraces decrease erosion, lessen surface runoff, support crops that require irrigation, and permit more effective farming.

Mt. Kanlaon

As you can see from the vantage point of the photo below, the inclined trail is unending and merciless. We sweated, grunted, and panted as we struggled to combat heat, exhaustion, and sore legs while carrying a full load of food, supplies, and camping equipment behind our backs.

Mt. Kanlaon

Whew! A 15-minute rest on top of a hill can be a huge surge of relief!

Mt. Kanlaon

I think everyone shared the same sentiment; we were absolutely grateful and happy for the short break. Sir TBong offered slices of fresh pineapples so we can regain our physical body’s energy.

Mt. Kanlaon
(Photos courtesy of John Michael Gonzales)

That’s the beautiful vista from our resting place! Amazing! While the sweet pineapples and cool water replenished our energies, knowing that we were inching slowly towards the clouds filled our spirits with hope and serenity.

Mt. Kanlaon

Before long, the break was over, and we felt a new flow of energy as our bodies adjusted to the climbing conditions. We walked a little faster, stronger, longer. Before long, we were cresting higher hills. Terraces and manicured farms became fewer and cruder; signs of agriculture gradually faded as we approached the mountain’s treeline.

Mt. Kanlaon

We passed by the last house before our base camp and the treeline. During my first climb here, we camped at a flat, grassy field beside the house. This time, however, that field was tilled and planted with crops, prompting Mt. Kanlaon guides to move the base camp higher.

Mt. Kanlaon

That’s a beautiful, unspoiled limestone cliff right beyond the edge of the farmlands. Bouldering, anyone?

Mt. Kanlaon

Beyond that hill is our base camp. Check out the photo below; you can see that the treeline is quite near.

Mt. Kanlaon

That’s a really muddy trail that we had to walk on before reaching the Mapot base camp. Look at the photo below; you can just imagine the thickness of the mud and how difficult it is to walk on that trail during rainy season. Good thing we planned this climb during the hot, dry, summer season.

Mt. Kanlaon

See those thin trees beside and behind Sir Arly? Sir Arly explained that they replanted these trees to hopefully grow a second-generation forest. Agricultural encroachment has moved the treeline farther up the mountain, worrying the Canlaon Tourism Office. Concerned with the environmental damage, the Office worked with the Department of Energy and Natural Resource to plant new trees in an attempt to halt—or possibly reverse—human encroachment.

Mt. Kanlaon

After three hours of a merciless, grueling climb, we finally reached the Mapot base camp! Congratulations! At last, we can now have a well-deserved sound rest after a sleepless night and a tough climb.

Mt. Kanlaon

After a short rest, we assembled our tents and set up camp.

Mt. Kanlaon

That’s our camp. This is actually an almost perfect camp: the grassy ground is almost level, and there is a water source nearby where we can get fresh, potable water. The surrounding verdant mountain protected us from high winds while in front of us is a spectacular view of the lowlands.

Mt. Kanlaon

Speaking of the view, just check out that astonishing vista! Way below us are checkered fields, specs of human establishments, distant hills and mountains, and the serene Tañon Strait. Being treated to vistas like this is rare, and the opportunity should be treasured.

Mt. Kanlaon

While there was still light available, we set up our equipment and ingredients so we can cook our dinner and turn in early.

Mt. Kanlaon

Everyone was busy preparing something! Mmmm! Things definitely smelled great here as aromas of fried garlic and onions filled the air. The sizzle of something being pan-fried and the pleasant sound of bubbling boiling water made us squirt saliva in our mouths.

Mt. Kanlaon

Want to know our contribution to dinner? It’s Sweetie’s own yummy version of chopsuey with quail eggs.

Mt. Kanlaon

An hour later, dinner was ready. Check out that feast! That’s our chopsuey; John, Apol, and Val’s Bicol Express; and the guides’ spicy noodle soup and tinap-anan (smoked fish). For dessert, Sweetie brought mango float.

Who said that mountain meals are limited to bland and boring canned goods, and ready-to-eat or ready-to-cook meals? With a little planning, we can prepare a feast out there!

Mt. Kanlaon

Dinnertime! Attack! Sir Tbong and the rest of the guides could only shake their heads in amazement. They later gleefully remarked that this was not a normal “mountain meal.” It’s a fiesta out here! They laughed as they realized why our bags were heavy; they were filled with ingredients for sumptuous meals! We brought and prepared excellent food, which definitely increases morale, energy, and positive feelings during an arduous climb.

Mt. Kanlaon

It was a good thing we had our dinner early. By 5:00 PM, a thick fog started rolling in the campsite. The light got dimmer as the sun started to say goodbye.

Mt. Kanlaon

The temperature rapidly dropped, and the air became uncomfortably cold. At around 5:30 PM, Val announced that the air around us was 18 degrees Celsius and still dropping. Everyone changed into cold-weather gear to ward off the biting chill.

Mt. Kanlaon

Goodbye, sun, and thank you for being good to us today. It was time for a good night’s sleep. We have completed the arduous first leg of our first major climb this year, and it was definitely fun! Everything was readily arranged for us, we were part of a strong team, and we were in the hands of the best guides. We started the climb right, and we were definitely excited for the morrow.

Mt. Kanlaon

Stay tuned for Part 2 of this adventure

Tips

We will post our itinerary, suggested budget, and other important information about the climb proper in subsequent posts. What we will put here in our Tips section is information to complete the most crucial elements of the adventure, the filing and processing of your climbing permits.

1. Before climbing Mt. Kanlaon, you need to secure a climbing permit. The official permit consists of three documents: 1) an individual’s climbing permit, 2) a group permit, and 3) a waiver. We have copies of these documents, so Contact Us or send us an email at adrenalineromance@gmail.com so we can send them to you electronically. Print them out and fill them completely.

Important! Do not forget to include your contact details. The Canlaon Tourism Office will regularly update you of the status of your permit, and they won’t be able to do so if you don’t put your contact details.

2. In the permit, indicate which mountain trail you want to use. Presently, there are four official and established trails to choose from:

  • Mapot (Canlaon City, Negros Oriental side)
  • Mananawin (Canlaon City, Negros Oriental side)
  • Guintubdan (Murcia, Negros Occidental side)
  • Wasay (Murcia, Negros Occidental side)

During this climb, we took the Mapot-Mananawin trail, with Mapot as our entry point and Mananawin as our exit point. Contact the Canlaon Tourism Office for more information and advice about the mountain’s trails (see below).

3. For more information, reservations, and other queries, please contact the officers the Canlaon Tourism Office. Use the following contact details:

  • Street Address: Canlaon City Tourism Office, Brgy. Mabigo, Canlaon City, Negros Oriental, Philippines
  • Phone numbers: (034) 433-3813: (034) 707-5484
  • Cellphone Number: 0917-3125274
  • Contact Person: Mr. Laddie Lamis (0928-6384322)

4. The most important document in this set is the waiver, which you need to have notarized. Ensure that each team member’s waiver sheets are stamped and notarized by a licensed lawyer before you send them to Canlaon City’s Tourism Office. The Office won’t process your permit without the notarized permits.

5. Please find below the necessary fees you need to pay. Except for the processing fee, all permit fees should be paid individually.

  • P 300 – permit fee for locals and citizens
  • P 200 – permit fee for students (include a photocopy of your student ID)
  • P 500 – permit fee for foreigners
  • P 200 – processing fee (this is a per-group fee, not an individual fee)

5. Send your documents to this address:

Mr. Laddie Lamis
Tourism Officer
c/o Canlaon City Tourism Office,
Brgy. Mabigo, Canlaon City
Negros Oriental, Philippines

6. For your payment, go to a Palawan Pera Padala branch near you. Send your payment for permits and processing fee to Mr. Laddie Lamis (0928-6384322).

7. For guide and porter fees, please check the information below.

  • Guide – 750 per day
  • Porter – 500 per day

8. To preserve the trails and to avoid overcrowding the mountain, strict measures as to how many people at a time can use any single trail are implemented by the Canlaon City Office. Thus, expect a split-up of team members if you belong to a large group.

9. For safety and security of your team (especially if it’s a large one), the Office will require a number of skilled guides and/or porters to accompany you on the mountain.

  • 5 climbers or fewer – 1 guide
  • 6 to 10 climbers – 1 guide and 1 porter
  • 10 or more climbers – 2 guides

Mt. Kanlaon: Visiting the Mountain God (Part 2)

$
0
0

Mt. Kanlaon

Not so long ago, a mutual friend asked us, “Why do you climb mountains? You risk life and limb, waste money, and subject yourself to exhaustion just to be at the summit for a few minutes.” He has a point. Climbing mountains can be dangerous, considering we are constantly exposed to the merciless elements of Mother Nature; a single, simple mistake can cost us dearly. We sacrifice to save money and spend a lot of cash for gears, transportation, food, and logistics just to climb peaks when we could have saved that money for a car, house, etc. We tire ourselves out, suffer cramps, sweat in the heat, or shiver in the cold to reach the top. We get no money out of our sacrifices.

Yet, we find that what we do is all worth it—and so much more. By climbing mountains, we find true solace, serenity, and happiness from a cruel, chaotic world. We give ourselves a chance to defy our limits, using our creativity, skills, determination and, sometimes, stubbornness to push our way. We get to meet new friends, learn new things, and experience something new. We get to face our fears and expose ourselves to danger, allowing us to humble down and put ourselves back to our rightful place. We get to witness stunning views of valleys and skies, see how ecosystems work, and discover the unusual; those are events and things that not everyone has a chance to see. We believe that all the experiences, learning, and rewards that we gain by climbing mountains are all worth the risks and sacrifices we take.

Climbing the mighty Mt. Kanlaon was another great opportunity for us to experience life as we enjoy it. And the first day of the climb was just a sample of that experience.

Following an extremely frigid night, we woke up to a still frigid dawn. However, no amount of coldness can freeze the warmth and the gleam of a new day, a sign of new hope and energy.

Mt. Kanlaon

While watching the sunrise, Sweetie and I boiled some water to make hot coffee. In the mountains, coffee is an absolute must (notice the redundancy) for many mountaineers! There’s nothing better to stave off the extreme chill by sipping hot coffee. And it gets even better when you’re drinking coffee at dawn on the slopes of a mountain with a special someone!

Mt. Kanlaon

As the sun rose higher, the temperature rose until it was warm enough that we can take off our cold-weather gear. After enjoying the glorious Mt. Kanlaon sunrise, we prepared a huge breakfast; we need lots of energy for a demanding trek today.

We also prepared and packed our lunch; we’re going to take our lunch en route to Mt. Kanlaon’s Eastern saddle.

Mt. Kanlaon

After 45 minutes, a delicious breakfast was set on the grass. Eggs, tocino, hotdogs, dried fish—just our kind of breakfast.

Mt. Kanlaon

Attack the food! Actually, there was plenty for everyone despite the seemingly small serving you see in the photo below.

Mt. Kanlaon

It was time to break camp, clean up, and pack up after breakfast. We also filled up our bottles with drinkable water; the water source at the Mapot base camp is the last water source where we are assured of clean, drinking water. The water in the next source in Kutitap, which is hours away, is still clean and can be used for cooking but somewhat unsafe for drinking.

Mt. Kanlaon

While packing our gear into our packs, we chanced upon this nice lenticular cloud over the mountain. Lenticular cloud formations often look like gigantic flying saucers. Naturally, skeptics and researchers have cited lenticular clouds as explanation for several UFO sightings.

Mt. Kanlaon

A short prayer and a short briefing preceded our trek for the day.

Mt. Kanlaon

Then it was time to restart our climb. Our packs felt heavier than usual because we filled and carried several bottles of drinking water. That is in addition to the packed lunch we cooked earlier and our gear. Whew!

Mt. Kanlaon

After an hour of climbing under the increasingly hot sun, we felt relieved as we approached the lush treeline, which is a couple of hundred meters in altitude above the Mapot base camp that we left far behind.

Mt. Kanlaon

We can’t climb nonstop—hey, we’re also humans—so the team scheduled 5-minute rest stops for every hour of trekking. Here, the team rested at the very edge of a landslide brought about by the February 6, 2012 Visayas earthquake with its epicenter somewhere off the coast of Negros Oriental.

Mt. Kanlaon

After climbing for almost another hour, we finally reached the treeline. That means we were entering the shady forest, which was quite a relief after being exposed under the scorching morning sun for almost two hours.

Mt. Kanlaon

Due to its height, Mt. Kanlaon has its own microclimate. A microclimate refers to a localized atmospheric zone where the climate differs from the area surrounding that zone. Because of the mountain’s microclimate, perennial rains and showers constantly bathe the forest even though the weather in the lowlands is sunny.

That also means that the trail is somewhat muddy. That really presented quite a challenge because we had to navigate steep ascents laden with soft, muddy soil. We couldn’t just hold tree trunks, roots, and other vegetation; many are either thorny or rotten inside.

Mt. Kanlaon

We went deeper into the lush, ancient forest. Check out the sky in the photo below; as you can see, it was quite sunny. However, the surrounding air was quite cool and comfortable, around 24 to 25 degrees from Sir Val’s Suunto Sports Watch thermometer. Also, the ground and vegetation were wet.

Mt. Kanlaon

Wild berries, wild flowers, even wild bananas! Those are just some of the plants we found in the slopes of Mt. Kanlaon.

Mt. Kanlaon

Be careful! Sweetie had to do a bit of balancing act to get through this “bridge.” It spans a narrow gap, with deep ravines on both sides.

This is one of the things that we like about the forested Mapot Trail. It has a plethora of physical and mental challenges that await climbers who hunger for adventure.

Mt. Kanlaon

This flat, protected rest area deep in the jungle doubles as an emergency camp. Climbers who attempt to reach the summit but fail to do so due to bad weather or because night befell on them can pitch their tents here in the emergency camp.

Mt. Kanlaon

How do you go through a tree that is blocking the trail? Plenty of ways, actually!

Mt. Kanlaon

Close to noon, we reached Kutitap, one of the oldest regions of the forest. It was here where we filled some of our bottles with water for cooking.

Trivia: Is the place called Kutitap (Tagalog for “sparkle”) because fireflies light the place up at night? Is it because at some point during the day, something sparkles in there? Is it because of the sparkling water? Nope! According to Sir Tbong, it is named Kutitap because some years ago, a guide fastened a Kutitap Feeds sack on a branch as a sign that there’s a water source nearby.

Of course, the sack has long been removed, but the name Kutitap lived on.

Mt. Kanlaon

After a short rest and filling our bottles, we proceeded to Makawiwili Peak where we plan to take lunch. Along the way, we witnessed ancient trees that form the canopy of Mt. Kanlaon, common features in a dipterocarp forest.

Mt. Kanlaon

Many of the dipterocarp trees in the forest are covered with moist moss. The moss harbors numerous insects, worms, and other organisms. Thus, there is a complete ecosystem in just one ancient tree. Wow!

Mt. Kanlaon

After another hour of climbing, we reached an area where cogon grass started to emerge. It was a good sign; that means, we’re near Makawiwili Peak—and a well-deserved, much-needed lunch break.

Mt. Kanlaon

After 200 steps (at one point of the trail, Sir TBong said that it’s only 200 steps to the peak. Okay, some people really did count their steps. Hehehe!), we finally reached Makawiwili Peak. We simply dropped our packs from sheer exhaustion and took out our packed lunch, which we cooked earlier this morning.

Mt. Kanlaon

Lunch is served! Just look at our happy faces.

Mt. Kanlaon

After lunch, we climbed up Makawiwili Peak to get a glimpse of the breathtaking Margaha Valley and Mt. Kanlaon’s cone. Unfortunately, heavy fog blanketed the area. We kept still and quiet in the hopes of getting a clear view; local legend mentions that the mountain god does not like noises and covers his majesty if climbers are boisterous and rowdy. But the fog stayed there for quite sometime.

Notice, in the photo below, that we’re sitting a good distance away from the grassy edge. That’s because that edge is the lip of a cliff. It’s not safe to stand there because a strong gust of wind can push you over the edge. Also, the thick grass covers the actual lip of the cliff; what looks like strong ground may actually be flimsy grass.

For safety, climbers must crawl (prone) at the edge of the cliff.

Mt. Kanlaon

If there was a clearing, we could have seen this! Now, that should take your breath away! That’s Mt. Kanlaon’s mighty peak. From here, you can actually see ancient lava flows, now overgrown with foliage. That’s how Makawiwili Peak got it’s name; the view is makawili (Visayan word for “mesmerizing” or “breathtaking”)

At this vantage, the otherworldly Margaha Valley can be seen. Technically, that is not a valley, which we will explain in the next article.

Mt. Kanlaon

To get to our campsite, we have to walk along the lip of Margaha Valley. The original “Knife Edge” trail (red) runs along the very edge of the lip, following the actual contour of Margaha Valley. This is very dangerous as a misstep to the right can send the person careening over the edge. No one can survive the fall.

Because of the danger, tourism officials have decided to close the trail. Today, we can take a safer route through the forest (green), running parallel to the Knife Edge trail, to the campsite.

Mt. Kanlaon

From Makawiwili Peak, it was a continuous, knee-shattering, treacherous 2-hour downhill trek to the Eastern Saddle. Many times, we had to descend nearly vertical trails, holding on to roots, branches, trunks, and rocks for support.

Mt. Kanlaon

The air in this part of the forest was cooler and wetter than that in Mapot. The foliage was noticeably older too. It was like journeying through Mt. Kanlaon’s forest’s history.

Mt. Kanlaon

Just check out that lush greenery, moss-covered trees, and giant ferns. This is virgin rainforest at its finest.

About 90 percent of the trail consists of going downhill. In parts where the trail ascends or levels out, we were practically sighing in relief.

Mt. Kanlaon

After more than an hour, the clean, vegetation-covered trail started to incline sharply. That was good news; it meant we were nearing the saddle.

Mt. Kanlaon

Again, the presence of cogon grass and low-lying vegetation assured us that our whole-day ordeal was almost over. We were totally exhausted from the grueling climb up Mapot and the equally grueling downhill trekking around Margaha Valley’s northern lip. All we could think about was reaching the saddle campsite, drop our packs, and lie down on the ground.

Mt. Kanlaon

Finally, after more than 6 hours of trekking and climbing, we finally made it out of the forest. Leaving the treeline behind, we walked up a gentle slope of grassland. We were still quite disappointed though that the fog was still thick; it never let up since we arrived at Makawiwili Peak.

Mt. Kanlaon

At last, at around 3:30PM, we arrived at the Eastern Saddle campsite. Exhausted, we sluggishly set up our tents. The oppressive fog, unfortunately, was still there.

Mt. Kanlaon

Mountain shrubs and blossoms dot the Eastern Saddle in thick and large clumps.

Mt. Kanlaon

Then, the mountain god smiled upon us, seemingly acknowledging our efforts and welcoming us to his shoulder. The curtain of fog gradually dissipated, and the god showed himself. Mt. Kanlaon’s cone was there with all its glory. Immense! Overwhelming! Wondrous! Humbling!

Mt. Kanlaon

As if rewarding us for our efforts, humility, and respect, the curtain of fog retreated from the mountain, and we saw the splendor of Margaha Valley.

Mt. Kanlaon

We cooked dinner before daylight completely goes out. For our contribution, we cooked Sweetie’s very own version of carbonara using fettuccini instead of the usual spaghetti. We also used mushrooms and chorizo instead of bacon and cheese.

Now, you may wonder why we’re wearing thick winter jackets. We’re wearing those because the temperature there at the saddle is extremely cold (well, at least for us). It was around 18 degrees when the photo below was taken, and the temperature was still dropping as night approached.

Mt. Kanlaon

Not wanting to be outdone, our teammates and guides prepared their own delicious viands for the celebratory feast. And boy, was it a sumptuous feast at more than 2000 meters above sea level in the middle of nowhere at an extremely chilly temperature of 15 degrees.

We prepared creamy carbonara fetuccini while Sirs John, Val and Maa’m Apol served yummy tuna spaghetti. Our guides served steaming hot pochero, a very welcome and delicious soup in cold weather. Sirs John and Val also offered sweet fruit salad for dessert. Beat that, instant, ready-to-eat food!

Mt. Kanlaon

After a truly satisfying meal, Sweetie and I turned in early to sleep and contemplated on the day’s climb. We felt in our hearts that the mountain god has smiled upon us.

Stay tuned for Part 3 of this adventure.

Important Fees

Before we proceed to the itinerary and tips, it is important to determine how much you need to spend for the most important aspects of the climb. Please find below the pertinent fees that were involved in our climb.

Permit, Processing, and Guide Fees as stated in Part 1

  • P 300 per climber – permit fee
  • P 200 per group – processing fee
  • P 750 per day per guide – guide fee
  • P 500 per day per porter – porter fee

Transportation Fees

  • P 70 – bus fare (non-aircon) Cebu South Bus Terminal to Toledo
  • P 225 – fastcraft from Port of Toledo to Port of San Carlos
  • P 15 – Port of Toledo terminal fee
  • P 10 – tricycle from Port of San Carlos to San Carlos Bus Terminal
  • P 31 – bus fare (aircon) to Bagawines
  • P 80 – tricycle from Bagawines to Canlaon City
  • P 100 – habal-habal from Canlaon Tourism Office to Mapot Ranger Station (P150 for single rider)
  • P 100 – habal-habal from Mananawin Exit to Canlaon City (or Bolivar’s Spring Resort, in our case) (P150 for single rider)
  • P 30 – habal-habal from Bolivar’s Spring Resort to Canlaon City Bus Terminal (P 40 for single rider)
  • P 29 – bus fare (non-aircon) from Canlaon City Bus Terminal to Bagawines
  • P 25 – jeepney fare from Bagawines to San Carlos Bus Terminal
  • P 10 – tricycle fare from San Carlos Bus Terminal to Port of San Carlos
  • P 110 – ferry from Port of San Carlos to Port of Toledo
  • P 20 – Port of San Carlos terminal fee
  • P 70 – bus fare from Toledo to Cebu City

Accommodation at Bolivar’s Spring Park

  • P 300 – cottage fee
  • P 50 – entrance fee for an overnight stay per person

 We did not include our expenses for meals, snacks, souvenirs, tips, and other fees in this rate sheet as you may have different needs, preferences, itineraries, miscellaneous transportation, and sharing scheme from us. Note that all figures are subject to change without prior notice.


Mt. Kanlaon: Visiting the Mountain God (Part 3)

$
0
0

Mt. Kanlaon

According to Philippine folklore, there once was a Negrenese princess named Anina. One day, she overheard her father talking to the kingdom’s chief priestess. It was clear that both were extremely troubled over something. When Princess Anina asked her father about it, the king broke down and said that a mighty seven-headed dragon is coming to destroy the kingdom. To appease it, an unblemished maiden must be sacrificed to it.

Fear gripped the kingdom, and women wounded and scarred their bodies to disqualify themselves from the sacrifice. The royal couple, however, didn’t have the heart to tarnish the pure beauty of their daughter. Thus, Princess Anina was the only remaining unblemished girl in the kingdom.

Princess Anina willingly offered herself as a sacrifice to the dragon, which lived in a huge mountain. But on the day of the sacrifice, a mysterious noble lord who called himself Khan Laon arrived to slay the dragon. Khan Laon said he has the ability to communicate with animals; that was the key to victory. He then asked ants, bees, and eagles for help in slaying the beast.

Swarms of ants crawled under the dragon’s scales to bite and eat its unprotected flesh while bees stung the eyes of the beast. Eagles then carried Khan Laon to the mountain, dropping him above the dragon, to finally slay the beast. The king was so grateful that he gave Princess Anina to Khan Laon as his bride. The people then named the mountain after the noble lord. The spirit of the dragon, on the other hand, is very much alive until today, at times bellowing in rage, waiting for his revenge over Khan Laon.

The reality of Mt. Kanlaon is as beautiful and mystical as the legend that surrounds it.

We woke up to an ethereal sunrise at around 5AM. Being out here in the wilderness is indeed a rare opportunity to see unique, magical sunrises such as these.

Mt. Kanlaon

Everyone changed into warm weather gear; well, we slept wearing winter jackets, bonnets, hoods, feet warmers, and gloves! The temperature dropped to a very chilly 11 degrees during the night and has only risen slightly at 12 degrees by daybreak! Not used to such cold temperatures, we were definitely freezing!

Mt. Kanlaon

After securing our tents, making sure they won’t be blown away whenever a gust of wind blows, we started our trek up Mt. Kanlaon’s cone, its glorious crown. It takes around 30 to 45 minutes to climb the volcanic cone.

Mt. Kanlaon

The first quarter of the climb involved trekking along shrubbery and grasses that were sometimes waist-high. Good-quality trekking pants and armguards are strongly recommended here because the plants are quite sharp and prickly. Contact to the skin can cause scratches and rashes.

Also, be careful and watch your step when climbing here. In some places, thick vegetation covers the trail. You won’t know that you’re stepping on a deep trough since the thick vegetation conceals it.

Mt. Kanlaon

The terrain became more manageable once we got out of the shrubbery section and into the rocky slope. Still, it was important that we watch where we place our foot since we were walking on loose rock.

Every now and then rocks can be jarred loose and roll down below, endangering climbers directly below you. It is advisable that your team members spread out to lessen the danger of being hit by loose rocks.

Mt. Kanlaon

A brand-new, hope-filled day dawned upon Mt. Kanlaon and Canlaon City. As we climbed higher up the cone, we saw layers upon layers of stratus clouds forming far away, forming a serene sea of clouds.

Mt. Kanlaon

Fingers of low-lying clouds poured over the Eastern Saddle and into the bowl of the Margaha Valley. It was indeed a beautiful, ethereal view; but we were concerned that the clouds would also cover the cone. That would leave us unable to view the heart of Mt. Kanlaon—its crater. Fortunately, the wispy clouds stayed down.

Mt. Kanlaon

Half an hour later, we saw a cairn (man-made pile of rocks), a line of rocks, and a massive horn in the distance. Finally, we arrived at the summit!

Mt. Kanlaon

Mt. Kanlaon’s crater consists of an enormous cone of massive, sheer vertical stone cliffs that plunge hundreds of meters towards the heart of the mountain. Anyone who falls here is as good as dead due to the immense height. Even though if the person somehow survives the fall, there’s practically no way of retrieving him out of the crater short of having a daredevil pilot/rescuer fly a helicopter into the crater.

The true peak of Mt. Kanlaon is the “horn” in the photo below. Sir Tbong told me a few people attempted to traverse a knife-edge portion that forms the perimeter of the crater to get to the peak. The way is so scary and dangerous that they had to turn back to the staging point halfway around the crater’s lip.

Mt. Kanlaon

To have a glimpse into the crater, one has to crawl prone at the very edge of it. Standing right at the edge is a extremely dangerous—actually, a no-no—because a strong wind can blow you over the lip. One false, careless move here and you’ll fall to your death. Yes, we’re deadly serious.

Gazing down at the mouth of a volcano is an exhilarating, overwhelming experience that left us with a profound sense of humility and awe. Here, any perception of being extraordinary, special creatures of this earth is erased. We are a very small part of this world, and nature can easily consume us. The spirit of Mother Nature is so immense and encompassing that there is no way we can comprehend her powers at play.

The spectacular grandeur that is displayed in front of us utterly revived our respect for the earth.

Mt. Kanlaon

Let’s check out some of the interesting things inside the crater. A huge prominent cavern bores through one side of the crater wall. This could be the entrance of a large lava tube.

Mt. Kanlaon

At another side of the crater is this old landslide, which occurred in an earlier eruption.

Mt. Kanlaon

This is a doorway to the Earth’s mantle, the heart of Mt. Kanlaon. This is the true crater of Mt. Kanlaon, which lies hundreds of meters deep into the mountain. As of now, the volcano is sleeping. But since Mt. Kanlaon is one of the most active volcanoes in the country, the god can wake up anytime soon. When he does, everything feels his wrath.

The god actually awakened in 1996 without warning. According to the guides, several mountain climbers “teased” the god by dropping large stones into the crater. The volcano suddenly exploded, hurling enormous boulders, thick ash, and hot gasses. Sadly, the god’s wrath took the lives of three mountaineers and injured 17 others.

Mt. Kanlaon

Selfie time! Sweetie and I sat just a foot away from the edge of the crater.

Mt. Kanlaon

The summit area is rocky and almost devoid of plants. That’s why the tip of Mt. Kanlaon looks bare when viewed from a distance. Soil quality is so poor and the altitude is so high that most vegetation can’t survive here.

Also, check out that line of rocks that occupy a quadrant of the photo below. In the aftermath of the 2012 Visayas earthquake, Mt. Kanlaon guides discovered a long crack that appeared at one edge of the crater’s lip. As a precaution, they lined up rocks along the crack to indicate that stepping on the area within that fence of rock is prohibited.

Mt. Kanlaon

Of course, there is always that set of mandatory poses for Facebook. Hehehe! Hey, why not? After all, it’s not every day that we can step on its sacred slopes, right?

Mt. Kanlaon

The summit straddles both Negros Occidental and Negros Oriental. Here, we were able to view the lowlands and cities of Negros Oriental such as La Carlota, Murcia, and Bago.

That cloud covered slope contains the Wasay trail, an extremely long mountain trail that takes 2 days to complete. However, undertaking the trail is worth it as the exit point is directly in front of the gate of Mambukal Mountain Resort in Murcia. And you do know how hot springs soothe all those sores and aches, don’t you?

Mt. Kanlaon

I did a time-honored mountaineering tradition in Mt. Kanlaon. After reaching the summit, the climber is required to put a stone on top of that cairn. He or she then pauses for a moment of silence to honor the mountain spirit.

We did that and a little more: we paid respects to the people who successfully visited Mt. Kanlaon’s sacred peak and those who perished on its slopes.

Mt. Kanlaon

What an excellent team of fun-loving, positive, responsible, and determined climbers!

Mt. Kanlaon

Acclaimed mountaineer and 2005 National Geographic Adventurer of the Year Ed Veisturs once said, “Getting to the summit is optional. Getting down is mandatory.” Yes, it was time to get down safely and prepare ourselves to exit the mountain.

Can you spot our campsite on the mountain’s shoulder?

Mt. Kanlaon

As the sun rose higher, the clouds that covered the Margaha Valley parted. See that secondary high peak in the photo below? That’s Makawiwili Peak where we took our lunch yesterday. You can also clearly see that treacherous ridge and lip from Makawiwili Peak to the Eastern Saddle.

Mt. Kanlaon

It would definitely be a wonderful blessing to see sights like these, with checkered fields and lush valleys far below you. Sweetie was ecstatic, knowing that she’s in the skies.

Mt. Kanlaon

After carefully trekking down the rocky cone, we were finally back at our campsite, happy for having successfully reaching Mt. Kanlaon’s summit.

Mt. Kanlaon

Sweetie prepared our favorite breakfast viands: fried rice, scrambled eggs and tocino.

Mt. Kanlaon

Just check out that awesome view of the volcanic cone from our tent!

Mt. Kanlaon

A yummy breakfast at more than 2,000 meters above the sea!

Mt. Kanlaon

Oh, we did promise you some explanation about the gorgeous Margaha Valley in the previous article right? Well, Margaha Valley is not technically a valley. It is an ancient caldera, which, after thousands of years, has been overgrown with forests. A caldera, which is generally shaped like a bowl or cauldron, is created when the land collapses after a violent volcanic eruption. The collapse of the land is usually catalyzed when the magma chamber under the volcano is emptied out during a large eruption. With most of the magma ejected, the chamber could not hold the weight of the ground above it, triggering the collapse and the formation of the caldera.

Considering the immense size of the caldera, the original Mt. Kanlaon must have been gigantic, perhaps dwarfing many other mountains in the Philippines.

Margaha Valley also features a crater lake, which fills up with rainwater. According to the guides, the water there is thigh-deep and quite cold. We would have wanted to go down and visit Margaha Valley, but that was not in our itinerary. We’ll be back for you, Margaha Valley.

Mt. Kanlaon

Here’s a closer look at the Makawiwili Peak from the Eastern Saddle. See how vertical that wall is? And check out the right side of the photo. Can you see that scar amidst the tree-covered cliff? That is a huge landslide triggered by rains during the wet season.

Mt. Kanlaon

The cone of Mt. Kanlaon in full daylight and without cloud cover is simply spectacular.

Mt. Kanlaon

At the east side of the Eastern Saddle opposite of Margaha Valley, we were treated to a morning spectacle: a sea of clouds below us. From here, it looks like a strange, heavenly realm.

Mt. Kanlaon

The photo below gives you idea of just how high we are. Check out the farms below; they look like chalkboards!

Mt. Kanlaon

At around 9:30 AM, we bid goodbye to the mountain god, who gracefully let us sleep in his bosom and who showed us his power and wonder. As if on cue, wisps of clouds moved in to obscure the peak, once again hiding it from the view of mortal eyes.

Mt. Kanlaon

We descended using the Mananawin trail, a vegetation-covered trail that required several hours of knee-shattering, non-stop downhill trekking to complete.

Mt. Kanlaon

Almost forlornly, we had our last glimpses of the magnificent mountain god. It will probably be a year or two before we can visit Mt. Kanlaon again.

Mt. Kanlaon

However, the punishing trail also offers majestic and rewarding views of the mountain and its surroundings.

Mt. Kanlaon

The Mananawin-Pula trail junction was where the team came into the mountain’s cloud level. Awesome!

Mt. Kanlaon

Beautiful wild flowers along the trail were aplenty.

Mt. Kanlaon

After several hours of walking in the open grasslands, we sighed in relief as we entered the forest area of the trail.

Mt. Kanlaon

Here are some of the few interesting things we saw while inside the forest: a little bird’s newly made nest, juicy wild berries (they taste sour in the mouth but bitter in the throat), and small flowers that look like…well…you know, Princess Anina’s ehem, perhaps?

Mt. Kanlaon

Parts of the forest trail are tricky to navigate. We had to crawl under tunnels of vegetation, step on slippery and muddy trails, hold on to roots and branches for balance, and even use ancient trees to brace ourselves.

Mt. Kanlaon

At noontime, we reached Patay na Sapa (literally, Dead River) where no water flows anymore. However, Mother Nature is anything but predictable, and what is normally a rock-strewn riverbed may become a raging highway of water during rainy season. Guides said that several people have already perished here after being washed away in unexpected flash floods.

Mt. Kanlaon

Sentinel Rock is the main feature in Patay na Sapa. The moss-covered rock has features that make it appear like a human face, watching over the river.

Mt. Kanlaon

After a quick rest at the other side of Patay na Sapa (and to escape the annoying, buzzing bugs around), we continued on to the exit. The uphill climb was a welcome respite against the knee-shattering downhill trek.

Mt. Kanlaon

We then entered a large section of light woods, which means that we were now at the edge of the forest. Signs of civilization such as faint drones of motorcycles, water pipes, and small amounts of trash gave us determination to push our tired bodies forward. The agony was almost over.

Mt. Kanlaon

A small clearing immediately after the forest line served as a nice place to take a quick lunch on the trail. A nearby hose pumping potable water from a mountain spring served as our water source.

Mt. Kanlaon

After lunch, we left the clearing. In just a few minutes, and like a welcome balm, the scenery opened to vast rice terraces and farms. Finally, we were back in civilization.

Mt. Kanlaon

We were treated to snippets of simple rural life while we went down the mountain to our exit point. For us, city people, it is quite difficult to comprehend how these hardworking people can be happier, healthier, more relaxed, and more satisfied than us even though they have less money or material possessions than us. Salute to them!

Mt. Kanlaon

We arrived at the exit point with sore legs and tired feet. Thankfully, the Bolivar brothers were waiting there to immediately drive us to their humble but beautiful Bolivar’s Nature Resort. When we saw the swimming pool, we knew right away that we were in for a well-deserved reward.

Mt. Kanlaon

Ah, this is the life! Nothing can be more rewarding and relaxing having a refreshing swim in a spring-fed swimming pool; eating a dinner of monggo soup, tocino, and bulinao (fried and salted anchovies); chatting about the adventure with fantastic team-mates; sharing stories with our wonderful guides and the owners of the resort; a cool freshwater shower (finally!); and, best of all, a good night sleep in the open.

Mt. Kanlaon

We woke up and stretched to a beautiful day and had a nice shower and a filling breakfast. Check out Mt. Kanlaon in the background.

Mt. Kanlaon

After packing up, it was time to say goodbye. Farewell, Mt. Kanlaon. Thank you for letting us safely climb your slopes. Thank you for showing us your indescribable wonders. Thank you for teaching us valuable lessons in life. Thank you for putting us back in place within Mother Nature. We will visit you again.

Mt. Kanlaon

This climb wouldn’t have happened without the help of some very special people, and we would like to dedicate this little section to them. Thank you!

  • Sir Joel Olivares for proposing the climb and taking care of our climbing permits.
  • Sir Jigz Santiago and Sir Laddie Lamis for arranging everything and coordinating the elements of our climb.
  • Sir Steve Bolivar and bro for the rides and the accommodation at their humble but excellent resort Bolivar’s Spring Resort

Mt. Kanlaon

  • Sir Tbong, Sir King, and Sir Arly for being superb guides
  • John, Val, and Apol for being great climbing mates

Mt. Kanlaon

Itinerary

Note that we purposely bloated this itinerary to make the climb unhurried, relaxing, and enjoyable. Allow a 5-minute break for each hour of climbing.

Day 1
3:00 AM – meet up at Cebu South Bus Terminal
3:30 AM – depart CSBT, going to Toledo
5:30 AM – arrive at Toledo, walk to Port of Toledo
6:00 AM – buy tickets, prepare things, breakfast
7:30 AM – depart Port of Toledo via fastcraft, going to Port of San Carlos
8:45 AM – arrive at Port of San Carlos, ride tricycle to San Carlos Bus Terminal
9:30 AM – depart San Carlos Bus Terminal, going to Bagawines junction
10:15 AM – arrive at Bagawines junction, ride tricycle to Canlaon City
11:30 AM – arrive at Canlaon Tourism Office, meet guides, registration
12:00 NN – lunch, last-minute shopping
1:00 PM – depart Canlaon Tourism Office, ride habal-habal to Mapot Ranger Station
1:30 PM – arrive at Mapot Ranger Station, last minute briefing, start climb to Mapot Base Camp
4:00 PM – arrive at Mapot base camp, set camp, relax, picture taking, prepare dinner
6:00 PM – sunset, dinner, socials
7:30 PM – lights out

Day 2
4:30 AM – wake up, wait for sunrise
5:00 AM – watch sunrise, take photos
5:45 AM – prepare breakfast
6:30 AM – breakfast
7:00 AM – break camp, pack up, refill bottles with drinking water
8:00 AM – depart Mapot Base Camp, start climb towards the treeline
12:00 NN – arrival at Kutitap, rest, refill bottles with water to be used for cooking
1:00 PM – arrival at Makawiwili Peak, view Margaha Valley, take photos
1:30 PM – lunch
2:00 PM – start trek around the lip of Margaha Valley to Eastern Saddle
4:00 PM – arrival at Easter Saddle, set camp, take photos
5:00 PM – prepare dinner, change to warm-weather gear
7:00 PM – dinner, socials
9:00 PM – lights out

Day 3
5:00 AM – wake up
5:15 AM – start climb to the summit
5:45 AM – arrive at the summit crater, take photos
6:30 AM – start descent back to Eastern Saddle
7:00 AM – arrive at Eastern Saddle, prepare breakfast
8:00 AM – breakfast
8:30 AM – break camp, pack up
9:30 AM – start downhill trek via Mananawin trail
12:00 NN – arrival at Patay Na Sapa, rest
1:00 PM – exit forest, lunch on the trail
1:30 PM – trek down across farmlands to Mananawin Exit
3:30 PM – arrival at Mananawin exit point, ride habal-habal to Bolivar Nature Resort
4:00 PM – arrival at Bolivar Nature Resort, relax, swim
6:00 PM – dinner
7:00 PM – swimming, socials
10:00 PM – lights out

Day 4
5:30 AM – wake up, prepare breakfast
6:00 AM – breakfast
6:30 AM – pack up, prepare for check out
7:00 AM – check out, habal-habal ride to Canlaon Bus Terminal
7:15 AM – depart Canlaon Bus Terminal, going to Bagawines junction
8:00 AM – arrive at Bagawines junction, ride jeep to San Carlos City
8:45 AM – arrive at San Carlos City, relax, shop, go around the city
11:00 AM – early lunch
11:30 AM – ride tricycle from Gaisano San Carlos to Port of San Carlos
12:00 NN – buy ferry ticket
1:00 PM – departure from Port of San Carlos, ferry ride to Toledo
2:45 PM – arrival at Port of Toledo, ride bus/v-hire to Cebu South Bus Terminal
5:00 PM – arrival at Cebu South Bus Terminal, home sweet home

  • For acquisition of climbing permits, please check Part 1.
  • For budget planning and related expenses, please check Part 2.

Tips

Preparation

1. Mt. Kanlaon is considered a major climb. Before climbing the mountain, make sure you fully prepare for such an undertaking. We strongly recommend climbing a couple of shorter mountains or taking a few long treks before a Mt. Kanlao climb to condition your body to the rigors of the adventure.

2. During your practice climbs and treks, carry a mountaineering pack filled with your mountaineering gear (or bottles filled with water) so you can get used to the weight (remember, you are going to carry extra bottles of water and your food).

3. Ensure that you are fully hydrated for the trip. Also, we would recommend bringing hydration or salt tablets that you can add to your water to replenish lost ions during the climb.

4. A week prior to the climb, eat a carbohydrate-filled diet. Carbo-loading is crucial for stored energy, energy that you need for the climb. Get lots of carbohydrates from wheat bread, cereals, pasta, and rice. Don’t worry if your weight increases; you’ll get rid of that when you climb Mt. Kanlaon.

5. If you’re suffering from an injury or ailment, see your doctor first and seek his advice before joining the climb. A sick, injured member of the team compromises not just the team’s enjoyment but also its safety.

6. If you haven’t slept well the night before the climb due to causes such as excitement (yes, it can happen), inability to sleep in a moving vehicle, etc., we strongly advise setting camp on a base camp on the first day of the climb (we spent our first night on Mapot Base Camp). You need to replenish your energy before continuing the climb.

7. Be sure to prepare a meal plan to ensure you have enough food there. Usually, it takes 3 days to complete the adventure, so you have to stock on food. If you choose to follow our itinerary, your meal plan would look like below:

  • First day – dinner (breakfast and lunch can be taken before the climb)
  • Second day – breakfast, lunch, dinner
  • Third day – breakfast, lunch, emergency food (or dinner if you wish to stay in Bolivar’s Nature Resort)

8. For your convenience, bring food that is easy and quick to prepare and does not spoil easily. If you want to bring more elaborate dishes (such as what our team did for this climb), prepare and/or pre-cook the ingredients before the climb. Pack those ingredients in plastic bags or tubs.

9. Bring enough food so you can include the guide (and porter, if you hire one) in your meals. Normally, they would bring their own food, but it’s good mountaineering etiquette to give thought to the guide (and porter). After all, your guide and porter are important elements of your team.

10. You can bring extra equipment, but make sure you bring the items below:

  • good-quality 3-season tent with fly sheet and ground sheet (can be shared with the group)
  • cookset (can be shared with the group)
  • burner (can be shared with the group)
  • cold weather gear (warmer, thermal underwear, fleece jacket, windbreaker or winter jacket)
  • extra clothes (1 set for climbing, 1 set for sleeping, 1 set for returning home)
  • swimwear (in case you want to swim in Bolivar’s Nature Resort)
  • trekking shoes/boots
  • light flip-flops (for walking around the campsite)
  • sleeping bag or warm blanket
  • earth pad (to insulate your body from the cold ground)
  • raincoat, rain jacket, or poncho
  • hat, scarf, and sunglasses (to protect yourself from the sun)
  • extra empty 1.5 liter plastic bottles (2 for each person)
  • water bottle for trail water (at least 1 liter)
  • first aid kit
  • hydration salts, table salt, or Gatorade (to avoid and relieve cramps)
  • tourniquet (to relieve cramps. A strip of strong cloth will do)
  • toiletries and sunblock
  • toilet paper (for cleaning your cooking utensils)
  • headlamp or flashlight
  • whistle
  • cellphone
  • extra money
  • trail snack

11. Waterproof everything (especially your clothes, cold weather gear, tent, gadgets, and batteries) by putting your items in dry-bags. If dry-bags are unavailable, wrap your items in plastic bags.

Water

1. If you are taking the Mapot-Mamawin Trail, know that the last water source with safe, drinkable water in Mapot is in Mapot Base Camp. Thus, fill up your drinking water here (i.e. your water bottle for trail water and one 1.5 liter bottle).

2. The water in Kutitap can be used for cooking or for boiling for coffee or hot chocolate. However, it is not exactly safe for drinking. If you really need to drink the water that you got from Kutitap, be sure to boil it first.

3. The last water source with safe, drinkable water in Mananawin is at the very edge of Mananawin’s forest cover.

4. Conserve your water intake. Do drink when you’re thirsty. But sip, don’t gulp, your water.

5. Conserve your water. Do not use water to clean your utensils; use wads of toilet paper when cleaning your plate, cookset, cup, spoon and fork, etc. Use water sparingly when brushing your teeth. And use wet wipes to “wash” your face.

Transportation

1. As of March 31, 2014, all Ceres buses from San Carlos City to Canlaon City have been suspended due to franchise problems. We are still not sure when normal operations will re-commence. To get to Canlaon City from San Carlos, see below:

  • Ride a Dumaguete-bound bus from San Carlos City. Tell the conductor/driver to drop you off at the Bagawines crossing (eskina Bagawines).
  • In Bagawines, there are several options to catch a ride to Canlaon City. 1) Ride a Canlaon-bound bus that came from Dumaguete, 2) Rent a tricycle to bring you to Canlaon City, 3) Ride a habal-habal to Canlaon City.

2. Typically, you will ride a habal-habal from the Canlaon Tourism Office to the jumpoff point in Mapot (or Mananawin if you choose to climb the mountain from there). But if you wish, you can also arrange for a multicab or a flatbed truck to bring you there. Contact Sir Laddie (see Part 1 for contact details) to arrange a multicab/flatbed truck for you and your group. Obviously, the rental would be higher.

3. Alternatively, you can also arrange for Sir Laddie to pick you and your team up at either San Carlos City or Bagawines crossing. The same applies on your return trip. Negotiate the fare with him.

4. To return to San Carlos City from Canlaon City, see below:

  • Ride a Dumaguete-bound bus from Canlaon Bus Terminal to Bagawines crossing (eskina Bagawines).
  • Ride a San-Carlos bound bus that came from Dumaguete or a jeepney that goes to San Carlos City

Safety

1. Bad weather is the greatest threat in any climb, especially a major mountain such as Mt. Kanlaon. Don’t hesitate to cancel your climb if there is a forecast of rain or storm; you can always rebook your climb. And even if you go beyond the 1-month expiration date of your permit, wasting a few hundred pesos is a very cheap price to pay for risking your life.

2. The wind chill in Mt. Kanlaon’s campsites and saddles is the second greatest threat; it can actually cause hypothermia, especially when the temperature at the Eastern Saddle drops during the night or early dawn! If you’re not used to cold temperatures (like us), then you need to ensure that you stay warm. You can retain warmth by dressing up in layers (i.e. a dry shirt as a base layer, followed by thermal underwear, a fleece jacket, then a windbreaker/winter jacket). Keep your hands warm with knitted or thermal gloves. Keep your feet warm by wearing wool socks. Finally, keep your head warm by wearing a bonnet or putting the hood of your jacket up.

3. Ensure that you stay dry because the wind chill becomes even colder if you’re wet. Consequently, you’ll be more susceptible to hypothermia. At the first sign of rain, pull out and don your rain-protection gear immediately. Once you set up camp, immediately change into dry clothes if you somehow got wet.

If you’re drenched in sweat by the time you reach the camp site, change into dry clothes once you set up camp.

4. If you feel sick or if you develop cramps during the climb, don’t hesitate to ask the guide to stop so first-aid can be administered. Do not be a liability by keeping silent about your condition; remember that a sick or injured person is a liability and a safety hazard for the team.

5. Do not hesitate to crawl or to brace yourself down a difficult section of a trail if that seems to be the safest way for you to negotiate that section. Don’t follow your guide’s footing simply because the trek seems easy for them. Remember they climb that mountain almost weekly and are familiar with the trail features.

6. Mt. Kanlaon’s forest is truly ancient. Thus, before gripping or holding roots, branches, and trunks, make sure that they are firm and solid. Many are rotten inside although they appear solid externally. As much as possible, avoid holding shrubs and grasses; they can’t hold your weight.

It is also advisable to wear gloves, armguards, trekking pants, and hiking shoes to protect your limbs from scratches.

7. At Makawiwili Peak and the crater proper, never stand on the edge! The wind could blow you over the lip; and, at Makawiwili Peak, the edge is covered with grass. Rather, drop down prone and crawl over at the edge to take photos of the magnificent views below and before you.

8. When climbing up or going down the cone, don’t stay too close to the person in front or behind you as rocks may be jarred loose. Spread out and keep a distance of about 5 to 8 meters from each person.

9. Stay in visual range all throughout the climb, particularly when climbing the cone. If the cone gets covered with clouds, visibility is limited to only a few feet from you. That’s why you need a whistle to call or signal team members.

Etiquette

1. Mt. Kanlaon is a sacred mountain. Treat it with respect by observing silence and diligently following Leave No Trace principles.

2. Show respect by not making fun of local’s superstitious beliefs regarding Mt. Kanlaon. You will probably hear advice and warnings such as keeping quiet so you’ll have a clearing and not to say the word “asin” (salt) on the mountain as the word is prohibited by the spirits.

3. Do not throw anything in the crater.

4. Do not climb the mountain without a permit. It’s not only unethical but also illegal. Prepare to meet stiff sanctions if you do not follow this rule.

5. Include your guide and porter in your meals and socials. He’s a part of your team.


Puting Bato: An Unpolished Rock Climbing Gem

$
0
0

Puting Bato Limestone Monolith

Ever since we got hooked to the extreme sport of rock climbing, we have been trying, in our own humble way, to develop the budding rock climbing scene in Cebu. As you, dear readers, may have already known, we’re constantly promoting Cantabaco through our blog, urging everyone to visit the area and try out this confidence-building sport. Behind the online scene, we have invited friends to come with us during weekends, so they can experience climbing sheer rock walls.

Additionally, as avid rock climbers, we have always been on the lookout for new venues that can be developed as excellent rock climbing sites. Finding such sites is part of our support in the local climbing community. Presently, there are only two rock climbing sites in Cebu—the Cantabaco crag and the Mansorela crag in Baranggay Tagba-o, Cebu, which is still being developed.

We need more candidates, and we found one just an hour away from the bus stop in Lutopan at the Naga-Toledo Highway. Yes, it’s that near! And it’s so tall and so big that it can be seen from the Lutopan plaza. Best of all, the venue is near a bustling community, just like Cantabaco! That means comfort and convenience are nearby; we don’t have to suffer in the wilderness after a hard day’s climb.

The monolith is officially known as Bantogan Banog (thanks, Sir Wendell for the information), but locals simply call it Puting Bato (White Stone) due to its massive white limestone face. And last April 6, 2014, Sunday, we asked sir Enie, a rock climbing guide, to guide us to check this potential rock climbing treasure. This mini-adventure was also our post-climb reward for a successful Mt. Kanlaon climb.

An excellent, sunny Sunday starts with an adrenaline-pumping morning of scrambling up the pure limestone crag of Cantabaco, one of our favorite weekend hangouts in Cebu. During weekends where we don’t have any scheduled treks, trips, or other adventures, you can almost always find us climbing the routes here with great friends and fellow climbers.

We were also happy to meet several friendly climbers who came all the way from Dumaguete to experience climbing the Philippine’s premier sport climbing crag.

Puting Bato Limestone Monolith

Several folks wanted to come with us. Great! But before going to Puting Bato, we treated ourselves to a traditional Filipino lunch of inasal manok (roasted chicken); puso, or hanging rice (rice cooked in weaved coconut palms); and atchara (grated and pickled papayas). Coke, of course, was never absent.

Puting Bato Limestone Monolith

After letting those yummy morsels settle in our stomachs, we took a habal-habal ride to the jump-off point, which is just around 10 minutes from Cantabaco and a walking distance from the Lutopan “Landing” bus stop. From several vantage points on the highway, Puting Bato is clearly visible.

We passed by a quiet community, left our packs in Sir Enie’s cousin’s home, and continued our trek towards Puting Bato.

Puting Bato Limestone Monolith

After a quarter of an hour of trekking, we entered light woods, which momentarily hid Puting Bato from view. The evidence of civilization trickled ever so slightly, and we were in Mother Nature’s bosom.

Puting Bato Limestone Monolith

Patches of light woods made way for patches of grasslands. The cloudy day definitely made the uphill trek a little easier as there was no hot sun to scorch us.

Puting Bato Limestone Monolith

Then all of a sudden, the massive, immensely tall Puting Bato stepped right in front of us with all its glory. The shorter outcropping beside it has been baptized as Itom nga Bato (Black Stone).

Puting Bato Limestone Monolith

To give you an idea of just how huge this rock is, check out the photo below and compare the scale of the people to the rock wall. Remember that you are seeing the photo in forced perspective; the people are closer to the camera than the monolith.

A monolith, by the way, is an impressive geological feature that consists of a singular massive stone. Erosion exposes or forms monoliths, which are often made of very hard rock.

Puting Bato Limestone Monolith

Puting Bato is named so due to the gigantic white limestone wall that comprises its eastern wall. The photo below shows the other sides of this beautiful rock. One side is completely covered with vegetation.

Puting Bato Limestone Monolith

Sweetie checked out the white rock face of Puting Bato. We weren’t able to get really close to it due to the very dense vegetation at its base. However, by the looks of it, we deduce that it is made of very hard, very solid limestone. This makes it ideal for bolting. And with its immense height (higher than Cantabaco), it has the potential to become the first big wall of Cebu.

We can already visualize the routes. Climbers would have to pump it up and give it their all towards a quarter to the middle of the wall due to its relatively smooth face. Beyond that, as evidenced by the uneven and rough face of the upper part of the wall, the climb may become easier.

We reckon that the broad width of Puting Bato can comfortably accommodate around 25 to 35 routes. And with its height, it can accommodate the same number of multi-pitch routes.

Puting Bato Limestone Monolith

After shaking ourselves from the awe of seeing Puting Bato’s enormity, we took a rocky, forested trail that snakes towards the back of the monolith.

Puting Bato Limestone Monolith

The first 15 minutes of the trail involved a steep uphill climb on sharp, slippery rocks. It is recommended that trekkers wear closed footwear, trekking pants, and arm guards. We found out the hard way that the plants here can slice you up real good.

Puting Bato Limestone Monolith

This is where the fun—and dangerous—part begins. We had to scramble up an 80-degree rock trail to reach the top of Puting Bato. Although there are lots of handholds and foot ledges, the climb was still fairly difficult and hazardous considering that a late-morning shower drenched the rocks, making them quite slippery.

The trail is also steeply slanted on one side so that a misstep or a slip to the left will send you fatally careening over a sheer cliff. Check the photo below; the cliff at the left side of the trail (gray rock) is very visible.

Puting Bato Limestone Monolith

It was my turn to climb. Look at how steep this section is.

Puting Bato Limestone Monolith

At certain sections, we had to climb 90-degree faces of rough rock with barely a hole, outcropping, or ledge to hold on to. Several times, we wished we brought a rope and, perhaps, some cams or hexes to make the short climb safer.

Puting Bato Limestone Monolith

After successfully climbing the almost-90-degree rock face, we faced an easier challenge—trekking up a rocky, shrub-covered trail that leads to the summit.

Puting Bato Limestone Monolith

Another short scramble and we reached the summit of Puting Bato. After a short but somewhat treacherous scrambling, we were treated to 360-degree, all-encompassing view of the verdant plains below.

But we needed to be careful here. The summit area is quite small, and two sides drop to a deadly abyssal height.

Puting Bato Limestone Monolith

The view from the summit is nothing short of remarkable. From here, we can see the entire peaceful baranggay Lutopan, Toledo. That massive excavation is a strip mine/quarry of Atlas Mining Corporation. Yes, we were shocked at the extent of the destruction. But this is miniscule and much more controlled than the one we traversed in Surigao del Sur.

The rock on the foreground is the summit of Itom na Bato, the sister of Puting Bato. Then check out the low right corner of the photo below. Can you see the dirt trail? That’s the dirt trail that connects to the rocky trail behind Puting Bato. This gives you an idea of just how tall the monolith is.

Puting Bato Limestone Monolith

Dizzying height, don’t you think? That inch-wide ledge under Flor’s feet is the only thing that may save you if you fall.

Puting Bato Limestone Monolith

Be careful, ladies! Can you see someone familiar from up here? Check out the sheer verticality of the wall.

Puting Bato Limestone Monolith

The photo below shows the view from the west side, facing Tañon Strait and Negros Island. From here, we can see the still-verdant municipality of Toledo. Across the Strait is the majestic, cloud-covered Mt. Kanlaon (left). The other cloud-covered mountain at the right is Mt. Mandalagan, located in Silay, Negros Occidental.

Puting Bato Limestone Monolith

The northeast side of the monolith consists of beautiful green hills and peaks. Limestone cliffs cleave across slopes. Sir Enie said that those are excellent places for bouldering. We’ll have to check that out at a later time.

Puting Bato Limestone Monolith

Standing at the very end of the summit outcropping was downright scary! I had to fight waves of vertigo just to keep myself sane. Hehe!

But as you can see, the view from above is gorgeous. Coupled with the sounds of shrieking roosters and hymns from an afternoon mass, we experienced a different level of peaceful, rural life.

Puting Bato Limestone Monolith

Wild baby mangoes grow abundantly around the rocky summit.

Puting Bato Limestone Monolith

After checking out the surrounding area, we realized that the outcropping where we’re standing on was not the true peak. But it was the best place to be because it offered the best views. In other words, it was a “viewing deck.”

The way to the true summit is where these ladies are—a rock outcropping with a non-established trail that skirts the top edge of the eastern wall. Fortunately, as you can see from the photo below, the trail has plenty of handholds and foot holds.

Puting Bato Limestone Monolith

That’s the “viewing deck” from the start of the summit trail. It is not difficult to see how treacherous this place is. It is not difficult to understand that climbing Puting Bato is not for the careless and foolhardy.

Puting Bato Limestone Monolith

That is the true summit of Puting Bato on the opposite side of the viewing deck. You can see how steep the outcropping is.

Puting Bato Limestone Monolith

Going down from the summit requires a little bit of acrobatics. The rocks here are quite sharp, and one false move can definitely give you a nasty cut.

Puting Bato Limestone Monolith

At around 4:00 PM, the clouds became thick, dark, and gray. We can hear ominous claps of thunder in the distance. Knowing that wet stone can become even more slippery, we decided to go down the monolith.

Even as we trekked down, drops of rainwater started to fall down from the sky. Uh-oh!

Puting Bato Limestone Monolith

Going down was actually more difficult than going up because we had to be sure of our footing to avoid slipping. This was compounded by the fact that the rocks have become wet and slippery.

Puting Bato Limestone Monolith

Careful! Careful! That’s the rock face that we have to climb down. If you notice the photo below, there are blurred spots in certain areas; those are drops of water on the lens of the camera. Rain has fallen!

Puting Bato Limestone Monolith

Enjoying the climb down, ladies? Or just happy that the ordeal is almost over? Hehehe!

Puting Bato Limestone Monolith

The photo below gives you a better view of the rock face. You can see the sheer walls that are on either side of the trail. You can also see the back of the viewing deck from here. While the rain was refreshing, it also added an element of real danger as we went down; a slip could send us careening over the cliff.

Puting Bato Limestone Monolith

With one careful step at a time, we finally reached the dirt trail that leads back to the community. The trail was wet and muddy.

Puting Bato Limestone Monolith

Sweetie took one last look at the monolith. The flat grassy land in front of the rock face is an ideal campsite, staging area, and viewing area for rock climbers. Being huge, tall, quiet, and near civilization, Puting Bato, definitely, has a huge potential of being an exemplary rock climbing site.

Puting Bato Limestone Monolith

Arriving back at the community after a successful climb, we treated ourselves with some delicious, energy-replenishing camote-cue (traditional snack made of slices of sweet potato, caramelized in sugar and speared on bamboo skewers) and cold softdrinks.

Puting Bato Limestone Monolith

Thank you so much, guys, for accompanying us on our short but fun hike and letting us discover another less-known natural wonder in the beautiful island of Cebu. We have just visited an excellent rock climbing site that could help propel Cebu as a world-class rock climbing destination.

Puting Bato Limestone Monolith

Tips

1. For guideship services, contact Cantabaco rock climbing guides Enie Yonson or Willard Elemino. Formulate your meeting arrangement and negotiate the guide fee with them. Use the following mobile numbers to get in touch with them:

  • Enie Yonson – 0948-7124875
  • Willard Elemino – 0947-9220289

2. Pertinent transportation fees are:

  • P40 – Bus fare from South Bus Terminal to Lutopan Landing (in case your arrange for the guides to wait for you at the Landing rather than in Cantabaco)
  • P100 – V-hire fare from Citilink Terminal to Lutopan Landing (in case your arrange for the guides to wait for you at the Landing rather than in Cantabaco)
  • P10 – habal-habal ride Lutopan Landing/Puting Bato jump-off point to Cantabaco (or vice versa)

3. Spotting the jump-off point the first time is tricky; it is a ubiquitous alley beside a closed-down vulcanizing shop just a few hundred meters from the Lutopan landing bus stop. Additionally, there is a large network of trails (branching out from the community, and many of these trails actually lead away from Puting Bato. That is why we strongly recommend getting a guide the first time you visit Puting Bato.

4. It takes only 45 minutes to 1 hour to reach Puting Bato from the jump-off. To make the most of your time, do not go to Lutopan because you solely want to visit or climb the monolith. Instead, devote the morning climbing the Cantabaco crag. Then have lunch and proceed to Puting Bato in the afternoon.

5. The trail is composed of loose soil and slippery rocks. So, wear trekking sandals or trekking shoes with aggressive treads so your feet can obtain good traction.

6. Abort your climb in case of rainy weather. The rocks are very slippery, and climbing the monolith in the rain is exceptionally dangerous. You could lose your footing or hand hold and slip down the cliff. And you know what? Falls hurt or even kill!

If you’re up at the viewing deck or true summit and you can see, hear, or feel bad weather approaching, descend the monolith as quickly but carefully as you can.

7. When climbing up or down the vertical section of the trail, make sure you have a good grip or foothold. Don’t just blindly scramble up. Most of the trail sections offer good holds and ledges, but it always pays to be on the safe side by checking where you step and where you hold.

Also, do not hold grasses, thin branches, and shrubs for support since they can’t hold your weight; just use them to obtain balance. Rather use the rock to support your weight.

8. At the viewing deck and true summit, do not stand at the very edge. You could lose your balance due to vertigo or strong winds. Stay several feet farther and sit down. If you wish to go to the lip of those dangerous areas, crawl and assume a prone position.

9. Wear leggings and arm guards. The plants here are quite prickly and sharp.

10. Normally, you don’t need special equipment to trek and climb the Puting Bato monolith. However, do pack light and bring the following when visiting the place:

  • water (at least 1 liter)
  • dry-fit, comfortable clothes
  • trekking shorts or trekking pants
  • trekking shoes or sandals
  • umbrella, hat, or scarf
  • snacks
  • sunblock
  • face towel
  • rain gear (in case of bad weather)
  • extra money for emergencies
  • medications (if any)
  • camera

Canyoneering Downstream in Badian: A Perfect Extreme Adventure for Aspiring Adventurers

$
0
0

Downstream Canyoneering in Badian

The idea of engaging in extreme adventures seems to be fun and exciting. After all, who wouldn’t be excited at seeing breathtaking scenes, experiencing adrenaline-pumping activities, or sharing death-defying experiences with friends? However, based on our experiences, many people find out the hard and painful way that the world of adventure is not as easy as described in blogs or seen in photos and videos.

After their first fall off a high rock wall, some become traumatized by that heart-stopping moment. Many who are used to a pampered life may find trekking and camping in the wilderness a seemingly never-ending nightmare. A minor yet panic-inducing episode of a knocked-off regulator at 30 feet underwater may trigger a panic attack for a diver on his or her first DSD session. Yet, all these challenges, difficulties, and misfortunes are all part of adventuring.

For us, the key to a positive and lasting impression of the world of adventure is a happy, safe, easy, and enjoyable first experience. By having a pleasant experience during his or her first adventure, one will definitely be looking forward for more.

That was what we had in mind when we organized and invited a few friends to another canyoneering event last April 12, 2014. Last time we had a canyoneering adventure, we went upstream, fighting the current and the lay of the Matutinao River. This time, we opted to go downstream, from Kanlaob, Alegria to Kawasan Falls in Barangay Matutinao, Badian. Going downstream is perfect for beginners in the sport of canyoneering as it is easier, safer, and requires relatively less effort than upstream canyoneering.

In addition, April 12 was also our 23rd monthsary! We celebrated our monthsary the best way we know—having a high dose of adventure!

Note: We have already covered and posted photos of sceneries of Matutinao River during our upstream adventure. Thus, don’t be surprised if there are fewer photos here. However, check out our videos in this blog post!

As usual, we met at the Cebu South Bus Terminal at around 4AM.  By 8AM, we arrived at Moalboal town center, had a delicious breakfast (an adventure should start with a great meal), left our stuff at Sir Ya Man’s place, and rode a jeep to Alegria.

Before proceeding to Alegria, however, we stopped by Kawasan Falls to rent some life jackets for team members who don’t have life jackets of their own.

Downstream Canyoneering in Badian

From the highway, we took a 20-minute habal-habal ride to Barangay Kanlaob where the jump-off area is located. Riding a habal-habal is an adventure in itself, and such an adventure should be expected if you wish to travel in the Philippines.

Downstream Canyoneering in Badian

The barangay officials have started to take notice the increase of people trying out canyoneering adventures. We believe that’s the reason they are starting to collect P10 per person who enters the jump-off point. That’s okay as long as the P10 is spent for maintenance or for the livelihood of those who live there.

Sir Ya Man, Halourd, and Choy briefed the adventurers of the do’s and don’ts of canyoneering. After a short prayer, we were on our way.

Downstream Canyoneering in Badian

Fifteen minutes later, we entered the upper part of Matutinao River. The cool water splashing on our feet and legs was a welcome respite from the oppressive summer heat.

Downstream Canyoneering in Badian

Check out that sparkling water! Doesn’t it look so refreshing that you just want to dive in it? Well, that was exactly what we got!

Downstream Canyoneering in Badian

The first big challenge was to jump off a strong, fast-flowing 20-foot high waterfall and landing on a deep pool of cold river-fed water! There was no other way to enter the canyon but by high diving. Well, truthfully, there is another way, but it’s not as exciting as this.

Downstream Canyoneering in Badian

We felt that the excitement of leaping off a waterfall can’t be captured by a photo. So we decided to take a video of some of our team-mates. For many, it was an exhilarating experience.

For others, it was a test that required every ounce of courage and willpower. One thing was sure, though, everyone had a lot of fun!

The photo below shows the entirety of the first waterfall that we just jumped off of. It may not look high, but believe us, it is higher than you think. Once you’re up there, you’ll begin to develop jelly legs.

Downstream Canyoneering in Badian

Another mighty waterfall follows after the pool where we jumped into. Safely going down this waterfall requires a safety line, which was set up by Sir Ya Man.

Downstream Canyoneering in Badian

One by one, the team made their way down the waterfall. Constantly rushing water did not allow algae to grow on the rock, making it relatively safe to step on. However, we took no chances, and the team was instructed to hold on to the safety line.

Downstream Canyoneering in Badian

From the vantage point of the photo below, you can see how strong the flow of the waterfall is. To go down the last few meters, we had to either hold on to tiny, slippery handholds or inch downward on all fours on slippery rock.

Downstream Canyoneering in Badian

The waterfall flows into a beautiful, sparkling clean lagoon, carefully tucked in a lush jungle. In this part of Cebu, it’s the epitome of untouched paradise.

Downstream Canyoneering in Badian

That’s the rushing waterfall where we came from. It’s very beautiful, isn’t it? The guides call this area The Dead End because this is the end of the canyoneering course if one goes upstream.

Downstream Canyoneering in Badian

With a deep, cool lagoon and gorgeous canyons whose mossy rock faces feature trailing roots and vines, this is a great place for both root climbing and high diving. Oh, yes, you can actually feel the adrenaline flowing through your system. Check out the video below.

After spending half an hour of diving, swimming, and splashing around the dead end, Sir Ya Man signaled us that it was time to move on so we can reach Kawasan Falls at around 2PM.

Downstream Canyoneering in Badian

After that first heart-stopping jump, everyone realized that they can definitely defy their limits and get over their fear. In fact, they got pretty excited of jumping off waterfalls that line up the canyon although most are not as high as the first one.

Downstream Canyoneering in Badian

Even though the downstream river trekking was considerably easier than upstream trekking, it was still quite a challenge since we had to brace ourselves to avoid being swept off our feet. The rocks were quite slippery, and many parts of the river were obscured by foam or sediment.

Downstream Canyoneering in Badian

As always, we felt mesmerized by the immensity of the moss-covered stalactites that hang precariously up the canyon. The photo below gives you a better idea of just how massive these stalactites are; check out the scale of the girls versus the rock formations.

Downstream Canyoneering in Badian

Swimming in the greenish lagoons of Matutinao River is always a relaxing experience. During this adventure, we were reintroduced to Mother Nature’s balm that never fails to completely wash your stress, soreness, and exhaustion away.

Downstream Canyoneering in Badian

Not all segments of a downstream canyoneering adventure involve diving and swimming. We also had to scramble down and under massive boulders or walk across slippery petrified logs.

Downstream Canyoneering in Badian

An hour after we exited The Dead End lagoon, we reached the Cafeteria, the “official” resting place in the canyon. As usual, the breeze here was pretty chilly despite the fact that it was midday and the sun shone brightly over the land.

Downstream Canyoneering in Badian

After half an hour of munching on snacks and rehydrating, we were on our way. And what a restart; it was jumping over a short waterfall and swimming in a cool lagoon again!

Downstream Canyoneering in Badian

We reached the massive landslide area.

Downstream Canyoneering in Badian

The team carefully traversed over the huge boulders that the landslide left behind. Although it’s a relatively easy scramble, one has to be careful because a single, careless slip can cause injury. The rocks here are massive and, in some places, razor sharp.

Downstream Canyoneering in Badian

There are also various natural pools that are fed by small waterfalls in many areas of the river. It is really cool and relaxing when you sit down and immerse in the water in any one of these pools.

Downstream Canyoneering in Badian

After a short break, we carefully descended down these series of fast-flowing, cascading waterfalls.

Downstream Canyoneering in Badian

Trekking, swimming, and wading through the canyon left us with a lingering feeling of awe and humility. Mother Nature is just so immense, so beautiful, so powerful, and so terrifying that we felt ashamed that we, humans, even have the audacity to change or even destroy her to suit our needs and wants.

Downstream Canyoneering in Badian

We passed by an old, moss-covered petrified tree along the way. That tree signaled that we were actually near the end of the canyon.

Downstream Canyoneering in Badian

Be careful, and watch your step! Those wet, moss-covered rocks are very slippery. Don’t hesitate to ask for a helping hand.

Downstream Canyoneering in Badian

Going down those slippery rocks, we arrived at one of the most beautiful and exciting parts of the canyon. The water there is quite deep, and the current is quite strong.

Downstream Canyoneering in Badian

Here’s another view of the area. Now, what do deep water, fast-flowing current, and a high rocky platform add up to? A perfect area for high diving, of course!

Downstream Canyoneering in Badian

Check out the video below. Most of us didn’t hesitate to challenge ourselves; we stepped on the ledge, felt our heart beat faster, screamed our lungs out, and just went for it. For us, this was the best and the most fun part of the entire canyoneering adventure.

After having the time of our lives, we just let the current carry us to the end of the canyon where the last leg of the adventure begins, a 45-minute trek across boulders, wooded areas, and muddy trails to Station 3 in Kawasan.

Downstream Canyoneering in Badian

Ouch! Ouch! Those prickly, itchy plants can scratch you up real good. Be sure to wear arm guards or a long-sleeved rash guard to protect your arms, and leggings to protect your legs.

Downstream Canyoneering in Badian

After 3 hours of absolute canyoneering fun, we emerged at Kawasan Falls’ Station 3. You should see the priceless, puzzled looks of the holidaymakers’ faces when they saw us emerge from the forest, equipped with PFDs, life jackets, ropes, and other gear!

Downstream Canyoneering in Badian

Skimboarding at Basdako, Moalboal

Sir Ya Man has been inviting us to try out his other exciting sport: skimboarding. We figured out that it was another opportunity for fun and adventure. Thus, when we planned out and organized this adventure, we decided to include an overnight stay at Basdako in Moalboal so we can try out skimboarding, relax after an exhaustive canyoneering adventure, and just have a great time chatting with fellow adventurers.

After a quick lunch at Sir Ya Man’s place (the pancit that his mother prepared was awesome!), we headed out to Basdako.

Downstream Canyoneering in Badian

Considering that it was a weekend, there were already plenty of beachgoers there. Some set up beach tents while others rented rooms and cottages.

Downstream Canyoneering in Badian

Sir Ya Man then showed us how to skim over the waves using a thin board made of waxed plywood. We gotta tell you, he’s a professional skimboarder! Our jaws just dropped when he performed amazing tricks with ease.

Downstream Canyoneering in Badian

Uhmm…how did he do it?

Downstream Canyoneering in Badian

Definitely not like this! We can safely say that skimboarding is not as easy as it looks! Prepare for bruises, scrapes, and humiliation as you slip, fall, and skitter across the surf.

Downstream Canyoneering in Badian

Check out the video below and see how Sir Ya Man rides the board with ease (1st and 3rd clip). Compare that with how I ride the board (2nd and 4th clip).

The sun began to set, and I was still struggling—and unable—to find my balance on the board. It was then when I realized—and acknowledged—that I have rather poor sense of balance and timing. What a bummer!

Downstream Canyoneering in Badian

Okay, the girls had way better luck. Oh well, at least Sweetie is still proud of me. Hehehe! I love you, Sweetie! Just look at that gorgeous, fiery sunset!

Downstream Canyoneering in Badian

Despite the hordes of beachgoers, the place was serene enough so that Apol, Angel, and Jammy decided to practice some yoga moves.

Downstream Canyoneering in Badian

As night came, we set up our tents and ate our dinner. Tip: buy dinner and drinks before coming to Basdako! The food and beverages sold in the resort are ridiculously expensive for their carenderia quality.

Downstream Canyoneering in Badian

A weekend of adventure and fun that starts well also ends well with a little booze (no, we don’t drink); a plethora of chats through the night; great beach music; and, perhaps, a blossoming romance.

Downstream Canyoneering in Badian

Thank you, team (Apol, Angel, Jammy, Kerie, Jennifer, Lovely Ann, Sam, James, and Rico) for participating in our epic monthsary adventure! Thank you, Sir Ya Man, Sir Halourd, and Sir Choy for being excellent guides as always! Downstream canyoneering is definitely a fun, must-try adventure for those who wish to take the road of extreme outdoor activities!

Downstream Canyoneering in Badian

Suggested Itinerary

Day 1
4:00 AM – meet up at Cebu South Bus Terminal
5:00 AM – ETD Cebu South Bus Terminal, going to Moalboal
7:30 AM – stop at Moalboal, breakfast, buy packed lunch
8:00 AM – walk to Sir Ya Man’s house, leave unnecessary stuff, prepare gears
8:30 AM – ride bus/multicab to Alegria, stop by Kawasan Falls to rent life jackets
9:30 AM – arrival at Kanlaob Alegria crossing, ride habal-habal to jump-off
10:00 AM – arrival at Barangay Kanlaob jump-off, briefing, last-minute checks
10:15 AM – start canyoneering adventure
12:00 PM – lunch at “The Cafeteria”
1:00 PM – resume canyoneering adventure
2:30 PM – finish canyoneering adventure, exit at Kawasan Falls in Badian
2:45 PM – ride jeep to Sir Ya Man’s house, late lunch, get gear
3:30 PM – ride jeep or tricycle to Basdako, Moalboal
4:00 PM – arrive at Basdako Moalboal, swimming, skimboarding, set up tents
6:00 PM – dinner
7:00 PM – socials
11:00 PM – lights off

Day 2
6:00 AM – wake up, break camp
7:00 AM – ride tricycle to Moalboal Town Center
7:30 AM – arrival at Moalboal Town Center, breakfast
8:00 AM – ride bus or V-hire back to Cebu
11:00 AM – arrival CSBT, home sweet home

Budget (per person)*

P 110 – Non-aircon bus fare from CSBT to Moalboal (P 130 for aircon bus)
P 30 – Multicab/jeep fare from Moalboal to Kanlaob Crossing, Alegria
P 40 – habal-habal ride from crossing to Kanlaob jump-off **
P 10 – entrance fee in Kanlaob
P 50 – Life jacket rental
P 10 – exit fee in Kawasan ***
P 25 – Multicab/jeep fare from Kawasan to Moalboal
P 30 – tricycle fare from Moalboal Town Center to Basdako
P 5 – barangay Basdako entrance fee ****
P 10 – Basdako resort entrance
P100 – fee for setting up at tent at Basdako Beach *****
P 30 – tricycle fare from Basdako to Moalboal Town Center
P 110 – Non-aircon bus fare from Moalboal to CSBT (P 130 for aircon bus, 100 for V-hire)
TBN – Guide fee (to be negotiated)

* We did not include our expenses for meals, snacks, souvenirs, tips, and other fees in this rate sheet as you may have different needs, preferences, itineraries, miscellaneous transportation, and sharing scheme from us. Note that all figures are subject to change without prior notice.
** Be wary of unscrupulous habal-habal drivers who want to take advantage of you as a non-local. They quoted us P40 one way. However, when we reached the jump-off point, locals said that the normal fare is P30.
*** This was a shocking surprise for us. When we asked the in-charge personnel why we had to pay an exit fee in Badian, they retorted with an absurdly ridiculous reason that we are “using their water” even though rivers are public property. Although we were issued official government receipts, we haven’t seen or heard any official directive from the provincial government that they’re authorized to extract P10 from canyoneers who start in Alegria. Additionally, we’re not sure if this practice is implemented if we go upstream (i.e. starting in Kawasan and ending in Kanlaob, Alegria)
**** We are not sure if paying a fee to enter the barangay of Basdako is legal. But at Basdako’s border, tanods have set up a checkpoint to make sure all who pass through Basdako pay the P5.
***** This was also a shocking surprise for us because there was no notice of such a fee at the beach entrance. We didn’t know that setting up a tent is as expensive as staying in a cottage. We are not sure if collecting a “tent fee” here is legal. Be wary of people who ask payment from you; they don’t wear uniforms. Always ask for an official receipt or a copy of an official directive.

At present, we are trying to check on the legality of these fees.

Tips

1. Contact Sir Aldrin a.k.a. Ya Man at 0932-9256545, Sir Halourd at 0933-6292925, or Sir Choy at 0922-4444083 for guideship services. They are very experienced canyoneering guides. They will make sure you are safe and you enjoy the adventure.

Since they are freelance guides, they don’t have fixed rates. Thus, negotiate the price with them.

2. Wear a PFD (personal flotation device) or life jacket for safety. Many parts of the river are deep, and there is always a constant danger of drowning. Never underestimate the river even if you’re a strong swimmer and always be on the side of safety. If you don’t have your own personal PFD, rent one in Kawasan Falls for P50.

3. Wear a helmet. You’ll be climbing boulders, swimming under rock outcroppings, and jumping from heights. You need something to protect your head. A skateboarding or open-face motorcycle helmet will do just fine if you don’t have a proper climbing or caving helmet.

4. If this is your first time engaging in a canyoneering activity, we recommend going downstream rather than upstream. Otherwise, if you’re going upstream, you may end up with regrets and frustration after realizing that a lot is required of you. Also, strictly follow your itinerary and schedule. If you lag behind or if you constantly need supervision, then you’ll delay your team, and this becomes risky when darkness sets in.

5. For safety, don’t make high dives without asking your guide’s permission.

6. It is strongly recommended that you know how to swim, even a simple dog paddle. If you don’t know how to swim, it is mandatory that you wear a PFD.

7. For safety, do not stray away from the group. Keep them and yourself in visual range.

8. Take time to double-check your footing and your handholds. Many of the natural features that you’re going to use are slippery and unstable.

9. Use the webbing/rope that the guide provides. It’s there for your own safety and ease of traversing.

10. Do not disturb, handle, capture, or kill wildlife. Doing so violates both Municipal Ordinance 2009-01 and Republic Act 9147 (Wildlife Protection and Protection Act). Remember to practice the Leave No Trace principles. Never throw your garbage anywhere to protect and preserve the pristine beauty of the canyon.

11. Pack light but do bring the following:

  • Water (at least a liter)
  • Trekking sandals or aqua shoes with an aggressive tread
  • Rashguard
  • Cycling shorts, board shorts
  • PFD
  • Helmet
  • Snacks (store in waterproof container)
  • Packed lunch (store in waterproof container)
  • Dry bag (to store your valuables and lunch)
  • Extra dry clothes (you’ll leave them at the guide’s house)
  • Extra money for emergencies (stored in waterproof container)
  • Your guide will provide the technical requirements such as ropes, webbing, and carabiners.

If you wish to pitch a tent in Basdako, bring your tent, sleeping bag, blanket, sweater, and other camping gear.

12. Obviously, you need to waterproof everything. But since you’ll be jumping, swimming, and getting splashed around by strong curtains of water, you need much more than just the usual Ziplock sandwich bag or plastic bag. We recommend putting your valuables, batteries, and money in a Ziplock bag then put that bag inside a watertight box (or something equivalent). You can purchase watertight boxes and cases in outdoor shops like ROX Ayala, Habagat, or Cris Sports.


Capones Island and Anawangin Cove: Jewels of Zambales

$
0
0

Island Hopping in Capones Island and Annawangin Cove in Zambales

Mother Nature has an eternal cycle of destruction and creation. A supermassive star, for example, explodes as a supernova. Its shock wave instigating the gas in a nearby nebula to start the cosmic activity that results to the birth of a star. A forest consumed by wildfire during the hot summer months start to regrow after the autumn rains bathe the lands. Corals, destroyed by ships landing on top of them, find new life on the steel hulk. In time, the wreck turns into a vibrant artificial reef.

We wanted to witness an actual, developing evidence of that cycle of death and rebirth during Holy Week 2014. That evidence was the aftermath of the cataclysmic eruption of Mt. Pinatubo in Luzon, Philippines more than a decade ago. The eruption and the resulting ashfall and lahar swept away farms and houses, destroyed mountains and forests, snuffed out lives, destroyed infrastructure, dented the national economy, and even affected global weather.

However, in the years that followed, lands that were covered by Mt. Pinatubo’s ashfall became extremely fertile. Volcano tourism and scientific research at the tri-point of the provinces of Zambales, Tarlac, and Pampanga soared high. And undiscovered, barren coves began to take life, showing a new, gorgeous face of natural beauty.

Sweetie and I planned to see just how the volcano breathed life to these coves, namely the now-popular coves of Anawangin and Nagsasa. Of course, our adventure and learning wouldn’t be complete without a visit to the heart of it all—Mt. Pinatubo itself. Coming with us to experience the adventure were Sir Jigz Santiago, former Mt. Kanlaon head guide and now Canlaon City Kagawad, and his partner Ma’am April. If you go back to our earlier adventures, you may recognize them as the couple who went with us to Osmeña Peak in Dalaguete, Cebu a few years ago. You could thus call our trip an adventure-couple reunion with a tinge of a Holy Week holiday!

It was a good thing that Sir Jigz and Ma’am April were able to take a much earlier flight. After lining up for almost 5 hours, they were able to purchase bus tickets for all of us before we arrived. Had they’ve been booked in the same flight as ours or had they waited for us before buying tickets, we wouldn’t have been able to faithfully follow our itinerary. For that, we are forever grateful to them.

We left Manila at around 3:30 AM and arrived at Olongapo at 6:00 AM. Then we took another bus bound for San Antonio in Zambales.

Island Hopping in Capones Island and Annawangin Cove in Zambales

We skirted the beautiful “urbanized” coastline of Subic Bay where we saw fleets of giant ships, expansive harbors, and clean beaches filled with happy throngs of beachgoers in perfect harmony. Activity here, even in the early morning hours, is bustling.

As we left Subic and headed deeper into Southern Zambales, we saw the golden slopes of the majestic and massive Pundaquit mountain range.

Island Hopping in Capones Island and Annawangin Cove in Zambales

After an hour, we arrived at the quaint, lovely town of San Antonio. Check out their gorgeous town plaza!

Island Hopping in Capones Island and Annawangin Cove in Zambales

Knowing that it was going to be quite a long, tiring day, we headed down to San Antonio’s wet market where we found this large eatery. As what we always say, a good adventure starts with a good meal! Thus, we ordered a big, filling breakfast.

Island Hopping in Capones Island and Annawangin Cove in Zambales

As adventurers, we always make it a point to try out a region’s specialties. San Antonio’s specialty is pancit palabok, a delicious salty-sour Filipino-Chinese dish that consists of thin rice noodles with a special shrimp sauce poured on it. The dish is then topped with chopped spring onions, slices of eggs, and pork rind bits.

Pancit palabok is found everywhere in the Philippines, but the defining characteristic of San Antonio’s palabok is its very generous serving of shrimp sauce.

Island Hopping in Capones Island and Annawangin Cove in Zambales

After a heavy breakfast, we headed into the wet market proper to buy ingredients for our meals. It is imperative that you purchase ingredients or packed meals in San Antonio because there are no restaurants, carenderias, or eateries in the hidden coves of Zambales.

Island Hopping in Capones Island and Annawangin Cove in Zambales

After shopping for ingredients, we headed out to the tourism desk just beside the municipal hall for registration. The tourism officers secured the tricycle and island hopping arrangements for us.

Island Hopping in Capones Island and Annawangin Cove in Zambales

We were actually pleasantly surprised when we learned that our tricycle driver was a lithe, lively dudette rather than a burly dude. Now, we don’t have anything against women drivers, but it’s not every day that you can see female tricycle drivers!

Island Hopping in Capones Island and Annawangin Cove in Zambales

On the way to Pundaquit Beach, which involved a 30-minute tricycle ride, we were treated to a rich plethora of sights. A nice highlight of the ride was passing by a resort of some sort that is established right in the middle of a river. The resort seemingly shares the same space with farmers who use the river for agricultural purposes.

Meanwhile, the massive Pundaquit mountain range loomed ahead, obscuring the view of the secret coves, which are located behind that range.

Island Hopping in Capones Island and Annawangin Cove in Zambales

Pundaquit Beach

At last, we arrived at Barangay Pundaquit, which meant that the real adventure was about to start! The most prominent thing we noticed is that the Barangay is chock-full of beach resorts!

Island Hopping in Capones Island and Annawangin Cove in Zambales

We stopped at Pundaquit Beach, a public beach and a staging point for island hopping tours around the bay. Sans the noise and the throngs of tourists, this place was the perfect definition of idyllic. Just check the photo below: that’s a gorgeous scene of sky, mountain, and sea!

Island Hopping in Capones Island and Annawangin Cove in Zambales

During high tide, the sea fills up this nice sandy pool. Local kids usually take a dip here during searing days such as today.

Island Hopping in Capones Island and Annawangin Cove in Zambales

We did say searing, yes? Due to global warming, our summers of late have been extremely scorching. To cool off during the hot morning, we treated ourselves to generous servings of halo-halo, a popular Filipino beverage/dessert made of jellies, pieces of kaong, custard, pinipig crisps, and other ingredients mixed in shaved ice and milk! No soft drink, juice, or beverage can ever come to the “refreshing power” of a good halo-halo!

Aside from the usual ingredients, Pundaquit’s halo-halo has an additional ingredient—sweet, nutty caramel syrup that stuck to our taste buds.

Island Hopping in Capones Island and Annawangin Cove in Zambales

Because it was Holy Week (Good Friday, to be specific), Pundaquit beach was quite crowded with locals and visitors who want to take a break from the chaotic city life and simply take a much-needed vacation to recharge themselves. The sand that covers Pundaquit Beach is exquisite, clean, and fine, but there was really something peculiar about it. We’ll tell you about that sand in our next post.

Island Hopping in Capones Island and Annawangin Cove in Zambales

Since there were only four of us, we were assigned to a small, roofless boat. Later, during the cruise, we told ourselves, “We should have gotten a bigger boat.” Hehe! You’ll know why as you read this blog post.

Island Hopping in Capones Island and Annawangin Cove in Zambales

Starting with a loud guttural growl, the boat’s engine sputtered to life. We launched off from Pundaquit beach to head to our first destination Islas de Punta Capones, or, in short, Capones Island.

Island Hopping in Capones Island and Annawangin Cove in Zambales

Capones Island

Our boat sliced through the waves as we approached Capones Island. Capones Island is an oversized shoe-shaped rock outcropping that juts out of the water. Even from afar, we could already see the magnificent limestone cliffs that make up most of the island’s perimeter.

Island Hopping in Capones Island and Annawangin Cove in Zambales
(Photo credit: Jigz Santiago)

A sandy shore faces the mainland, and we could see throngs of visitors enjoying the sand and sea. The high rocky cliff forms a protective wall that embraces the beach. More than that, you already know what went through our minds, considering we are rock climbers. Yes, that rock face is a very good candidate for bolting.

Island Hopping in Capones Island and Annawangin Cove in Zambales
(Photo credit: Jigz Santiago)

Gorgeous limestone cliffs! We weren’t able to take a closer look at these marvelous walls. However, if the water right beneath it is deep enough, these rock faces may be excellent routes for deep water soloing, a style of non-roped climbing wherein the climber falls in the water in case he or she falls.

Island Hopping in Capones Island and Annawangin Cove in Zambales
(Photo credit: Jigz Santiago)

We docked at the south part of Capones Island, which is the entry point to the island’s highlight, the ruins of the Capones Island Lighthouse. Huge rocks embraced by rock cliffs compose the southern shore.

Island Hopping in Capones Island and Annawangin Cove in Zambales

Sadly, the island’s natural beauty up close was blemished by this ugly pile of garbage. Sad sights like these always never fail to elicit a tired, exasperated sigh from us. Why do people throw trash in paradise? Are they just too lazy to clean up after themselves?

Island Hopping in Capones Island and Annawangin Cove in Zambales

We climbed up the rocky trail that led to the lighthouse. The day was immensely hot, and the short, easy climb rapidly drained our strength. We should have brought an umbrella.

Island Hopping in Capones Island and Annawangin Cove in Zambales

All things considered, however, it was a very easy climb. Concrete and stone steps carved on the rock faces made the trek completely manageable even for old folks.

Island Hopping in Capones Island and Annawangin Cove in Zambales

Along the way, we passed by this old stone bridge which, during its time, doubled as a bunker of some sort.

Island Hopping in Capones Island and Annawangin Cove in Zambales

A well-established dirt trail led to the lighthouse, which was quite visible when we reached the top of the flight of rock steps. Check out the grass; the onslaught of salty moisture and the sun’s extreme heat made them wither.

Island Hopping in Capones Island and Annawangin Cove in Zambales

The trail continued through a lightly wooded area, much to our relief. A few minutes later, we entered through an old, eerie gate that was very reminiscent of gates in haunted-house flicks. We didn’t feel any sense of dread as we passed through the gate and into the compound, but we’re pretty sure that the experience would be quite, well, scary at night.

Island Hopping in Capones Island and Annawangin Cove in Zambales

We arrived at the Capones Island Lighthouse, which is, in fact, a historic lighthouse. This lighthouse once guided vessels coming from the north towards Subic Bay, Corregidor Island, or Manila Bay. It was built and became operational sometime in the late 1890s.

Island Hopping in Capones Island and Annawangin Cove in Zambales

From the facility’s veranda, one can see a beautiful, encompassing view of the expanse of the West Philippine Sea. We imagine that during the lighthouse’s heyday, lonely crew members would gather around here, chat with each other, play a guitar, share glasses of tuba (coconut wine), and appreciate the view during their break.

Island Hopping in Capones Island and Annawangin Cove in Zambales

Stepping into the lighthouse’s lower levels was like stepping back in time. Sometime in the early 20th century, the Capones Lighthouse was abandoned. Years ago, in compliance with the Philippine Coast Guard’s Maritime Safety protocol, the tower was renovated and a solar-powered light was installed to replace the old lamp-and-lantern assembly. The rest of the station was left to deteriorate.

Island Hopping in Capones Island and Annawangin Cove in Zambales

The top of the 65-foot lighthouse can be accessed by a rusty spiral ladder that shakes with each step and a series of equally rusty ladders.

Island Hopping in Capones Island and Annawangin Cove in Zambales

After a short climb, we arrived at the heart of the lighthouse, a set of rotating lamps that could send beams of bright lights to guide ships and boats. We’re not sure if the lamps are still functional.

Island Hopping in Capones Island and Annawangin Cove in Zambales

I climbed at the very top of the lighthouse, which turned out to be an excellent vantage point. Below the main lighthouse are the severely deteriorated keeper’s house and miscellaneous buildings, a deep well, and a non-functional water tank. Most of the rusting station is overgrown by plants.

According to my research, the Environmental Protection of Asia Foundation was supposed to renovate and convert the lighthouse into a marine conservation research center. Until now, since the agreement was signed in 2004, no visible development is evident.

Island Hopping in Capones Island and Annawangin Cove in Zambales

Light woods cover one side of the island. We wouldn’t be surprised if this patch of vegetation would be filled with snakes, lizards, and other reptiles.

Island Hopping in Capones Island and Annawangin Cove in Zambales

Now, that’s a completely stunning view of a peninsula, the sky, and the vast expanse of the azure West Philippine Sea. We would gladly wake up to a view like this every day!

Island Hopping in Capones Island and Annawangin Cove in Zambales

After half an hour, we descended from the lighthouse and headed towards the island’s prominent peninsula. Check out the grass; they’re golden in color! Yes, they are almost hay-like in appearance. A wonder of nature, don’t you agree?

Island Hopping in Capones Island and Annawangin Cove in Zambales

Laid out in front of us is the splendor of Zambales! And personally, the beauty of the place becomes even better when I’m together with my Sweetie! Hehehe!

Island Hopping in Capones Island and Annawangin Cove in Zambales
(Photo credit: Jigz Santiago)

After taking a couple of photos, we went back to our boat. Check out the rocks that line up the shore; they almost look like the pebbles of Mabua Pebble Beach in Surigao City.

Island Hopping in Capones Island and Annawangin Cove in Zambales

Anawangin Cove

After a satisfying hour-long visit in Capones Island, we were ready to cruise to our next destination. The 30-minute cruise to Anawangin Cove was unexpectedly choppy despite the calm, windless weather.

Island Hopping in Capones Island and Annawangin Cove in Zambales

As we skirted Pundaquit’s coastline, we witnessed gorgeous mountains that abruptly ended in massive sea cliffs. Looking at the mountains, you might think that the bare slopes are the results of deforestation. Nope, these are all natural; the slopes are made up of either grasslands or loose soil.

Island Hopping in Capones Island and Annawangin Cove in Zambales

We didn’t expect it! Just like a stage curtain, we saw this beautiful sandy cove half an hour later. The cove was nestled in the loving embrace of a protective range of high, grass-covered mountains. We have arrived at the much touted Anawangin Cove.

Island Hopping in Capones Island and Annawangin Cove in Zambales

As we approached the shore of Anawangin Cove, we saw massive numbers of vacationers and beachgoers, all excited for a weekend of cool water, relaxing sea breeze, and great fun with friends and family. We didn’t expect that such a secluded cove could be so crowded.

Island Hopping in Capones Island and Annawangin Cove in Zambales

Just check out the photo below. Now, that’s what we call a beach! Powdery white sand, aquamarine waters, and encompassing mountains!

Island Hopping in Capones Island and Annawangin Cove in Zambales

But like any other place that attracts tourists or has a huge potential as a tourist destination, Anawangin Cove has become commercialized in no time at all. Check out the rates; they’re quite high considering that the cove is technically a public beach.

Island Hopping in Capones Island and Annawangin Cove in Zambales

Most vacationers who wish to stay overnight in Anawangin Cove bring and pitch tents rather than rent a cottage. Beachgoers who don’t have tents can rent one at an affordable price. However, tent rental is limited in number, so we strongly advise bringing your own tent.

When we arrived at Anawangin Cove, there were already hundreds of tents and even more vacationers. We understand that these places get heavily crowded during Holy Week, but we never expected that such a remote, secluded area could be THAT crowded.

Island Hopping in Capones Island and Annawangin Cove in Zambales

A large forest of pine-like Agoho trees provides shade to give beachgoers respite from the unrelenting, punishing summer sun. Behind this forest is a marsh that provides sea birds with plenty of critters for food.

Island Hopping in Capones Island and Annawangin Cove in Zambales

It didn’t take long before we decided that Anawangin Cove was just too crowded for our taste. So, we boarded our small boat and headed out to the much-farther and, hopefully, less crowded Nagsasa Cove.

It was one of the most intense 45-minute boat ride in our lives. You see, the waves were quite massive even though we were close to shore; that’s not surprising since we were sailing in open water. But we still held on to the boat until our knuckles turned white. Wave after wave battered our small boat, and we were sure that our vessel would disintegrate any moment. At times, we flew right over a wave’s crest; in other times, we huddled in fear as we surfed down deep troughs.

Our young and experienced boatman, however, was not even slightly perturbed!

Island Hopping in Capones Island and Annawangin Cove in Zambales

Along the way, we were treated to a spectacular display of immense sea cliffs and sea caves, clear testaments that speak volumes of just how magnificent, powerful, and pitiless Mother Nature is.

Note: Due to the cold water and the warm air, our camera lens fogged during the cruise. We weren’t able to take clear photos of the sea cliffs. But don’t worry, they will be featured in the next article.

Island Hopping in Capones Island and Annawangin Cove in Zambales

Finally, after almost an hour, we turned right towards a well-protected, secluded bay which fronted a sandy shore. At last, after a hair-raising, harrowing, wet boat ride, we reached Nagsasa Cove, our destination for the day.

Island Hopping in Capones Island and Annawangin Cove in Zambales

Go to the next post for details of our stay in the picturesque Nagsasa Cove.
(Cover photo by Jigz Santiago)

Pinoy Travel Bloggers Blog Carnival Entry

This is our entry to Pinoy Travel Bloggers Blog Carnival for the month of May 2014 entitled, “Luzon Lovapalooza” hosted by Mervin of the award-winning travel blog Pinoy Adventurista.


Nagsasa Cove: Nature’s Cradle of Healing and Rebirth

$
0
0

Nagsasa Cove in Zambales

Rebirth is part of Mother Nature’s cycle. But often, this aspect of the cycle can be so subtle that it evades human perception. Indeed, Mother Nature’s rebirth can take years, decades, or even centuries to become evident. Often, it is necessary to travel far and wide to see how she heals herself after being ravaged by humans or after being a victim of her own uncontrollable temper.

We found a stunning place where we witnessed Mother Nature’s rebirth and healing process in action. That place is the secluded Nagsasa Cove situated at the coast of province of Zambales in Luzon, Philipines.

After a harrowing 45-minute boat ride on choppy waters from Anawangin Cove, we finally entered the embrace of Nagsasa Cove. In contrast to the temperamental attitude of the open West Philippine Sea, the water in the bay fronting the grayish-white shore was calm and serene.

Nagsasa Cove in Zambales

At last, we set foot on sandy Nagsasa Cove. If you somehow get lost here, don’t worry. There are signs that point to where you came from. Hehehe!

Nagsasa Cove in Zambales

Colorful tents lined up the sandy, shady spaces beneath the canopies of Agoho trees. Tents can be rented for an affordable price at either Nagsasa Cove or at Pundaquit Beach. However, they come in very limited numbers, so we suggest bringing your own.

Nagsasa Cove in Zambales

Our boatman led us to a vacant table where we can finally put down our bags, check if the contents are wet, unpack our supplies, and eat the packed lunch that we bought from San Antonio.

Nagsasa Cove in Zambales

Our boatman set up our rented tents (we decided to rent tents to lighten our load and to make most of our payment) and assured us that he’ll be back early in the morning.

Because it was Holy Week, Nagsasa Cove was loaded with beachgoers just like any other popular beach in the country. Thankfully, it was not as crowded as Anawangin Cove, and the whole place still exuded an airy, free feeling.

Nagsasa Cove in Zambales

One of the things that allow you to breathe a sigh of relief is this sari-sari store at the beach, a store in the middle of nowhere actually. Here, you can buy cigarettes, simple ingredients, noodles, candies, toiletries, and other stuff that you may need during your stay. The store also has electricity, so you can charge your phone for a relatively hefty price. Best of all, they sell refreshing ice-cold softdrinks!

The bad thing is that all merchandise is sold twice to thrice the normal price. Thus, we suggest you buy everything you need from the mainland.

Nagsasa Cove in Zambales

After having lunch and re-organizing our things, it was time to hit the waters. The tide was slowly receding but that did not stop us from taking a dip in the warm waters of Nagsasa Cove.

Just check out that spectacular mountain scenery! It makes swimming in an idyllic beach an even more awesome experience.

Nagsasa Cove in Zambales

A long stretch of powdery golden sand fronting a small forest of Agoho trees make up half of Nagsasa Cove’s stretch of shoreline. Also, check out the shore. Do you notice that the sand on Sweetie’s feet is gray?

Well, that’s because it’s not just pure beach sand. The grayish color comes from ash deposits that settled on the land after the cataclysmic eruption of Mt. Pinatubo many years ago. As decades passed, with the help of the sea, the ash crystallized into sand-like particles that give this part of the shore its distinctive gray color.

Nagsasa Cove in Zambales

The sand of Nagsasa Cove is somewhat like coarse powder partly due to the blanket of volcanic ash that covered the beach many years ago.

Nagsasa Cove in Zambales

The southern part of the shore is home to Kamp Bira Bira, a resort within Nagsasa Cove. You see, the whole stretch of Nagsasa Cove is divided into resorts. But unlike the shores of Lapu-lapu City in Mactan, Cebu where we live, no ugly sea walls have been erected to demarcate the properties. The result is a long, continuous, beautiful sandy shore where you can walk freely from one end to another.

Nagsasa Cove in Zambales

Outrigger boats of different sizes line, bring and fetch beachgoers. They got really busy during this time of the year. Those boats may look flimsy, but they’re actually tough and very stable. They are available for rent at a relatively affordable rate.

Nagsasa Cove in Zambales

Well, on a hot afternoon like this, who can resist not having fun in the water? No one!

Nagsasa Cove in Zambales

The underwater landscape is pretty much sandy for a mile or two from the shore. Thus, there aren’t many features such as rocks, fields of sea grass, or corals. However, the gentle waves that lap the shore do form the sand into small, long dunes.

In this desert of underwater sand, there are still tidbits of life. We saw this nice, stingless jellyfish swimming around.

Nagsasa Cove in Zambales

Oh yes, if we could only live the rest of our lives like this without worrying about responsibilities! While others enjoyed the beach, I took a very relaxing nap on our hammock.

Nagsasa Cove in Zambales

At around 5:00 PM, our chefs Sir Jigz and Sweetie, prepared our traditional Filipino dinner. We were about to buy firewood at the store (which was pretty expensive) to light up the grill when a local kid passed by. He shook his head after seeing us desperately trying to start a flame. He led us to the back of the beach where we found piles upon piles of dried Agoho branches, which can be used to light up a fire.

Nagsasa Cove in Zambales

Sir Jigz and I were talking about mountaineering stuff when Sweetie suddenly let out a squeal of delight and told us to grab our cameras. Sure enough, she saw the magnificent, orange sunset of Nagsasa Cove. Sir Jigz and I raced to the shore and took photos of one of Mother Nature’s greatest artworks.

The serenity and beauty of Nagsasa Cove’s sunset filled our souls with peace and wonder.

Nagsasa Cove in Zambales

We were treated to a picture-perfect moment of the setting sun. Actually, this was one of the few times in our adventuring career when we saw the entirety of the sun’s disc as it bids farewell to a day. It was simply fantastic!

Nagsasa Cove in Zambales

Doesn’t that traditional dinner look mouthwatering? We prepared grilled pork; salted eggs with tomatoes; sautéed bagoong (pieces of garlic and onions sauteed in shrimp sauce); fresh vegetables dipped in very hot and spicy vinegar-soy sauce and rice.

Nagsasa Cove in Zambales

Bon appétit! After finishing our simple but sumptuous dinner, we cleaned up our plates, chatted for awhile, and went to bed. We were dead tired; it took us only a few minutes before we drifted to unconsciousness even though the rest of the beach was still very much alive and kicking.

Nagsasa Cove in Zambales

We woke up to a gorgeous morning scene of golden mountains and blue skies. Sans the throngs of people, it is definitely paradise here in Nagsasa Cove.

According to some locals we talked to, Nagsasa Cove was originally a barren, sandy shore that was dotted here and there with bare rocks. Then, a few years after the eruption of Mt. Pinatubo and the ash has settled down, Agoho trees and other vegetation suddenly sprouted in this otherwise barren shore. Indeed, Mother Nature finds a way to breathe life.

Nagsasa Cove in Zambales

While Sir Jigz and Ma’am April went up the hill to take photos of early morning scenes, Sweetie and I prepared tocino (sweetened pork slices), scrambled eggs, and tuna for breakfast.

Nagsasa Cove in Zambales

When the duo returned an hour later, they brought with them a few guests, an old Aeta woman together with her grandchildren who came all the way from their mountain village in the province of Pampanga to sell their wares. She told us stories of her life, tales of local culture, and even amusing jokes.

We bought some of her merchandise which includes a sponge made from the bark of a tree and seeds of some sort. She said the sponge can be used for the hair to remove dandruff, and the seeds can be brewed into coffee that can cure stomachaches, headaches, sore limbs, jaundice, and other discomforts. Amazing!

Nagsasa Cove in Zambales

After breakfast, Sweetie and I decided to climb up a nearby hill at the southern bend of the cove. Yesterday afternoon, we saw this hill from the shore and thought that we could see an encompassing view of Nagsasa Cove at the top.

The soil on the hill has a reddish tint, which means it is full of iron.

Nagsasa Cove in Zambales

After passing a “tunnel” of vegetation, we came to a very exposed, grassy part of the trail. Even at an early 7:00 AM, the sun was already searing hot, and we were drenched in sweat.

Nagsasa Cove in Zambales

Going up the hill’s summit involved a short 15-minute but steep climb up a trail of loose soil. Oh, don’t worry about getting lost. You can’t because the trail is clearly marked.

Nagsasa Cove in Zambales

After a little while, we reached the hill’s peak, which offered no shade from the burning sun. Check out the reddish soil and the ragged red rocks.

Nagsasa Cove in Zambales

The red soil and rocks as well as the golden hay-like grass give the hill and the surrounding mountains of the Pundaquit range a distinctive golden, reddish brown color. From afar, we thought the bare slopes were the results of years of deforestation. Upon closer look, the bareness was actually natural. Nature is simply amazing!

Nagsasa Cove in Zambales

At the hill’s summit and with a cloudless sky, we can see the vast expanse of the West Philippine Sea. Suddenly, we felt so small and insignificant while we stand enthralled by Mother Nature. At the same time, we felt special and needed; it is up to us, humans, to preserve paradises like these.

Nagsasa Cove in Zambales

The top of the hill offers an excellent vantage on the bay that sheltered Nagsasa Cove from the unpredictable temper of the West Philippine Sea. As you can see, the bay is quite deep as evidenced by the deep blue water.

Nagsasa Cove in Zambales

The magnificent, golden brown Pundaquit Range acts as a wall that keeps the coves of Zambales secret treasures. At times, we thought of them as the Himalayas of this part of Luzon, and they are great venues for mountaineering and trekking.

Nagsasa Cove in Zambales

After having our fill with the breathtaking sights, it was time to get back to the shore. It was time to pack up and get ready for the journey to Pundaquit Beach.

Nagsasa Cove in Zambales

As we went down, we could see the entirety of Nagsasa Cove. Just look at how well protected this beautiful cove is.

Nagsasa Cove in Zambales

Near the bottom edge of the hill, some jagged rocks break down the monotony of the seemingly endless fields of sand under the sea.

Nagsasa Cove in Zambales

After 15 minutes, we were all packed up and ready to depart Nagsasa Cove. The girls took refuge at a shady area provided by an awning’s shadow while Sir Jigz and I kept a lookout on our outrigger boat.

Nagsasa Cove in Zambales
(Photo credits: Jigz Santiago)

Yes, for the past two days, we were mountaineers turned into beacheneers. Hehehe!

Nagsasa Cove in Zambales

At 9:00 AM as agreed with our young boatman, our boat arrived at the shore. After waterproofing our packs and covering them with life jackets to protect them from sea spray, we were ready to depart and begin the next stage of our Holy Week adventure.

Nagsasa Cove in Zambales
(Photo credits: Jigz Santiago)

Goodbye, Nagsasa Cove! May you stay as beautiful and magnificent as you are. May your visitors accept the crown of responsibility in keeping your shores, mountains, and waters pristine. May the government keep a diligent eye in forever protecting you from man-made degradation and destruction.

Nagsasa Cove in Zambales

On our way out of the bay, we had another clear glimpse of the slopes that surround Nagsasa Cove. As you can see in the photo below, the rebirth continues as evidenced by the small patches of Agoho trees that grew many years after Mt. Pinatubo’s eruption. Agoho trees are not supposed to be endemic here in Nagsasa Cove.

Nagsasa Cove in Zambales

Sea Cliffs

The sea cliffs that line up the coast of Zambales are truly stunning wonders of nature! And because we sailed close to them on the way back to Pundaquit beach, we were able to see them clearly in all their glory.

We spotted this sinister-looking rock outcropping at the entrance of the bay.

Nagsasa Cove in Zambales

Just look at those gorgeous cliffs! If they’re solid, they’d be perfect rock climbing venues.

Nagsasa Cove in Zambales

A fisherman’s boat passed by one of the lonely, uninhabited rock islets off the coast of Zambales.

Nagsasa Cove in Zambales

Here’s another nearby rock outcropping with a lonely patch of green. We wouldn’t be surprised if this serves as a vantage point for fishermen who harvest the bounties of the West Philippine Sea.

Nagsasa Cove in Zambales

Here’s a cliff that is around a hundred or more feet high. Tall cliffs like these make perfect homes for gulls, terns, and other seabirds.

Rock climbing, anyone?

Nagsasa Cove in Zambales

We cruised by Anawangin Cove, kept secret by the same wall of magnificent mountains that protected Nagsasa Cove. It’s not every day and every place where you can see mountains meeting forests and sandy shores.

Nagsasa Cove in Zambales

These boats filled with tourists were on their way to either Anawangin or Nagsasa Cove. We silently envied them because they were protected by roofs.

Nagsasa Cove in Zambales

In some areas, the transition from mountain to sea is immediate but imperceptible. Here, a mountain slope dips into the sea.

Nagsasa Cove in Zambales

But in some places, the mountain abruptly ends as it meets the sea. Check out the photo below. It looks like a giant cleaver chopped the mountain in half. Also, notice the unusual rock slabs.

Nagsasa Cove in Zambales

As we neared Pundaquit Beach, our boatman expertly maneuvered his boat between a massive cliff and a gigantic outcropping. We held our breath as he eased the boat between the natural features with only a few feet to spare. Not only that, he had to make sure that the outriggers don’t hit the sharp submerged rocks under the tiny channel.

We clapped and gave a thumbs-up after safely getting through the channel. Great job!

Nagsasa Cove in Zambales

After an hour-long boat ride, we finally saw and approached the crowded Pundaquit Beach where the next stage of our journey begins.

Nagsasa Cove in Zambales

We may be living in a third-world country, but we have first-world ways to put joy and laughter in our lives. Filipino humor never fails to make us smile.

Nagsasa Cove in Zambales

After a 15-minute tricycle ride back to San Antonio, we boarded a bus to Olongapo City where we plan to take our lunch and take another ride to the source of this destruction and rebirth.

Despite our misgivings due to the fact that we planned this trip in the middle of Holy Week, our Zambales island hopping trip was definitely a great success. We were treated to awesome views and memorable adventures. We were in the company of the coolest fellow adventurers. And most importantly, we were able to witness how Mother Nature healed herself, and that rebirth was perfect.

Nagsasa Cove in Zambales

Suggested Itinerary

Day 1
12:00 AM – depart from Mactan Cebu International Airport, head to Manila
1:00 AM – arrival at NAIA 3, take taxi to Pasay Victory Lines terminal, buy bus tickets
3:30 AM – board bus and depart for Olongapo City
6:00 AM – arrival at Olongapo City Bus Terminal, take bus to San Antonio
7:00 AM – arrival at San Antonio
7:30 AM – breakfast, shopping for packed meals, ingredients for dinner and breakfast, water, drinks, snacks, etc.
8:00 AM – register at San Antonio Tourist Information Desk, wait for tricycle
8:15 AM – ride tricycle to Pundaquit Beach
8:45 AM – arrival at Pundaquit beach, waited for the guide to secure a boat for us
9:15 AM – start of island hopping trip, boat ride to Capones Island
9:45 AM – arrival at Capones Island, explore the island, climb the Capones lighthouse
11:00 AM – depart Capones Island, boat ride to Anawangin Cove
11:45 AM – arrival at Anawangin Cove, swimming, explore the cove
12:15 PM – leave Anawangin Cove, boat ride to Nagsasa Cove
1:15 PM – arrival at Nagsasa Cove, set up tent, organize stuff, lunch
1:30 PM – swimming, explore the cove
5:00 PM – cook dinner, watch sunset
6:00 PM – dinner
7:00 PM – wash up, prepare to sleep
8:00 PM – lights out

Day 2
5:30 AM – wake up, prepare breakfast
6:30 AM – breakfast
7:00 AM – break camp, pack up
7:30 AM – climb the hill, enjoy Nagsasa Cove’s view
8:45 AM – go down the hill, wait for the boat
9:00 AM – depart Nagsasa Cove, ride boat back to Pundaquit Beach
10:00 AM – arrival at Pundaquit Beach, freshen up, wait for tricycle
10:30 AM – ride tricycle back to San Antonio
11:00 AM – arrival at San Antonio, wait for bus to Olongapo City
11:15 AM – ride bus to Olongapo City
1:00 PM – arrival at Olongapo City Bus Terminal (heavy traffic at Subic)
1:30 PM – lunch at Jollibee

Budget (per person)*

  • P 300 – taxi fare (shared by group)
  • P 218 – bus fare from Victory Lines Pasay Bus Terminal to Olongapo City Bus Terminal
  • P 44 – bus fare from Olongapo City Bus Terminal to San Antonio
  • P 30 – tricycle fare from San Antonio to Pundaquit Beach
  • P 399 – island hopping package**
  • P 400 – boat rental***
  • P 50 – day tour in either Anawangin Cove or Nagsasa Cove (covered in our package)
  • P 100 – overnight rate in either Anawangin or Nagsasa Cove (covered in our package)
  • P 30 – tricycle fare from Pundaquit Beach to San Antonio
  • P 40 – bus fare from San Antonio to Olongapo City Bus Terminal

* Except where indicated, all prices are in a per-person basis. We did not include our expenses for meals, snacks, souvenirs, tips, and other fees in this rate sheet as you may have different needs, preferences, itineraries, and sharing scheme from us. Note that all figures are subject to change without prior notice.

** We bought a 2 day/1 night island hopping package online.  As indicated in the voucher, our purchase supposedly includes the following:

  • Island hopping (Capones Island with lighthouse tour, Anawangin Cove, and Nagsasa Cove)
  • Overnight camping in Nagsasa Cove
  • Cookware
  • Tent
  • Complimentary mineral water
  • Tour guide
  • Clean bathroom and fresh water
  • Sharing cottages for free use
  • Entrance fees, overnight fee, and guide fee

But during the actual trip, we weren’t given any complimentary water and cookware. The “cookware” that we used was an old grille, one of several that are lying around the beach for anyone to use. Thankfully, we brought our own cooksets.

No guide was provided; it seemed that our boatman was the so-called guide. There was a bathroom with fresh water for washing, but that’s the common public bath and toilet in Nagsasa Cove. All guests, even those who didn’t avail of the package, can use the facility. The “cottage” turned out to be a simple bamboo table.

As it turned out, we just paid for the fees and the tent rental.

*** The boat fee is not included in the package; we thought it was part of the package due to the “island hopping” inclusion in the voucher. No fine print whatsoever. We only knew about the exclusion when we bought the package online. After we paid, the travel agency then sent an email saying that the boat fee is excluded. We really don’t want to say this, but we felt it was a deception. So be wary when purchasing packages online.

Tips

1. Manila taxi drivers are notorious for offering fixed prices, even those that park outside the airport. The one that we got quote us P300 for a 5-minute ride. If you want to save money, go outside to the highway and flag a passing taxi. Always insist on turning the meter, and pay the driver with the exact amount on the meter. Many drivers keep the change.

2. We bought an island hopping package online, swayed by the promise of an 87 percent discount; we’d pay P399 rather than P3,000. But we were very disappointed on how the package was implanted (see above).

Thus, we strongly advise to get a package from reputable travel agencies, those with positive reviews, or go for a DIY trip. We are not sure about the rate, but we believe you can save more and experience better service if you go the DIY way. Negotiate with the locals at Pundaquit Beach, or ask assistance from the San Antonio Tourist desk.

3. We recommend you bring your own tent. There are only a limited number of tents for rent, and you’d be sleeping on the sand if there are no more tents available. We’re not sure how much the tent rental is, but if you bring your own tent, you’ll save money.

You can rent a tent in Pundaquit Beach or at the makeshift stores in Anawangin Cove or Nagsasa Cove.

4. Alternatively, you can bring a hammock. There are plenty of trees where you can set up a hammock.

5. Purchase food, drinks, charcoal, and other stuff that you need at the San Antonio Market. No restaurants or eateries are available in the coves. Sari-sari stores in the coves offer merchandise at extremely high prices.

You don’t need to pay corkage if you bring your own food and drinks.

6. Charge your phone and camera batteries fully, and bring extra batteries. You may also want to bring solar power chargers or power banks. There is no electricity in the coves, and everything electrical is powered by generators or batteries. Stores may offer charging services, but you have to pay an exorbitant price for a 15-minute charge.

7. Bath and toilet facilities in the coves are rudimentary but clean. Please save water and don’t linger too long when using these facilities. There are other people waiting in line too.

8. Most likely, your boatman will not stay overnight in the cove with you. Thus, before he leaves, arrange your preferred pickup time with him. Get his cell phone number (if he has one) so you can follow him up in the morning.

9. Aetas roam around the coves to sell wares and souvenirs. Buy from them. Not only you will be helping their livelihood, but the items they sell are handmade and are of very, very good quality.

10. Waterproof your pack and the contents inside. Wrap the contents of your pack in plastic bags. Then before boarding your boat, put your pack inside a large plastic garbage bag.

11. Pack light but bring the following:

  • water (at least three liters)
  • sandals
  • sunglasses
  • umbrella, hat, or sarong
  • swimming attire
  • extra clothes
  • mosquito repellent
  • sunblock
  • toiletries
  • snacks and softdrinks
  • packed meals or ingredients for your meals
  • flashlight/headlamp
  • charcoal for cooking
  • fire-making tools (matches, lighter, flint-and-steel, etc.)
  • grill
  • cookset
  • eating utensils
  • burner and butane canister (you can buy a butane canister in San Antonio)
  • personal medicines
  • plastic bags/garbage bags
  • extra money for emergencies

12. Preserve the beauty of these coves. Pack up your trash and bring them back to San Antonio for proper disposal. Do not throw your garbage at the garbage pits at the back of the coves.


Mt. Pinatubo: A Monster of Destruction, Creation, and Magnificence

$
0
0

Mt. Pinatubo

The nation shook, and the world reeled during the cataclysmic event that happened in our country last June 1991. Mt. Pinatubo—a quiet, inconspicuous, and heavily eroded stratovolcano located at the tripoint of Zamales, Tarlac and Pampanga provinces in the Philippine island of Luzon— suddenly roared to life and released its fury. The force of the eruption was so great that volcanologists categorized the event as one of the most powerful volcanic eruptions in the 20th century, reaching Plinian/Ultra-Plinian levels.

Mt. Pinatubo spewed out 10 billion tons of magma and ash and 20 million tons of sulfur dioxide, ten times the quantity of material that was ejected during the eruption of Mt. St. Helens in Washington, USA. Worse, the eruption happened during the arrival of Typhoon Yunya. The combination of ash, rain, and wind killed more than 800 people. Homes, buildings, and other infrastructure collapsed under the weight of ash deposits falling down the skies. Farms, reforestation areas, and agricultural projects were severely damaged, affecting the livelihood of thousands of farmers.

But the worst was yet to come. Lahar—swift mudflows that consist of water, ash, mud, and rocks—caused by rainwater carried volcanic deposits across the land, causing widespread destruction. Lahar carved canyons, ate mountains, and altered river systems. The lahar flows continued years after the explosion. Finally, Mt. Pinatubo released a huge amount of particulates into the atmosphere, lowering global temperatures by 0.5 degrees Celsius and increased ozone depletion significantly albeit temporarily.

We have long wanted to visit and pay tribute to this historically significant monster that both destroyed the land and created new wonders. So we included a solemn visit to Mt. Pinatubo together with our trip to Capones Island, Anawangin Cove, and Nagsasa Cove in Zambales.

We ate lunch in a Jollibee outlet in Olongapo City (and stayed awhile within the establishment’s confines to bask in its air-conditioned coolness) after our visit to Nagsasa Cove. After lunch, we hiked to the city’s Victory Lines Bus Terminal to board a Baguio-bound bus. There were still a few seats left in the 2PM bus trip, thus, to save time, we gladly took it even though our seat assignments did not allow us to sit as a group.

Mt. Pinatubo

Three and a half hours later, we arrived at the municipality of Capas in Tarlac where we took a tricycle to our homestay. The tricycles in Zambales and Tarlac share the same feature: very tiny and low cabs. They’re quite cramped and stuffy, but that’s part of the adventure! Tricycles all over the Philippines differ in design, by the way.

Mt. Pinatubo

Our homestay was located some 15 to 20 kilometers from the city center—quite a distance, actually. Along the way, we witnessed a dramatic sunset.

Mt. Pinatubo

Although modernity has crept into the highlands and interior parts of Tarlac, many areas are still laid back, typical atmosphere in far-flung provinces. Agriculture still stands as a primary industry. This fact was poignantly evidenced by this modified contraption which acts as a farm tractor and a private vehicle.

Filipino ingenuity never fails to amaze us.

Mt. Pinatubo

Close to 6PM, we arrived at the warm, homey, and cozy Bognot’s Homestay, a popular backpacker’s haven for those who want to step foot on Mt. Pinatubo. A few years ago, Sweetie and Alexa stayed here during their Mt. Pinatubo visit.

Mt. Pinatubo

After half a day of riding on a boat under a sweltering sun and salty sea and another half day riding a bus, we were dying to have a shower, change into clean clothes, and relax. Thus, we felt a great sigh of relief as we entered our air-conditioned room.

The rooms in the Bognot’s Homestay are very well-maintained and comfortable without compromising the homey atmosphere. Ours has its very own toilet and bathroom!

Mt. Pinatubo

After freshening up, we headed to the kitchen where our hot, tasty, home-cooked dinner of chicken adobo and chopsuey was waiting for us. We ate with audible gusto after a long ride.

During our hearty dinner, we also made friends with a co-guest Richard Aquino (the guy in light blue). Richard, who is taking his master’s degree in New Zealand, revealed that he was doing a study on volcano tourism. I was honored to be one of his respondents for his research.

Mt. Pinatubo

A relaxing and good night’s sleep left us brimming with energy for the next day. While eating a hot breakfast of eggs and sausages, Ms. Sonia, the owner of Bognot’s Homestay and an operator for Pinatubo Tours, engaged us in a lively, information-filled talk. Because she is a traveler/adventurer herself, Ms. Sonia also knows what we want and require as travelers/adventurers.

The homestay is one of the concrete results of that understanding. She is aware that backpackers are always on the hunt for low-cost, comfortable accommodations. Thus, she established the homestay to cater to that market.

Mt. Pinatubo

At 6AM, we were ready for our Mt. Pinatubo adventure. Ms. Sonia offered to drive us to the jump-off point just a few kilometers from the homestay and just before the edge of the vast lahar fields.

Mt. Pinatubo

Along the way, we witnessed vast farms and swamps, which, more than a decade ago, were swept away by the immensely strong lahar flows. There were still remnants of lahar, but most of the areas in this part of the land were now rehabilitated, either by man or by nature.

Mt. Pinatubo

After 15 minutes, we arrived at the jump-off station where we were given a briefing of the tour and assigned a guide. There was already a Caucasian tourist there, and he joined our group. A line of parked rugged 4X4 off-road trucks stood fueled and ready to take adventurers to Mt. Pinatubo.

Souvenirs and refreshments were also sold at the jump-off point/staging area.

Mt. Pinatubo

Adventurers may also wish to explore and traverse the lahar field via ATVs (All Terrain Vehicles). You can rent an ATV at an affordable price.

Mt. Pinatubo

We chose an open-top 4X4 that would take us through the fields. Never mind the dust, heat, and wind; we want to take nice photos. And riding in an off-road trail in an open-top 4X4 seems to be a more “authentic” off-road trip.

That Australian guy is Paul, and he joined our team.

Mt. Pinatubo

Crossing the Lahar Field

Clinging to the side of the vehicle was Manong Rene, our guide. Manong Rene also worked as a barangay official; thus, he knows a lot about the place and the culture there.

Mt. Pinatubo

The first hour of this trip involved traversing a seemingly endless field of lahar. Lahar is a kind of mudflow that is made up of a thick mix of rock, sand, pyroclastic material, and water, which flows from a volcano. The flow may be generated by rain, glacial flows, or an existing river. Lahars are very destructive and can wipe out anything in their path.

According to our guide, the plain which we were traversing once contained the massive Clark Air Base.

Mt. Pinatubo

Early morning rains formed rivers in the lahar. It’s quite dangerous to cross here. 4X4s or some other powerful vehicles are needed to traverse the soft and wet ground.

Mt. Pinatubo

The huge lahar field stretches out for miles. It seemed like a desert of ash-laden sand, but we did saw remarkable features such as streams and ash walls as high as an average human.

Mt. Pinatubo

We stopped by for a minute to let our butts rest. Check out the lahar; the texture was like very coarse large grained sand.

That’s our open 4X4 Land Cruiser, a powerful and reliable monster.

Mt. Pinatubo

Tire marks from other 4X4s show the way to Mt. Pinatubo. But Manong Rene said that these tracks will be erased come rainy season, and the drivers will have to find a new way into the field.

Mt. Pinatubo

But not all is barren in this desert-like land. Many natives here, particularly the Aetas and other indigenous people, traverse the field. In fact, we found this fellow riding along a customized sled pulled by a carabao. Where are they going? We don’t know; this place is in the middle of nowhere.

Mt. Pinatubo

As we neared the edge of the plain, we began to see remnants of vast hills and mountains being cleaved off by the lahar. The ground became rocky and uneven due to the huge rocks carried by the mudflow.

Mt. Pinatubo

But not all were consumed by the devastating lahar flow. In fact, we could see immense cliffs nearby that were still covered by vegetation. It was quite weird to know that less than a mile away from that cliff is an entire plain that was swept away by a massive mudflow.

Mt. Pinatubo

Along the way, we also met these cute Aeta kids plying their trade early in the morning. Playful and mischievous, they tried to sell us a packet of bananas for P100!

Aetas are indigenous people who reside in the mountain ranges of Luzon. They are considered to be among the earliest settlers and inhabitants of the country. Relatively isolated from modern civilization, the Aetas have preserved their ways. We hope that one day, we’ll be able to experience a week or more of living in their mountain village.

Mt. Pinatubo

During a break before entering a canyon, we chanced upon these amazing remnants of Mother Nature’s fury. Check out the remnants of mountains behind us. Those were cleaved by the lahar’s powerful flow.

Mt. Pinatubo

Massive cliffs of sand and ash are continuously being reshaped by wind, rain, and mudflows. In a year, a significant part of this cliff will disappear due to erosion.

Mt. Pinatubo

These jagged cliffs look like they’re in an alien world. Years ago before Mt. Pinatubo’s eruption, they were part of the mountains that surround a river valley. Now these are all that’s left of those mountains, which are swept away by the powerful lahar.

Mt. Pinatubo

The end of the lahar field is marked by an immensely high wall of jagged cliffs formed by lahar. But somewhere in that wall is a pass that leads to the impressive—and dangerous—lahar canyon.

Mt. Pinatubo

Riding Through the Lahar Canyon

A canyon of destruction! A powerful, massive river of lahar once flowed here and carved this canyon. Lahar can flow tens of meters per second. The flow can range from ten meters to 140 meters in height. Looking at this canyon, it is not difficult to imagine how the lahar that resulted from Mt. Pinatubo’s eruption killed people, affected nature, destroyed infrastructure, and dented the national economy.

Mt. Pinatubo

In some areas, the cliffs have stopped eroding, and the soil has started to absorb the nutrients that the lahar brought with it. In these areas, vegetation has started to grow on the eroded cliffs.

Nature heals and finds a way.

Mt. Pinatubo

Several times, we had to ride through a fast-flowing stream. Manong Rene said that when it rains, these streams become mighty rivers that can easily sweep away vehicles, structures, and boulders in their way. In the lahar canyons, rains can quickly produce dangerous flash floods that can threaten everything here.

That’s why when it rains, a tour to Mt. Pinatubo is aborted. If the tour is already underway when the weather turns sour, guides and drivers quickly gather the participants and exit the lahar field as quickly as they can.

Mt. Pinatubo

Trekking to Mt. Pinatubo’s Crater

After almost 2 hours of negotiating the lahar field and canyons, we came to a place where our 4X4 can go no further. It was time to get down, pack up, and get ready for a 1-hour trek.

Mt. Pinatubo

We started the trek at around 8AM. Walking along the rock-strewn canyon bed was like walking back into the past. The place was very quiet, and the only sounds we heard were the rush of the river, the songs of birds, the whisper of the morning breeze, and the crunch of crystalized lahar beneath our feet. In this solemn place, we could imagine the might of the lahar flow, the panic that gripped the souls of residents, and the lamentations of people who lost their loved ones and livelihood during this historic natural catastrophe.

Mt. Pinatubo

At times, we crossed flowing streams of cool water. The clear streams may seem shallow and tranquil, but they become raging monsters during rainy or stormy season.

Mt. Pinatubo

Along the way, we found this Aeta boy building this attractive playhouse with rocks found at the canyon. It’s just amazing how rich imagination inspires these children— cut off from modern conveniences, computers, tablets, video games, and toys—to create something truly wonderful and fun. It reminded us of our childhood years when climbing trees, flying kites, crawling under the bushes, and running under the rain were the best ways to have fun.

Mt. Pinatubo

Sheds such as these are erected along the trail. They provide a welcoming rest area for hikers who need to take a break, hydrate, or grab something to eat.

Mt. Pinatubo

Tall walls of lahar loomed precariously on the canyon. A disturbance, even as simple as a loud shout, could cause the wall to erode and disintegrate, sending massive landslides of rock and ash. During our briefing, Ms. Sonia warned us not to shout or touch the walls because they may topple over.

Mt. Pinatubo

As we neared Mt. Pinatubo’s crater, we passed by a picturesque area filled with volcanic boulders. Also, check out the walls of the canyons; grass and bushes have started to grow. This is exactly Mother Nature’s healing process in action.

Mt. Pinatubo

Extreme heat and pressure imbedded quartz crystals on these volcanic rocks. The stones sparkle when the sun strikes the rocks at the right angle.

Mt. Pinatubo

Red water? No, not really. The color comes from the reddish volcanic rocks that form the stream bed. The water is not hot; it’s surprisingly cool to the touch.

Mt. Pinatubo

After an hour of trekking, we arrived at Mt. Pinatubo’s tree-bordered rest station where we enjoyed a short rest after walking under the increasingly hot morning sun.

A word of advice: beverages here are quite expensive. A bottle of water or a can of Coke costs P100, or four times the regular price. Better bring your own beverages.

Mt. Pinatubo

Of course, there’s that obligatory pose in front of a welcome sign! Hehe! We wanted to prove ourselves that we’re still at a “young age,” so we timed ourselves as we started the last leg of the trek.

Well, it took us 17 minutes. Guess we’re not as young as we believed we are.

Mt. Pinatubo

We started the short trek by walking along what appeared to be a stream that was almost drained with water. Along the way, we were treated to lovely vista of green hills, rich vegetation, and rocky trails and breathed cool, fresh mountain air that was a balm to our senses.

Mt. Pinatubo

The trail to Mt. Pinatubo’s crater has a lot of features: huge boulders of sedimentary and volcanic rocks, rushing streams of crystal clear water, and hidden paths inside light woods.

Mt. Pinatubo

At last, we reached the bottom of the stairs that leads to the crater. Sweetie kept teasing me, telling that we had to climb 1,000 steps to reach the summit. Damn, a final grueling climb?

Mt. Pinatubo

Thankfully, it was not. After climbing 25 to 30 steps, we saw Mt. Pinatubo’s welcome sign.

Mt. Pinatubo

Mt. Pinatubo’s Caldera and Crater Lake

A large, elevated part of the caldera now acts as a staging area/garden park for the guests. Stone walkways allow guests to comfortably stroll around the area. Simple roofed structure offer visitors shelter from the sun and rain.

As we walked along the paths, we saw a large cross that now serves as a monument to the hundreds of people who lost their lives during the volcano’s cataclysmic eruption last June 1991.

Mt. Pinatubo

At the back of the park where we came from, green hills form a protective wall around the crater lake, hiding Mt. Pinatubo’s beauty from the world.

Mt. Pinatubo

Words and even the photo below are not enough to describe the immeasurable beauty of Mt. Pinatubo’s caldera and crater lake. The tranquil view of this can best be described as out of this world. Seeing the entirety of the caldera, which is 2.5 kilometers in diameter, and the crater lake that the eruption left behind left us a deep sense of awe. We realized just how beautiful and terrifying Mother Nature is after looking at the caldera.

Mt. Pinatubo

Let’s go down to have a closer look at that aquamarine lake. Don’t worry if you’re a non-hiker; the way down is marked by a stone path.

Mt. Pinatubo

Natives and local guides built a number of these native bamboo-and-nipa cottages that serve as rest stations for hikers.

Mt. Pinatubo

Upon reaching the sandy shore, Sweetie checked out the water of Mt. Pinatubo’s crater lake; it’s not hot.

Water from monsoon rains filled up the caldera soon after the volcano’s eruption, eventually forming a crater lake now known as Lake Pinatubo. Lake Pinatubo is considered to be one of the deepest and most beautiful lakes in the Philippines.

At first, the water in the lake was hot and extremely acidic. In time, subsequent rainfall cooled down and diluted the lake.

Mt. Pinatubo

That is one of the walls that make up the caldera. The gradual erosion of the caldera caused by winds, rains, and other natural causes may lead to the ultimate collapse of one of the caldera’s walls. When that happens, Pinatubo Lake will drain out in a huge deluge and will be destroyed.

Mt. Pinatubo

For safety and to protect Mt. Pinatubo, please take heed of the rules written on the signs.

Mt. Pinatubo

A high cliff borders the shore. Although it appears mighty, it is actually made up of compact lahar. Anything can set it off crumbling on the ground: the rains, loud noise, or a careless bump. Thus, be vigilant of the surroundings and don’t do anything stupid.

Mt. Pinatubo

Several foreigners relaxed and enjoyed the vista of Mt. Pinatubo’s caldera. No, they didn’t swim even though the water is definitely inviting. Swimming or kayaking in the lake is now prohibited although they allowed these activities some years back.

Lake Pinatubo posed a threat to nearby residents last September 2001 when geologists discovered that the walls of the caldera were becoming unstable. If left unchecked, the wall could collapse, sending a deluge of mud of water. To remedy such a catastrophe, the government ordered workers to dig a 5-meter wide channel at the thinnest edge of the crater to initiate a controlled flooding.

The move was successful, draining one-fourth of the lake’s volume and averting a massive disaster.

Mt. Pinatubo

At 11:00 AM, we ate the packed lunch that Ms. Sonia provided. The nipa-and-bamboo cottages shielded us from the hot sun.

Mt. Pinatubo

Then, it was time to go back. Just check out those green, beautiful cliffs. They’re definitely mind-blowing!

Mt. Pinatubo

As we walked back towards the last parking area through the lahar canyon, we realized just how powerful Mother Nature can be as we stared at the lahar-eaten walls. It took just a few months to leave a huge swath of destruction such as this.

During bad weather, trekking in these canyons is strictly prohibited.

Mt. Pinatubo

See how unstable that wall of sand is? That’s why trekkers are advised to keep voices down. Loud voices could hasten erosion and can cause the walls to fall down, endangering anyone below them.

Mt. Pinatubo

That jagged wall of sand is the remnant of a once powerful mountain that was devoured by the lahar. Soon during the rainy season, this remnant may forever disappear from the face of the earth.

Mt. Pinatubo

After an hour of trekking, we finally reached the parking area where our driver patiently waited for us. We shot the photo below, then boarded the 4X4 quickly. Why quickly, you might wonder? Well, there was a thick, ominous, gray cloud approaching. You do know what happens to this place when it rains, right?

Mt. Pinatubo

On the way back to civilization, we discovered the streams which we crossed earlier that morning were getting stronger and deeper. That means, rain has started to fall somewhere.

Mt. Pinatubo

However, it was still quite warm and humid in the canyon. So much so that when we encountered this small herd of carabaos (water buffalos), they were almost fully submerged in the water, enjoying the liquid’s coolness. Of course, they moved out as we invaded their spa.

Mt. Pinatubo

Before long, we exited the canyon and entered the vast lahar field. Now, this was an unpleasant part of the trip. You see, the wind was blowing hard behind us. Thus, we didn’t have any protection from the dust, ash, and sand that was churned out by the vehicle’s wheels.

Now we know what it feels like inside a sandstorm!

Mt. Pinatubo

After an hour and a half, we were back at the jump-off point and enjoyed some glasses of ice-cold halo-halo while waiting for Ms. Sonia to pick us up. She then brought us back to her wonderful homestay where we can take a shower, pack our things up, and check out. Ms. Sonia is such a beautiful, wonderful guide and host.

Mt. Pinatubo

She didn’t just take care of us. Knowing that it’s Easter Sunday and people are now returning to Manila to get ready for Monday (thus the really heavy traffic), she drove us all the way from Tarlac to the NAIA 3 Terminal! Now, that’s what you call “going out of the way!”

Thank you so much for the warm hospitality and exceptional service, Ms. Sonia! Rest assured that we will avail of your services again for many of our upcoming Luzon adventures!

Mt. Pinatubo

Thank you to Sir Jigz Santiago and his partner, April Marcial, for accompanying us for this trip. We had so much fun together doing these adventures. Let’s do another one during our anniversary next year, shall we?

Mt. Pinatubo

Our Zambales escapade was a complete success and a truly fun adventure! Most importantly, we were able to do what we actually came for: a solemn, reflective visit to the mighty volcano that once utterly destroyed the land but is now reshaping it into something wonderful.

Suggested Itinerary

For the itinerary and budget of Day 1 and half of Day 2, click here.

Day 2
2:00 PM – ride Baguio-bound bus to Capas
5:30 PM – arrival at Capas in front of McDonalds, ride tricycle to Bognot Homestay
6:00 PM – arrival at Bognot homestay, check in, freshen up
7:00 PM – dinner, recharge gadgets, prepare pack for next day, socials
9:00 PM – lights off

Day 3
4:00 AM – wake up call, shower, final preparation
5:00 AM – breakfast
5:45 AM – depart for Mt. Pinatubo jump-off point
6:00 AM – arrival at jump-off point, briefing, choose 4X4, buy souvenirs
6:30 AM – depart for Mt. Pinatubo via the lahar fields and canyons
8:00 AM – arrival at final parking area, start trek
9:30 AM – arrival at the crater, relax, take photos
11:00 AM – exit crater, trek to parking area
12:30 PM – arrival at parking area, ride 4X4 back to jump-off point via the lahar field
2:00 PM – arrival at jump-off, wait for ride to homestay
2:30 PM – arrival at homestay, freshen up, prepare packs
3:30 PM – depart for Manila, transfers courtesy of Ms. Sonia
4:00 PM – stop by Capas National Shrine
4:30 PM – continue drive to Manila
8:00 PM – arrival at NAIA 3, check in
11:00 PM – depart for Cebu

Budget*

  • P 173 – bus fare (air-conditioned Victory Liner bus) from Olongapo City to Capas, Tarlac
  • P 125 – (P250 for 2 pax) tricycle fare from Capas to Bognot Homestay
  • P 2,150 – Pinatubo tour with the following inclusions:

- Meals (breakfast, lunch, snacks. Our dinner was complimentary)
- Van transfer Manila or Clark
- 4X4 vehicle (5 guests per vehicle)
- Local guide
- Tourism fees (entrance fee, registration fee, conservation fee, permit to trek)
- Aeta fee (P150 per pax)
- 1 night accommodation (P500 per person per night)

* Except where indicated, all prices are in a per-person basis. We did not include our expenses for extra meals, snacks, souvenirs, tips, and other fees in this rate sheet as you may have different needs, preferences, itineraries, and sharing scheme from us. We also indicated the Aeta fee and the rate for accommodation in case you want to go DIY. Note that all figures are subject to change without prior notice.

We have not included the bus rates from Capas to Manila because Ms. Sonia drove us all the way to the airport. Please research the bus rates in the Internet. Or, you may call Ms. Sonia Bognot (see below) for information and assistance.

Tips

1. For accommodations and tour arrangement, contact Ms. Sonia Bognot using the following contact details:

Ms. Bognot is a very accommodating host. She delivers excellent service at very affordable prices, considering that she’s also a backpacker and traveler. Make sure you ask for the terms and conditions and details of your tour. Reconfirm your arrangement a few days before schedule.

2. Be early at the bus terminal in Olongapo, Capas, and elsewhere. Every day, there are plenty of travelers, and bus tickets are sold out quickly.

3. To preserve the lahar fields, canyons, and Mt. Pinatubo itself, only a maximum of 400 guests are allowed to enter Mt. Pinatubo per day. That is why a reservation is recommended, especially during the peak season of October to June. Those with no reservation or arranged tour through an accredit organizer can still come but will be put on a wait-list basis.

4. A tour through the lahar fields, canyons, and Mt. Pinatubo is dependent on the weather and trail conditions. Thus, to ensure safety and security, a tour may be cancelled on the day of the trek itself even if the guests are already at the jump-off. In such an event, guests may reschedule their tour.

5. The lahar fields and canyons that lead to Mt. Pinatubo as well as the walls around the caldera are dangerous considering that the lahar has not yet stabilized. Thus, keep your voice down and avoid making loud noises; sound waves can be powerful enough to erode the lahar and trigger a landslide.

When trekking, do not touch and stay away from the lahar walls.

6. You can ask the driver or your guide to stop at certain points so you can take good photos.

7. Note that as of 2013, swimming is not allowed in the crater lake.

8. Expect a dusty and bumpy ride as you traverse the lahar field and canyons. You may want to cover your nose and face with a scarf to keep off the dust.

9. For a healthy person, the trek to Mt. Pinatubo is relatively easy. But for others, it may be a challenge. Assess yourself if you are fit enough to hike for around two hours in a hot, dusty, rocky environment. Note that your payment is not refunded should you discontinue or refuse to participate in the activity because you found hiking too exhaustive.

10. Buy your drinks or snacks beforehand. Those sold at Mt. Pinatubo’s rest station are simply too expensive.

11. Pack light but do bring the following:

  • water (at least 1 liter)
  • snacks
  • sunscreen/sunblock
  • scarf (to protect yourself from dust)
  • wide-brimmed hat
  • sunglasses
  • trekking pants
  • dry fit shirt or rashguard
  • trekking sandals or shoes
  • extra clothes
  • face towel
  • rain gear (in case of bad weather)
  • plastic bags (for waterproofing your clothes and gadgets)
  • first aid kit/prescription medication
  • camera and extra batteries

12. Practice and observe the Leave No Trace Principles of a responsible hiker. Keep Mt. Pinatubo pristine.


Poog Cliff: Jump-start a Love for Rock Climbing

$
0
0

Rock Climbing in Poog

Too often, we see this scenario: a group of excited and enthusiastic people show up at the crag in Cantabaco to try out the sport of rock climbing for the first time. Usually, guides set up the two classic 5.8 routes—Vulva and Hait—for them to try out. Heaving, huffing, puffing, and screaming, the first-timers make their way up the routes. We usually have this impression that they are very happy with the experience. At last, we often think, we have added a few more members in Cebu’s climbing community.

Alas, this is not a perfect world, and that is not always the case. Several observations later, it turned out many of these first-timers and novices found climbing the easiest routes in Cantabaco a very difficult endeavor. After falling from the route, having too many takes (i.e., rest stops and hanging on the rope), and failing to reach the anchor, many become disappointed at their failure and simply give up, never to return to Cantabaco again.

What we need, therefore, is to find, establish, and develop an easy sport climbing crag where the routes are easy enough so that most, if not everyone, can make it to the top. Raise an eyebrow for all we care, but psychologically, people get inspired to continue to do something if they have a positive first experience. In rock climbing, first-timers are more likely to pursue the sport if they successfully finished the route and reached the anchor during their first few climbs.

We found the perfect candidate cliff unexpectedly last May 10, 2014. And it gets better: the cliff is very accessible, very near the conveniences of modern civilization, and just a several minutes away from either Toledo or Lutopan.

Earlier during the week, Sweetie and I planned to climb our favorite routes in Cantabaco for the entire weekend. To make most of our time, we went to the crag early morning, around 7 AM, on May 10. As we got off from the habal-habal, we found local guides, fellow climbers, and friends Sir Enie and Sir Willard at the former’s store. After catching up on things, both guides invited us to join them for an exploratory trip to a cliff in the nearby barangay of Poog.

This was definitely unplanned! Excited for an unexpected new adventure, Sweetie and I readily abandoned our morning climb to go with them. After all, it was an opportunity for us to discover and promote a potential rock climbing site.

After fetching fellow climbers and friends Ascamion Coimbra and his partner Gretchen, we rode motorcycles to Poog, which is around 20 minutes from Lutopan.

Rock Climbing in Poog

Ascamion and Gretchen forgot something, so they had to go back to Cantabaco. While waiting for them, we took a cold and refreshing Coke break at one of the humble stores located at the Upper Poog-Toledo Highway junction.

Rock Climbing in Poog

After a couple of minutes, Ascamion and Gretchen arrived. We entered the cemented road that leads to Upper Poog and to the crag.

If you don’t have a private vehicle or motorcycle, don’t worry. There are plenty of habal-habal drivers who can take you to Upper Poog.

Rock Climbing in Poog

After 5 minutes, we rode on an unfinished, relatively rough road, which also meant that the crag was near. In fact, we saw its top jutting up the road. The pangs of excitement began to take a bite.

Rock Climbing in Poog

We disembarked from our motorcycles when we reached this nice house. That path beside the house led directly to the crag.

As responsible climbers and guests, we asked permission from the homeowners to climb their crag.

Rock Climbing in Poog

After taking a quick group shot, we hiked down the dirt trail towards the crag. It took only 5 minutes of hiking through a large coconut grove when the beautiful crag suddenly emerged right in front of us.

Rock Climbing in Poog

Wow! Just check out that gorgeous rock behind us! Don’t be fooled into thinking that the rock face in the photo isn’t large. That’s just forced perspective. That rock face is immense as you will soon see.

What’s more, there are lots of shady and flat grassy areas where you can pitch a tent or lay out a picnic mat.

Rock Climbing in Poog

The photo below shows the right side of the cliff. Gorgeous, isn’t it? Judging by its length, the entire cliff can probably accommodate 30 to 40 sport climbing routes.

Rock Climbing in Poog

Except for two bolted routes which we spotted when we entered the belay area, the cliff is not bolted. Ascamion and Enie silently surveyed the cliff for a possible route.

The presence of the bolted routes meant that this crag was an abandoned project. Hopefully, we can revive it.

Rock Climbing in Poog

A Little Bit of Caving

We noticed a dark opening at the cliff. When the children who accompanied us to the cliff told us that there is a cavern inside the crag, Willard, Gretchen, Sweetie, and I decided to explore the cave. Wow, this is a mini-adventure!

Rock Climbing in Poog

While we carefully made our way inside, the children told us that the folks in the community took refuge in the cave when Typhoon Yolanda struck. Also, by judging at the massive amount of graffiti scribbled on the walls, it is obvious that this cave is not just a bunker. It is a dwelling, a hangout, a lovers’ lane, or a secret venue for doing things that the public is not meant to know.

Rock Climbing in Poog

There were several nooks, crannies, and holes where we had to get on all fours or on our bellies to access. The act of crawling and wriggling like a worm added to the fun and excitement.

Suddenly, we remembered our first date, an adventure-filled caving experience in Campo Siete.

Rock Climbing in Poog

Despite the massive amount of vandalism, large sections of the cave still featured marvelous rock formations, flowstones, and stalagmites that are untouched. We hope that someday, we can give locals a lecture regarding the importance of preserving natural, delicate features such as these.

Rock Climbing in Poog

The cave’s main chamber has a ceiling that is so high that we can’t actually see the top. Human incursion must have driven the original inhabitants in this cave, probably some species of bats and birds.

Rock Climbing in Poog

On our way down, we stopped by a large opening in the cliff. We called this spot The Terrace, and it offered a nice view of farmlands and woodlands in the surrounding area. We could also see the gigantic Atlas Mining quarry in the distance.

Being several feet off the ground, the Terrace is a perfect vantage point for photographers who want to take good photos or videos of climbers in action without having to secure themselves around an anchor.

Rock Climbing in Poog

Below the Terrace, Ascamion and Enie set up some equipment in preparation for a climb.

Rock Climbing in Poog

Climbing the Crag

Willard had fun with some local kids who were curious as to what we’re doing here. Apparently, the presence of sweaty, ripped guys and pretty, sexy girls hauling ropes and wicked-looking equipment and climbing a high cliff is virtually unheard of here.

Rock Climbing in Poog

It was time to climb with Ascamion leading the way and with Enie as his belayer. Since the cliff is not bolted, we had to ascend it via trad climbing. Trad climbing is a rock climbing style in which a climber places cams, hexes, slings, and other gear that are needed to protect against falls. After the climb, all pieces of gear are removed.

Rock Climbing in Poog

Compare trad climbing to sport climbing (our style of climbing) in which all protection and anchor points are drilled and permanently installed on the route. Ascamion is the only one in our team with trad climbing experience and equipment, so he placed all the pros (protection) for the subsequent climbers.

Rock Climbing in Poog

While Ascamion climbed, the rest of the team took a relaxing break from caving at the belay area. Check out those cool, shy kids.

Rock Climbing in Poog

After several minutes, Ascamion finally reached an ideal point where he can place an anchor. That point is around 70 feet from the ground.

See that cavern way below Ascamion? The one with a patch of green? That’s The Terrace that we mentioned a while ago.

Rock Climbing in Poog

The super rock climbing team of Ascamion and Enie! Ascamion is a prolific and passionate Italian climber who has a lot of outdoor experience under his belt. He is into mountaineering, rock climbing, scuba diving, and more! A true blue adventurer indeed!

Enie, of course, is an experienced rock climbing guide in Cantabaco.

Rock Climbing in Poog

Then it was Sweetie’s turn to climb the route. Because it was our first time to do trad climbing, Ascamion advised us to climb the route top rope rather than leading it for safety reasons.

Rock Climbing in Poog

Go, Sweetie, go! Take a close look at the rock face in the photo below. You can see that there are lots of large handholds, footholds, and ledges, which makes climbing the route quite easy.

This is actually the kind of rock face that we are looking for, a rock face that is accessible, conducive, friendly, and relatively easy to ascend for first-timers and novice climbers.

Rock Climbing in Poog

That’s the belay area, which is rather small and narrow for a large crag and long crag. Also, there was an unpleasant and unmistakable waft of excrement in the air.

No worries though. When we get the go-signal from the property owners to develop the crag, we can ask and pay a few locals to clean the place and clear out the vegetation to expand the belay area.

Also, check out Sweetie; she’s got limestone dust all over her. The presence of limestone dust (product of natural erosion) means that this part of the cliff hasn’t been—or rarely—climbed before.

Rock Climbing in Poog

Then it was my turn to climb. The photo below shows just how high and large this cliff is. I’m miniscule compared to the size of that rock face.

Rock Climbing in Poog

We set up the route at the left side of the cliff. The right side is even more immense; the photo below shows just a tiny part of that side of the cliff. Also, check out the rock face. They’re full of holes, cracks, and slabs, which possibly make them easy and fun to climb.

A large, vegetation-covered crevice divides the two sides of the crag. Judging from its natural features, there may be a natural rock trail way inside the crevice so one can scramble all the way to the top of the cliff.

Rock Climbing in Poog

If I were to rate this route, which I feel is easier than the two easiest routes in Cantabaco, Hait and Vulva (both 5.8 in the YDS scale), it would be around 5.7. Thus, first-timers and novices who feel that climbing Hait and Vulva is still quite a challenge, then this crag is for them.

Hmmm…just blurting out the vain side of me: check out my back muscles! Hehehe! That’s the result of climbing.

Rock Climbing in Poog

After a few minutes, I reached the anchor and let out a whoop of triumph. In fact, I was beaming all the way down to the belay area.

Rock Climbing in Poog

Enie wanted a bit of a challenge so he lead climbed the route. Willard was his belayer.

Rock Climbing in Poog

Easy peasy for Enie! For hardcore, advanced rock climbers who prefer and are always on the hunt for the most challenging crags, you may find the Poog cliff a disappointment. However, you can always climb these rock faces to practice, build up endurance, or simply to have a break from all those tough crimpers, monos, pinches, and slopers.

Rock Climbing in Poog

Go, go, go, Enie! By the way, the two bolted, established routes are on the leftmost side of the crag. According to Sir Wendell Bagdhok, a professional Cebuano climber who was a member of the team that bolted the two routes, both routes are rated 5.11a. Hmmm…something that we want to chew on.

We couldn’t see the anchors of both routes from the belay station, so we did not risk climbing them. We need more information from the original team who bolted the routes.

Rock Climbing in Poog

Willard went inside the large crevice to check if there is a way to scramble up to the top without the use of ropes.

Rock Climbing in Poog

After everyone had their fill of climbing, Ascamion climbed up the route again to retrieve the protection gear. Again, he’s the only one who knows how to do this considering he’s the only one in the team who has trad climbing experiences.

We left the anchor in place for subsequent climbs.

Rock Climbing in Poog

On our way back to Cantabaco, we went to a nice vantage point in Media Once (a nearby barangay) where we saw a nice view of the Poog cliff. The cliff where we climbed is at the center right of the photo below.

As you can see, Toledo, Cebu has a huge potential in becoming a rock climbing destination in the Philippines.

Rock Climbing in Poog

We left Poog by noontime, had lunch on our way to Cantabaco, and worked on our Area 5 projects the entire afternoon.

Rock Climbing in Poog

Thank you so much, Enie, Willard, Ascamion, and Gretchen for inviting us to this exploration climb. At last, we found a crag that can truly inspire others to try out and enjoy the exciting sport of rock climbing. You have our full support in developing this crag. Let us begin!

Rock Climbing in Poog

Support Our Project, The Poog Crag Development

Hi bloggers, readers, followers, and friends! As part of our effort to make Cebu a world-class rock climbing destination, we are planning to bolt the Poog cliff for sport climbing. However, bolting rock climbing routes is quite a complicated matter in this part of the world, particularly because 1) it is expensive and 2) there are no suppliers of hangers and bolts here.

Help us promote sports tourism in Toledo as well as the sport of rock climbing. If you would like to help us in this endeavor, you can donate expansion bolts and hangers. 10 such bolts and hangers and 2 rappel hangers are needed to establish a single route. And as far as we know, the cliff can accommodate around 40 routes.

Check this link for information about climbing hangers and bolts. Photos of bolts, hangers, and rappel hangers (anchors at the top of the route) can be seen at the right side of the page.

In return for your generosity, we will name the bolted routes after you (or you can provide us any word, term, phrase, or name that you want).

Our coaches have specific parameters in mind. So please send us a message so we can give you the specs of what we need. Thank you.

Budget Per Person*

  • P 50 – non-aircon bus fare Cebu South Bus Terminal to Upper Poog-Toledo Highway crossing
  • P 10 – habal-habal fare from Upper Poog-Toledo Highway crossing to Upper Poog
  • P 10 – habal-habal fare from Upper Poog to Upper Poog-Toledo Highway crossing
  • P 50 – non-aircon bus fare from Upper Poog-Toledo Highway crossing to Cebu South Bus Terminal
  • P 100 – v-hire fare from Citilink Terminal to Upper Poog-Toledo Highway crossing. If you’re lucky, you can hail a V-hire coming from Toledo at the crossing. But most likely, V-hires passing by the crossing will be full. You need to ride a habal-habal or a bus that goes all the way to Toledo City. From Toledo, ride a v-hire that goes to the Citilink Terminal.
  • Guide fee – please negotiate with the local guides

* We did not include our expenses for meals, snacks, tips, and other fees in this rate sheet as you may have different needs, preferences, itineraries, miscellaneous transportation, and sharing scheme from us. Note that all figures are subject to change without prior notice.

Tips

1. Poog Cliff is very accessible. Take a Toledo-bound bus at the Cebu City South Bus Terminal. Ask the conductor to drop you off at the Upper Poog-Toledo Highway crossing at the left side of the highway. Your landmark is a sari-sari store called Rosita’s Store. Disembark from the bus, and take a habal-habal to Upper Poog.

You can see the cliff when you reach the unfinished part of the road. Get off at the gray, concrete house by the road.

2. Alternatively, you can take a V-hire at the Citilink Terminal in Cebu City rather than the bus. Once you get to the Poog crossing, follow the directions above.

3. Make sure you ask permission from the property custodian before climbing the cliff. The custodian resides in that grey, two-story concrete house beside the trail that leads to Poog cliff.

4. The Poog cliff is not yet developed for sport climbing save for two 5.11 bolted routes, which was installed by the original discoverers of the crag. Thus, for the moment, trad climbing is required to send the crag. Unfortunately, trad climbing is virtually non-existent here in Cebu.

If you really want to climb the crag, contact Cantabaco guides Enie Yonson (0948-7124875) or Willard Elimino (0947-9220289) so they can refer you to Ascamion Coimbra. In our circle of climber friends, only Ascamion has the experience and gear for trad climbing.

5. Ascamion is not a guide, but it is only prudent to give him some sort of honorarium for setting up the route for you. Negotiate the honorarium with Ascamion.

6. For trad climbers, bring a variety of cams and hexes. Also, you may want to bring several slings; the cliff has plenty of huecos (local guides call them through-and-throughs), holes that allow you to girth hitch a sling.

7. Bring your own rock climbing shoes, harness, and other equipment. If you don’t have them, you can rent equipment from the Cantabaco guides at affordable rates.

8. For your lunch and snacks, you can buy your food before heading to the cliff. There are a lot of stores and eateries nearby where you can buy your meals and drinks. It is quite exhausting if you have to go back down from the crag to buy lunch.

Or you can do it the way we did: we climbed the cliff in the morning then we returned to Cantabaco after lunch. We ate our lunch on the way to Cantabaco. You can eat your lunch at the carenderias at the Upper Poog-Toledo Highway crossing.

9. Unless you have a private vehicle, it is best to exit the crag early in the afternoon (around 3 PM) and head to the highway. This is especially true on Sundays. It will be difficult to catch a ride late in the afternoon because people from Toledo who are going back to the city to prepare for the work week will fill up buses and v-hires to the brim.

10. Together with the Cantabaco climbing team, we are making plans to develop the Poog cliff into a sport climbing crag. However, know that this may take quite some time as there are property issues, permits, negotiations, logistics, finance, and other aspects that need to be resolved and worked out before we can drill.

In the meantime, you can support this project by donating bolts, hangers, slings, and ropes. Please read the “Support Our Project, The Poog Crag Development” section above.

IMPORTANT NOTE:

Just because the photos look cool and fun does not mean that you can take climbing lightly. Climbing is inherently DANGEROUS! Every time you climb, your life and the life of your partner hang in the balance. There are only three things that will happen in climbing: you succeed, you get seriously injured, or you die. Your safety depends on you and SOLELY on you! Thus before you go out there, it is vitally important that you get some basic training on climbing principles, techniques, and safety first.

Visit a local indoor climbing gym to practice for a few sessions before heading out to the big rock wall. You should also get training from professional guides. Although blogs (including ours), books, tutorial videos, and articles could be a good source of information, you should find a certified climbing instructor to properly coach you through the sport. We got our training from Cantabaco’s guides and climbing instructors, and even if then, we’re still learning. Let us be clear on one thing: we are NOT climbing instructors.


Gear Review: Mammut Tusk superDRY 9.8mm x 70m Dry Rope

$
0
0

Mammut Tusk Superdry Dry Rope

When you’re hundreds of feet up a rock, hanging precariously on your fingertips while stepping on an almost non-existent ledge, you would definitely need to put all your trust on two things. One, your belayer whom you put your life literally on his or her hands; and two, your safety equipment, which can prevent a life-threatening fall. And among the most essential climbing equipment you need to ensure that you live to see another morning is your rope.

Your rock climbing rope is your lifeline. Thus, it needs to be of superior quality; you wouldn’t want to entrust your life to an old frayed rope with doubtful quality, do you?

I got mine from my Dad, a fine, handsome chap who is very supportive of my endeavors. Knowing that I utilized the local guide’s heavily used ropes for my climbs, he figured out that he still wants to see his precious son alive. So he bought me a superb, high quality, branded Mammut Tusk superDRY dry rope.

With a 9.8 mm diameter, the single, dynamic, UIAA approved rope is lightweight, which is ideal for long climbs and approaches. Its kernmantle design features a high-tech shock-absorbent core that is covered by a strong, waterproof double-braded sheath, enabling the rope to resist an impact force of around 8.8 kilonewtons. Both core and sheath are protected by a patented superDRY treatment, which protects the rope from water and dirt. Its length of 70 meters is longer than most standard climbing ropes, enabling me to climb up or rappel down extended routes. The Mammut Tusk stretches 30 percent during a lead fall.

Although we use available ropes at the crag, the Mammut Tusk has been our mainstay. It feeds very easily in the belay device and has a really great, slightly stiff feel on how it clips to a quickdraw. Rapelling is easy and smooth due to the ease of how it feeds in a figure-8 or an ATC. Furthermore, with an extra 10 meters of length, we don’t have to worry too much about running out of rope.

Mammut Tusk Superdry Dry Rope

The sheath is so well woven that it hasn’t showed any sign of fraying even if we’re using it almost every weekend. It does get splotches of mud and dust every now and then, but a quick wipe with a damp cloth can easily remove the gunk.

The Mammut Tusk does have a couple of minor drawbacks. First, only a short black bar indicates the middle mark, which is difficult to see against the dark blue sheath. I wish Mammut used a light-colored middle marker or a different sheath pattern to indicate the other half of the rope. Second, it often twists and coils the first few times we’ve used it, making it a nightmare to feed through the belay device. Thankfully, the twists disappeared after continued use.

Mammut Tusk Superdry Dry Rope

Despite these minor drawbacks, the Mammut Tusk is a great climbing rope. We are extremely pleased with it; and its exceptional quality, durability, strength, and handling more than offsets its relatively high price.


Puerto Princesa, Palawan: A Return to Love, Adventure, Serenity, and Nostalgia

$
0
0

Puerto Princesa Adventure

Love is sweeter the second time around! No, don’t get us wrong. We didn’t fight, break up, and reconciled. Rather, Sheila and I have been in this amazing relationship for two years! Yes, two years of love, inspiration, travel, and adventure, and we’re still going strong. In concordance with our love for each other, we wanted to celebrate our second year together by doing something nostalgic and special.

We decided to return to where we celebrated our first year together, in the paradise island of Palawan. This time, however, we decided to let other friends join in our anniversary adventure. With us were lovely Alexa; the Duders Kristine, Lilian, and Muffins; the mountaineer sisters Agnes, Sam, and Reynen; and the sweet family Kei, Zaldy, and Eli.

Except for us, it was their first time to set foot in Puerto Princesa, and they were utterly excited. But the real adventure—and our real 2nd year anniversary celebration—is 238 kilometers north of Puerto Princesa. Yes, we celebrated our 2nd year anniversary in the municipality of El Nido.

Our excitement for this trip had a tight grip on us since the night before. So much so that we woke up really early even though our flight was still scheduled at noontime! Thus, Sweetie, Alexa, and I were at the airport a little before 9AM. We were there before the check-in counters opened! Duders Kristine, Lilian, and Muffins arrived at around 10AM. In no time at all, we boarded the Cebu Pacific aircraft that would take us to Puerto Princesa.

Puerto Princesa Adventure

For Sweetie and I, it was such a nostalgic feeling when the aircraft reached its cruising altitude. The one-hour flight suddenly brought pleasant memories of our first anniversary last year. After all, we celebrated the first year of our relationship in beautiful Puerto Princesa.

For Alexa, it was an exhilarating, wondrous experience. You see, it was her first time to actually see cottony clouds and the clear, blue sky in daylight! True, she has been flying with us a couple of times, but we always flew at night or early morning. During those times, she couldn’t see anything outside but darkness.

Puerto Princesa Adventure

We arrived at the Puerto Princesa airport 15 minutes ahead of schedule. Thus, we had to wait for a little while for our booked van to pick us up.

Puerto Princesa Adventure

Victoria Guest House and Cottages

It only took around 10 minutes from the airport to reach the humble but very cozy Victoria Guest House and Cottages, our home for the next couple of nights. Victoria Guest House and Cottages is an affordable bed-and-breakfast that does not only offer excellent accommodations but also acts as a tour agency, assisting guests in their Palawan tours and adventures.

Puerto Princesa Victoria Guest House and Cottages

Warmth, friendliness, hospitality, and tradition all in one place! The entrance to Victoria Guest House featured gardens, native materials, and traditional paraphernalia such as tribal masks, clay jars, and gongs.

Puerto Princesa Victoria Guest House and Cottages

As soon as we entered the premises, we were given cold, refreshing mango juice as welcome drinks. This was a pleasant surprise—and an indicator of an excellent start. In all our trips, we have never experienced being given welcome drinks in a bed-and-breakfast.

Puerto Princesa Victoria Guest House and Cottages

A neatly arranged footpath led the way to our rooms and other areas of the bed-and-breakfast. Rock gardens, shells, potted plants, wooden furniture, and structures made of native materials all add to a homey, classic, friendly Filipino atmosphere.

Puerto Princesa Victoria Guest House and Cottages

The open-air lobby was made to make guests feel the comfort and warmth of a traditional Filipino home. While waiting for our keys to our assigned rooms, Sweetie enjoyed swinging on a rattan hammock.

Puerto Princesa Victoria Guest House and Cottages

Aside from the friendly dog which roams freely around, Victoria Guest House also keeps some resident pets. They have a handsome black Mynah who can utter greetings and a magnificent serpent eagle who glares at passers-by balefully. Personally, though, we would have wanted these beautiful creatures out in the wild, not in cages.

Puerto Princesa Victoria Guest House and Cottages

After a little while, the staff showed us our rooms. The rooms were very traditional although they do have modern conveniences such as air-conditioning units and showers. Don’t you just want to lie down on that soft bed and forget the world?

Puerto Princesa Victoria Guest House and Cottages

Don’t worry if you need to accommodate a group. Victoria Guest House has rooms large enough to accommodate 6 people. These rooms have the same cozy, traditional ambiance as the smaller ones.

Puerto Princesa Victoria Guest House and Cottages

The open-air kitchen is clean and well-equipped. Being open air, we can clearly see how our food was prepared. The nice thing about this was that we could actually see and smell what was cooking. The delicious sights and smells made our tummies rumble even more.

Needless to say, food enthusiasts, budding chefs, and culinary students will have a heyday here.

Puerto Princesa Victoria Guest House and Cottages

Lunch was worth the one-hour wait. We had a sumptuous seafood lunch consisting of huge bowls of Tinolang manok and sweet-and-sour fish. After we took our lunch, we started our Puerto Princesa city tour, which served as a warm-up for the coming activities.

Puerto Princesa Victoria Guest House and Cottages

Palawan Wildlife Rescue and Conservation Center

Our first stop was the Palawan Wildlife Rescue and Conservation Center. For Alexa and the rest of our friends, this was quite an exciting stop because it would be their first time watching real live crocodiles.

Palawan Wildlife Rescue and Conservation Center

The last time we visited the center, we didn’t have the opportunity to show our dear readers a photo that shows how large and how long Rio is. Now, you can see just how massive Rio the crocodile is; just compare the size of that skeleton to our three lovely friends Agnes, Sam, and Reynen.

Palawan Wildlife Rescue and Conservation Center

These juvenile crocodiles were vicious! A few seconds after this photo was taken, that nearest croc with the open mouth suddenly attacked the fiberglass wall of its pen. It scared the wits out of me! The bite force of a crocodile, even a young one, is so strong that it can sever your fingers easily.

Palawan Wildlife Rescue and Conservation Center

These huge, dangerous crocodiles basked lazily in the afternoon sun. They keep their mouths open to cool off.

Palawan Wildlife Rescue and Conservation Center

We were quite fortunate that Mac-mac, the largest living saltwater crocodile in the facility, showed up. “Large” doesn’t even describe how enormous he is! Truly, he ranks among the largest crocodiles in the world.

Palawan Wildlife Rescue and Conservation Center

After we had enough of the crocodile pens, the ladies stopped by the souvenir stalls to see if there is something interesting to buy. We love the crocodile stuffed toys, but they were quite expensive given our limited budget. Oh well.

Palawan Wildlife Rescue and Conservation Center

Rancho Santa Monica and Baker’s Hill

By mid-afternoon, tummies started to growl despite the full, hearty lunch. Thus, we decided to go to the quaint and lovely Baker’s Hill to grab a bite to eat. Before that, however, we stopped at Rancho Santa Monica to enjoy a view of gorgeous Honda Bay and quaint Puerto Princesa City.

Rancho Santa Monica and Baker's Hill

The house/ranch of the late senator Ramon Mitra was simple but elegant in design. We weren’t allowed to go in still.

Rancho Santa Monica and Baker's Hill

When Senator Mitra was alive, he was a huge fan of horses. The Mitra family carried that tradition of his love past his death. Thus, it is no surprise that many horses roam freely here. A beautiful rainbow arched across the sky when we visited Rancho Santa Monica. It certainly was a good omen, don’t you think?

Rancho Santa Monica and Baker's Hill

We spent only a quarter of an hour in the Ranch before our tummies really complained. Well, it was time to have some hot merienda in magical Baker’s Hill. The verdant landscaped gardens, statues of favorite cartoon characters, brick pathways, and expertly sculpted topiaries coupled with the fragrant scent of freshly baked bread never fail to bring back the child in us. Just like our visit last year, we were transported to a fairy-tale world.

Rancho Santa Monica and Baker's Hill

Merienda time in the middle of a playground! Alexa and Eli quickly finished their snacks so that they can try out the slides, swings, and seesaws.

Rancho Santa Monica and Baker's Hill

There’s LOVE in the air! We didn’t visit this particular “attraction” the last time we came here.

Rancho Santa Monica and Baker's Hill

One of the coolest things in Baker’s Hill is that they have several of these cartoon-inspired playhouses where kids can play freely. We visited Shrek’s domicile. Fiona didn’t seem too happy that she had visitors in her clay/log home. Hehehe!

Rancho Santa Monica and Baker's Hill

Baker’s Hill’s resident peacock spread his tail in all its splendor! For many of our friends, it was their first time to see a peacock. Every time the creature rustles and spreads its tail, our friends let out a whoop of delight! Awesome!

Rancho Santa Monica and Baker's Hill

A visit to Baker’s Hill isn’t complete without buying some of their mouthwatering crinkles, hopias, breads, cakes, and other baked delights.

Rancho Santa Monica and Baker's Hill

When we got back to the city center, Alexa and the other fellows asked to stop by a souvenir shop to purchase some items. Alexa was giddy with excitement; she saved money for an entire year for this trip. In the end, she got more than a thousand pesos of pocket money! Way to go, Alexa!

She bought herself and her best friend a few bling-blings. She felt proud to have bought something coming from her own savings.

Rancho Santa Monica and Baker's Hill

The Baywalk and Plaza Cuartel

As late afternoon approached, we headed to the city’s Baywalk, a popular esplanade where locals go to relax, watch the sunset, and grab a bite to eat. There were plenty of people milling around.

Puerto Princesa Baywalk and Plaza Cuartel

Everyone enjoyed the peace and relaxed atmosphere. However, we weren’t able to see a glorious sunset due to the thick gray clouds that gathered quickly at the horizon. We would have wanted to let our friends witness the glory of Puerto Princesa’s sunset, just like the last time we visited here.

Puerto Princesa Baywalk and Plaza Cuartel

Here’s something you don’t see every day…unless you’re in Puerto Princesa. The Duders ordered sorbetes (Filipino ice cream made of purple yam and cheese) in a hamburger bun. Lilian said it was delicious!

Puerto Princesa Baywalk and Plaza Cuartel

Our last stop for the day was Plaza Cuartel, a historic place in Palawan where a number of American and Filipino soldiers were brutally executed by Japanese troops during World War 2.

Puerto Princesa Baywalk and Plaza Cuartel

Aside from the reverence and the solemnity, the Plaza is a cool place to hang out and to escape the din of the city. It’s a place where students congregate, where lovers whisper sweet nothings, and where veterans pay their respects to fallen comrades.

Puerto Princesa Baywalk and Plaza Cuartel

At around 6:30 PM, we went back to the guest house, hot, sweaty, and tired but completely satisfied with the tour. After everyone had a short rest, the staff served us a tasty, hearty dinner.

Puerto Princesa Baywalk and Plaza Cuartel

Puerto Princesa Underground River

We woke up early the next day at around 5:30 AM to have a quick breakfast. Even though eyes drooped and tired limbs gently screamed for us to crawl back into the covers, everyone was filled with excitement. It was the start of the real adventure, which begins with a visit to the eerie and majestic Puerto Princesa Underground River, one of the most well-known UNESCO Heritage Sites and one of the New 7 Natural Wonders of the World.

After more than an hour’s drive toward the town of Sabang, we took a break at a popular stopover. Check out the name of this stopover. Quite a tongue-twister, isn’t it?

Puerto Princesa Underground River

Fresh buko for an after-breakfast snack! There’s nothing more energizing than drinking the sweet juice and eating the soft meat of a fresh, young coconut.

Puerto Princesa Underground River

We arrived at Sabang around 8:00 AM. Even at this early, there were already plenty of people. In fact, we needed to wait more than an hour to board our boat that will take us to the Puerto Princesa Subterranean River National Park at the other side of Sabang Bay.

Puerto Princesa Underground River

Like guardians watching over the denizens of a clear, green sea, the towering limestone cliffs and secret beaches of Sabang Bay never fail to hold us spellbound.

Puerto Princesa Underground River

After a 30-minute ride, we reached the beautiful, white-sand Sabang Beach and the entrance to the National Park. Swimming is not allowed here because this is a marine protected area. The waters do look tempting.

Puerto Princesa Underground River

While waiting for our turn to enter the cave, I left the group for a little while to check out the other side of the waiting area. I witnessed a beautiful white-sand estuary that opens up to the waters of the West Philippine Sea. This estuary is very rich in marine life.

Puerto Princesa Underground River

A park ranger whom I talked to said that it rained hard in Sabang the night before. Rainwater carried sediments from the mountain and deposited it into the sanctuary, making the water brown and murky. The last time Sweetie and I visited the PPUR, the water in the estuary was aquamarine green.

Puerto Princesa Underground River

After a short walk through the lightly wooded jungle and a short wait at the edge of the lagoon, we were ushered to a rowboat that will take us inside the cave itself.

Puerto Princesa Underground River

All set, ready, and full of excitement!

Puerto Princesa Underground River

A strong push from the park rangers and the boat smoothly glided towards the leviathan entrance of the cave.

Puerto Princesa Underground River

Entering the PPUR was like entering an alien world. Squeaks from thousands of bats, the calls of thousands of swiftlets, and the sound of dripping water from stalactites all form a strange cacophony of otherworldly music.

Puerto Princesa Underground River

Those dark spots are actually bats hanging upside down from that gigantic slab of rock. The streaks are their waste, called guano. Guano is used for many things such as fertilizers, lawn treatments, fungicides, and composting activators.

Puerto Princesa Underground River

Stalagmites, stalactites, flow stones, and other amazing rock formations abound. Many of those rock formations are huge!

Puerto Princesa Underground River

The guys and gals listened intently to the guide and rower as he blurted out interesting facts about the PPUR. It was actually fun listening to the guides as they mix amazing facts with wisecracking jokes.

If you’re the lazy type of person, don’t sit up front of the boat. That’s because the people sitting up front hold the floodlight.

Puerto Princesa Underground River

Sometimes, these nature-sculpted flow stones resemble vegetables, fruits, animals, people, and everyday objects.

Puerto Princesa Underground River

After an hour in darkness, we exited the PPUR and welcomed the warm, bright daylight. When we asked them how was the tour, everyone answered that they were simply amazed beyond words. No wonder they were very quiet inside the cave during the entire tour! Hehehe!

Puerto Princesa Underground River

Happy faces! Congratulations, guys! You just visited one of the official New 7 Wonders of Nature!

Puerto Princesa Underground River

Near noon, we boarded back our outrigger boat to take us back to the port of Sabang. Along the way, everyone kept quiet to enjoy the picturesque, serene, wonderful view of the bay.

Puerto Princesa Underground River

Hungry? Don’t worry! A standard Puerto Princesa Underground River tour also includes a buffet lunch. The food was not really spectacular, but who are we to complain? It was an eat-all-you-can lunch! After long waits, short treks, and riding the waves, we were definitely starving!

Puerto Princesa Underground River

After a hearty lunch, we dared everyone to eat tamilok, which is considered to be a fear factor food. Apparently, they were not afraid because everyone dug in without hesitation! Everyone agreed that the tamilok tastes okay, and Alexa even wanted seconds!

Puerto Princesa Underground River

We stopped by Elephant Cave before going back to Puerto Princesa City. Little did we know that just a few months after we visited here, the place became part of a leg in The Amazing Race Philippines Edition.

Due to the lack of time, we weren’t able to visit Ugong Rock. We would have wanted our friends to experience the fastest zipline in the country!

Elephant Cave

The first and second days in Palawan were totally exciting and fun! But that was just a teaser. The real adventure, the “meat” of this trip, was our fascinating tour around the gorgeous islands of El Nido. Stay tuned for our El Nido adventure!

Tips

1. You can book accommodations at Victoria Guest House and Cottages. Look for Ma’am Mylene to assist you. Get in touch with them using the following details:

  • Mailing address: WESCOM Sea Road, Barangay San Pedro, Puerto Pricesa City, Philippines 5300
  • Landline: +63 (48) 723-2312 / +63 (48) 433-8054
  • Cellphone Number: 0917-7576739 / 0928-7814757 / 0917-5440549
  • Email: victoria.house98@yahoo.com
  • Facebook Page: Victoria Guest House and Cottages

You can also ask Ma’am Mylene to arrange your Puerto Princesa City Tour and PPUR Tour. She can also arrange an El Nido tour.

2. You can also visit Victoria Farms and Eco Jungle Cottages at Maoyon River courtesy of Victorian Guest House and Cottages.

Victoria Farms and Eco Jungle

3. For more detailed information about each destination in our city tour, click this Puerto Princesa City Tour tab link. Click on a city attraction that interests you, and scroll down to the Tips section of each post for more information about that attraction.

4. For more detailed information about the Puerto Princesa Underground River tour, click Part 1 and Part 2 of our previous Puerto Princesa Subterranean River National Park tour. Scroll down to the Tips Section of each post for important information.


El Nido, Palawan Island Hopping Adventure – Tour C: Of Nature’s Secrets and Art

$
0
0

Tour C El Nido Palawan Island Hopping

Mother Nature is an extraordinarily skilled sculptor, an artist that no human can hope to match. She paints skies with dazzling colors and whittles away immense cave systems to form strange cathedrals. Her tools—the wind, sun, rain, river systems—all work in seamless strokes to create masterpieces that enchant even the most unimaginative individual. And we, as Filipinos, are fortunate that we have one of these masterpieces right in our very own country.

After our warm-up tour around Punta Princesa, it was time to head to the main event and the real celebration of Team Sweetie’s 2nd year anniversary, an island hopping adventure around the archipelago of Bacuit Bay in El Nido, Palawan. El Nido, a first class municipality in Palawan 238 miles away from Puerto Princesa, is dubbed by CNNGo as the Best Beach and Island Destination in the country. The place is known for its extraordinary natural beauty, amazing geological formations, and its rich ecosystem.

We woke up at 1AM and were on the road 30 minutes later. It was actually the earliest time we ever traveled, so most of us were still in dreamland. You see, El Nido is a 5-hour drive from Puerto Princesa; and to start the island hopping adventure at 8AM as per our itinerary, we need to be in El Nido early.

At around 5:30AM, we reached the bus terminal in the northern municipality of Taytay where we ate a hot breakfast courtesy of Victoria Guest House and Cottages. The filling breakfast and steaming coffee shook off the drowsiness in us.

Tour C El Nido Palawan Island Hopping

After breakfast, we were on the road again. This time though, with the drowsiness drowned in coffee, we were able to appreciate the lovely countryside views around us.

El Nido was still more than an hour away, and we traveled over miles of alternating asphalted roads and dirt roads.

Tour C El Nido Palawan Island Hopping

A little over an hour, our guide ate Helen suddenly blurted out, “We’re here!” Indeed, from the coastal road, we could see the gorgeous Bacuit Bay where the magnificent limestone islands of El Nido are nestled.

Tour C El Nido Palawan Island Hopping

As natural, protective walls, these limestone cliffs form an imposing border on the east side of the El Nido Poblacion. These limestone cliffs are breathtakingly immense and are perfect venues for rock climbing.

Tour C El Nido Palawan Island Hopping

At around 7AM, we arrived at the newly opened Arkitel Bed and Breakfast, which was our designated accommodation. It was a really humble, homey, friendly place, guarded by a cute Shih Tzu named Bullet. The B&B also has a nice terrace where guests can relax, have a drink, and chat while lazily watching the world go by on the street below. We left our packs in our respective rooms and hurriedly headed out to the beach, which was just a 5-minute walk from Arkitel.

Tour C El Nido Palawan Island Hopping

A gorgeous crescent public beach of fine sand bordered by high limestone cliffs welcomed us as we emerged from an alley. Having breakfast here would be awesome! Also, the sea was so calm and so inviting that I simply jumped into the water.

Tour C El Nido Palawan Island Hopping

Sweetie and Alexa, along with the others, enjoyed the view of Bacuit Bay while waiting for our assigned boat. It was still quite early; island hopping trips usually start at 9AM. We were at the beach around 8AM.

Tour C El Nido Palawan Island Hopping

After awhile, ate Helen called us. It was time to board our assigned boat. Everyone was pretty excited to get this island hopping adventure going.

Tour C El Nido Palawan Island Hopping

As we cast off, our guide Gilbert explained our itinerary, schedule, the destinations we are about to visit, and safety rules. We’ve been to many island hopping adventures before, but this was actually the first time we experienced having a comprehensive briefing. That is actually a good practice.

Tour C El Nido Palawan Island Hopping

On our way to our first destination, we passed by Cadlao Island. At 10.06 square kilometers, it is the largest island in the Bacuit Bay archipelago and the closest to the mainland. Its karst limestone peak, with a height of 640 meters above sea level, is also the highest in the bay’s islands. Cadlao Island has white-sand shores, hidden lagoons, coral-crusted reefs, mysterious caves, lush forests, and towering cliffs. Many tour operators in El Nido actually provide special packages for adventures within Cadlao Island.

Tour C El Nido Palawan Island Hopping

Those are just some of the 45 lush and lovely islands and islets within Bacuit Bay. Each of these islands has its unique features, characteristics, and geological formations. Millions of years ago, these islands were all underwater.

Tour C El Nido Palawan Island Hopping

Helicopter Island

Our first destination of the day was a popular yet secluded getaway called Helicopter Island, named so because it looks like a helicopter when viewed from the east. Check out the photo below; does it resemble a helicopter to you?

Tour C El Nido Palawan Island Hopping

The smooth and relaxing boat ride to Helicopter Island took a little over 15 minutes. When we got there, everyone excitedly dug in their feet in the fine, golden sand. We would love to wake up, have breakfast, and simply enjoy life in a beach like this!

Tour C El Nido Palawan Island Hopping

The “tail” of Helicopter Island comprises of this enormous limestone cliff. Yes, you know what we’re thinking: what a perfect venue for rock climbing! Problem is, there’s no belay area. Similar cliffs in the islands are home to swifts, gulls, bats, and other marine birds.

Tour C El Nido Palawan Island Hopping

After getting our masks, we ventured out into Helicopter Island’s snorkeling area, which was safely cordoned off with buoys.

Tour C El Nido Palawan Island Hopping

El Nido has some of the best snorkeling areas in the Philippines, and Helicopter Island’s reef definitely proves this. Just 10 to 15 yards from the shore, we were treated to an extraordinary display of beautiful, virgin corals.

Tour C El Nido Palawan Island Hopping

Just look at that incalculably rich variety of corals! And to think that this coral forest is just less than 10 feet below us! Compare that to the Kontiki dive site; the coral-rich areas are 30 feet or more below sea level.

Tour C El Nido Palawan Island Hopping

Hidden Beach

After we had enough of snorkeling, we cruised to our next destination, a place called Hidden Beach. On the way, we passed by this interesting island, which appears like the hump of a monstrous whale.

As a Star Wars fan, though, it looks like the wreck of a Rebel troop transport.

Tour C El Nido Palawan Island Hopping

Beyond that “Rebel troop transport” was a large island where hidden beach is located. Do you know where it is? Island hopping guides usually quiz their guests about the location of Hidden Beach.

Clue: it’s not in that immense cave.

Tour C El Nido Palawan Island Hopping

It’s actually a little bit to the side of the cave, its narrow channel hidden by a forest of rock outcroppings. No wonder it is called Hidden Beach; you can’t see it head-on.

Shhh! Don’t tell anyone we told you where it is.

Tour C El Nido Palawan Island Hopping

Between the sharp rock outcroppings is the boat entrance to Hidden Beach. Well, we had the option to take that entrance. However, we wanted to visit Hidden Beach via a more unique entrance.

Tour C El Nido Palawan Island Hopping

That unique entrance is a small hole that Mother Nature carved out of the side of a cliff. According to the guide, this hole is covered with water during high tide. Be careful and watch your head as you enter the hole.

Tour C El Nido Palawan Island Hopping

At the other side of the hole is a very tranquil white-sand beach protected by soaring limestone cliffs that were formed by erosion. This place truly deserves its name! Those boats docked on the shore entered Hidden Beach via the narrow channel.

Tour C El Nido Palawan Island Hopping

See that crevice carved from that wall of rock? That’s where we came from.

Tour C El Nido Palawan Island Hopping

We frolicked in the clear, clean water of Hidden Beach, which was surprisingly warm. We felt safe, secure, and loved after seeing those razor-sharp cliffs embracing the lagoon.

Tour C El Nido Palawan Island Hopping

We would have wanted to stay for an hour or so in the Hidden Beach. However, we had to go back to the boat after half an hour since we still have lots of destinations to cover. Going back to the boat is easy; we only had to wade (or swim) through that cliff-bordered channel.

Tour C El Nido Palawan Island Hopping

Secret Beach

Our next destination was almost 45 minutes away from Hidden Beach. Along the way, we quietly admired the beauty of Bacuit Bay. Aside from the magnificent karst cliffs of the island, Bacuit Bay also teems with marine life. Under the water surface is a rich alien world kingdom of graceful manta rays, massive dugongs, numerous species of fish, vast coral reefs, and rare sea turtles.

According to the guide, Gilbert, there are more than 30 dive sites in Bacuit Bay, which range from 15 feet to more than 100 feet in depth.

Tour C El Nido Palawan Island Hopping

Rough limestone cliffs make up most of the geography of the islands in Bacuit Bay. However, many of these islands have short strips of beaches that are carpeted with immaculate, white, fine sand. Many of these beaches are turned into first-class resorts or inhabited by local fishermen.

Tour C El Nido Palawan Island Hopping

Finally, we reached . . . a limestone wall? Where’s the beach? The only indication that there was something going on in there was a fleet of outrigger boats docked right in front of the wall.

Tour C El Nido Palawan Island Hopping

As we got closer, we finally saw what the fuzz was all about. It was a small hole naturally carved from that immense sea cliff. To access Secret Beach, we need to swim through that hole.

Tour C El Nido Palawan Island Hopping

The water leading to the hole was quite deep, around 20 to 30 feet. Furthermore, a relatively strong current pushed us towards the hole. Donning a life jacket, even if you’re a strong swimmer, is recommended for safety.

Tour C El Nido Palawan Island Hopping

The hole that we saw at the surface was just the proverbial tip of the iceberg. The rest of the hole, which was submerged, looked definitely both foreboding and awesome underwater.

Tour C El Nido Palawan Island Hopping

Upon reaching the other side of the hole, we were treated to a hidden paradise that was so perfect it was utterly otherworldly in its beauty. Towering, razor-sharp cliffs conceal a lagoon with liquid that is so clear that it can’t merely be seawater!

The beauty of Secret Beach inspired Alex Garland to write his famous novel The Beach, who was, at that time, vacationing in El Nido. The Beach was later made into a movie which starred the famous heartthrob Leonardo de Caprio.

Tour C El Nido Palawan Island Hopping

The other side of Secret Beach is a small sandy beach dotted with rock outcroppings. Even though it was close to noon, the air inside this secluded lagoon was quite chilly. Air that was cooled by the sea is trapped within the walls of the lagoon.

Tour C El Nido Palawan Island Hopping

See how clear the water is? That huge rock looks like it’s just a foot or two under the water’s surface. In reality, that rock rests around 6 to 10 feet underwater!

After we had our fill playing in the lagoon, it was time to get back to the boat. And—-our tummies were grumbling.

Tour C El Nido Palawan Island Hopping

Star Beach

Just 10 minutes away from Secret Beach, we reached a small, secluded area of white sand nestled between two large rock outcroppings. We have reached the simple yet pretty Star Beach. This is where guides and boatmen usually take their guests to have lunch.

Tour C El Nido Palawan Island Hopping

Ate Helen, Guide Gilbert, and our boatmen wasted no time in preparing a sumptuous meal for us. Now, this was truly one of the highlights in our El Nido trip. Our lunch was truly an unexpected surprise. You’ll see why in awhile.

Tour C El Nido Palawan Island Hopping

Ahh, this is definitely the life! While waiting for lunch, we chatted, laughed, and relaxed.

Tour C El Nido Palawan Island Hopping

Lunch took longer to prepare than expected, so Sweetie, Alexa, and I decided to explore the kantil that was just a few yards away from the shore. Check out those awesome limestone cliffs in the background.

Tour C El Nido Palawan Island Hopping

According to guide Gilbert, Star Beach is officially NOT a snorkeling site. But it should be! Just check out that rich coral field at the edge of the kantil.

Tour C El Nido Palawan Island Hopping

All kinds of corals, fish, and other organisms make Star Beach’s “in-house” reef incredibly vibrant. We actually saw the mantle of a live clam imbedded in a rock. This was the first time I’ve ever seen a clam in the wild since I was 8 years old.

Tour C El Nido Palawan Island Hopping

After an hour, ate Helen announced that lunch is ready. Lunch was an understatement! They prepared a feast! Delicious, mouthwatering boiled crabs, grilled fish, grilled pork belly, eggplant and tomatoes, mangoes with bagoong, biko (glutinous rice cooked in sugar and coconut milk), and fruits were all displayed on our picnic table with culinary splendor.

Just check out that vegetable salad at the right side of the photo! It comes complete with a swan carved out of a cucumber!

Tour C El Nido Palawan Island Hopping

After a short prayer, it was time to attack the table Pinoy picnic style! Everyone stopped talking and laughing and concentrated intensely on devouring the sumptuous gastronomic wonders laid before us.

We were so full that we actually felt drowsy! We call this phenomenon “Sakit sa Baboy,” or “Pig Syndrome.” hehe!

Tour C El Nido Palawan Island Hopping

Matinloc Shrine

After letting the food settle in, we cruised to our next destination just 15 minutes away, a place called Matinloc Shrine, an abandoned pilgrimage site.

Tour C El Nido Palawan Island Hopping

Although abandoned and completely neglected, tourists are still allowed to visit the shrine. Thus, a concrete pier was provided for boats to dock.

Tour C El Nido Palawan Island Hopping

Matinloc Shrine, formally known as the Shrine of Our Lady of Matinloc, was inaugurated and blessed on May 1993. To date, many locals still travel to this abandoned shrine to honor the Lady.

There is also an abandoned villa beside the shrine. Owned by a religious local named Jablon Fernandez, the villa was supposed to be a lodging facility for pilgrims. Apparently, it was abandoned before it could even house the first pilgrims.

Tour C El Nido Palawan Island Hopping

There is a small “museum” which shows the history of Matinloc Shrine. It’s kind of strange that there’s a museum in this isolated, remote island.

Inside the museum are photos and newspaper clippings that explain the history of Matinloc Shrine, how it was built, and the miracles that supposedly occurred in the area after the shrine was constructed.

Tour C El Nido Palawan Island Hopping

For us, the best part of the island is the viewing deck which provides us an all encompassing view of the Matinloc channel. To reach it, we had to climb several steps that were carved into the rock.

Climbing the rock steps is relatively safe, but you still need to be careful since the rocks are quite sharp and the sides are quite steep.

Tour C El Nido Palawan Island Hopping

After a couple of minutes or so, we reached the viewing deck, which is bordered by sharp, towering limestone rock faces. The rock face is climbable due to its sharp ledges and eroded holes, but that would be at the climber’s own risk.

Tour C El Nido Palawan Island Hopping

Wow! Just look at that awe-inspiring view of the Matinloc channel! And we just scratched the surface! Underneath that aquamarine water is another alien world full of wonders seen only by a few.

Tour C El Nido Palawan Island Hopping

Then it was time to visit amazing beaches!


El Nido, Palawan Island Hopping Adventure – Tour D: The Souls of Tranquil Shores

$
0
0

El Nido Palawan Island Hopping Tour D

The Philippines is world-renown for its endless array of stunning beaches that can be considered among the best in the world. And when we say endless, we definitely mean it! The combined coastline of our country’s 7,100-plus islands stretches to more than 36,280 miles, making our coastline the 5th longest in the world! Within that coastline are numerous beaches, each with its own life, beauty, and soul. During our El Nido trip, we were given the privilege to see some of the best and the most unique beaches in the country.

After visiting some hidden paradises, we were ready to visit the next set of amazing destinations. We headed back out to Bacuit Bay and cruised alongside the many islands that dot the bay.

El Nido Palawan Island Hopping Tour D

Not all land masses in Bacuit Bay are large islands. Indeed, we found plenty of imposing rock outcroppings such as these which jut out of the blue sea. It’s pretty amazing to know that these rocks were once submerged in water.

Today, marine birds, bats, snakes, lizards, and other creatures make these rock outcroppings their homes.

El Nido Palawan Island Hopping Tour D

Cadlao Lagoon

After half an hour of cruising across Bacuit Bay, the boat slowed down, which meant that we were near our first destination, a magical place called Cadlao Lagoon. Nestled in the middle of those rock outcroppings is the lagoon itself.

El Nido Palawan Island Hopping Tour D

We gasped in awe as we slowly entered Cadlao lagoon. The place is simply enchanting! Just check out that extremely clear water. Or is it simply seawater? It’s more like liquid crystal! We could actually make out individual corals, rocks, seaweeds, and fish due to the clarity!

El Nido Palawan Island Hopping Tour D

The water here is actually brackish. That means fresh water from a spring in the island flows out to the lagoon to mix with salty seawater.

That cute nipa hut on the beach is a station and shelter for Bantay Dagat personnel who constantly keep watch over the protected Cadlao Lagoon and the surrounding areas.

El Nido Palawan Island Hopping Tour D

Even though we didn’t get off the boat at the enchanting Cadlao Lagoon, we were quite happy to simply see its beauty and cruise around it.

Just check out those awesome ragged rocks!

El Nido Palawan Island Hopping Tour D

Pasandigan Beach

As we cruised to our next destination, we chanced upon islands with gigantic, soaring, glorious cliffs. Those cliffs must soar hundreds of feet up in the air!

Rock climbers would really have a heyday trying to ascend these monoliths. Unfortunately, the local government of El Nido prohibits climbers to set up routes in any of the cliffs. Sigh! We can just drool over them.

El Nido Palawan Island Hopping Tour D

After awhile, we slowed down in front of this stunning white-sand beach with a gigantic limestone wall looming over it like a watchful guardian. We have arrived at the Pasandigan Beach, a place that is not just a popular rest stop but also a treasure trove of secrets.

El Nido Palawan Island Hopping Tour D

Just look at that ultra-clear water! This part of Pasandigan Beach is perfect for snorkeling.

After the sea wind dried our skin and left rough, salty residue on it, everyone was ready to take a dip.

El Nido Palawan Island Hopping Tour D

What a lovely combination of coconut groves, sand, sea, and cliffs! As one of our readers said, “Nature heals.” It really does. When we visited the Pasandigan Beach, we could feel our stress being washed away by the gentle waves.

If those cliffs were bolted, rock climbers like us would have loved to stay here for several days while we try to onsight, flash, or redpoint the routes.

El Nido Palawan Island Hopping Tour D

Seeing the adventurous side in me, Guide Gilbert led me to a well-kept secret in the island. For me, it was a privilege; he doesn’t usually show this secret to his guests. That’s because this secret is only accessible by swimming 50 or so meters in deep water then entering a small cavern.

Needless to say, getting to this secret is potentially dangerous.

El Nido Palawan Island Hopping Tour D

We emerged on the other side of the hole, deep inside a limestone cliff. We walked in shin-deep water until we reached a trench of deep water. See that dark area at the center of the photograph? Imagine the monsters that lurk beneath the surface.

El Nido Palawan Island Hopping Tour D

Farther down the cave, we swam along this “river” of crystal clear, cold water. Although it’s quite dark here, the white-sand bottom of the trench reflected an eerie, lowing greenish light.

The muted drone of the sea sounds very strange here as if it was the raspy breath of a giant.

El Nido Palawan Island Hopping Tour D

At last, we arrived at the heart of this secret place, the bottom of what looks like a sinkhole. The gentle afternoon sunlight flowing into the hole made the place glow in an ethereal light.

Gilbert also explained that when it rains, this hole turns into a nice waterfall! Cool!

El Nido Palawan Island Hopping Tour D

After spending around 15 minutes in the cavern, it was time to go back. Yes, that’s where we came from. That hole leads to the open sea.

El Nido Palawan Island Hopping Tour D

Paradise Beach

We spent another half an hour in Pasandigan Beach before we headed out to another destination. On the way, we specifically told the boatman to cruise close to the islands. We can never get enough of those magnificent cliffs.

This one has a very nice, very large overhang.

El Nido Palawan Island Hopping Tour D

Hi, guys! Are you enjoying El Nido? We met these Caucasians kayaking in the waters of Bacuit Bay. They were as enchanted with the beauty of the island as we were!

El Nido Palawan Island Hopping Tour D

In less than half an hour, we reached another white-sand beach called Paradise Beach. Instead of cliffs like in Pasandigan Beach, Paradise Beach is bordered by thick trees.

It was at this moment when our trusty waterproof camera started to have problems; it started to fog.

El Nido Palawan Island Hopping Tour D

‘What a lovely nook!’, we exclaimed as the boat slowed down to dock at Paradise Beach. Look at how clear the water is. Look at how virgin the forest is. It’s name, Paradise Beach, is indeed fitting!

El Nido Palawan Island Hopping Tour D

Swimming time! Well, at this time, half of the group was quite exhausted. The kids went frolicking in the water, while some of the adults simply sat down on the fine, powdery sand and enjoyed the view of Bacuit Bay.

El Nido Palawan Island Hopping Tour D

Our kind of paradise! Yeah! If we would have a billion pesos, we’d buy this paradise and live here forever. Hehehehe!

El Nido Palawan Island Hopping Tour D

Sweetie enjoyed the warm water and the tranquil view while contemplating on how honored and lucky we were to have set foot in one of the most enthralling places on Earth.

Sorry for the blurry photo; our camera’s fog became worse, :(

El Nido Palawan Island Hopping Tour D

Natnat Beach

After an hour, it was time to head back home to Poblacion, El Nido. On the way, we passed by Natnat Beach, supposedly another destination included in Tour D. With low, overhanging limestone cliffs that border the beach, we think that this would be one heck of a bouldering paradise.

Unfortunately, we were not able to stop at Natnat Beach since it was already 4PM by the time we departed from Paradise Beach. Island hopping tours were not allowed to go beyond 5PM for safety reasons.

El Nido Palawan Island Hopping Tour D

Poblacion, El Nido

45 minutes later, we finally reached the Poblacion. Everyone was dying for a cool, freshwater shower and a change of clothes!

Now, dear reader, we want you to focus your attention on the highest point in the photo. Yes, that monolithic rock behind the structure with the red roof. That’s Taraw Cliff, and we vowed to climb it the next day!

El Nido Palawan Island Hopping Tour D

While waiting for the others to finish rinsing off, we relaxed at Arkitel’s terrace and watched El Nido go by—without the coffee, of course. Check out the streets; they’re very narrow!

We were simply captivated with the laid-back, rustic lifestyle of the Poblacion. True, there are plenty of tourists loitering around; it’s a popular resort town anyway. However, the presence of plenty of tourists, hotels, and other tourism-related service providers did not mar the pastoral, simple, and peaceful atmosphere of the town.

If you want to experience some peace and quiet while being spellbound at the beauty of Mother Nature, then El Nido is the perfect holiday destination for you!

El Nido Palawan Island Hopping Tour D

After Sweetie and I finished showering, we headed to the beachfront to watch the sunset. As a resort town, it is not surprising that an eclectic array of bars, café’s, restaurants, hotels, karaoke joints, and shops line up El Nido’s crescent shaped beach front.

While this place is vibrant during the day, it becomes alive at night as tourists enjoy parties, videoke sessions, beach dates, and other nightlife activities.

El Nido Palawan Island Hopping Tour D

A few minutes later, the sun said goodbye for the day. But before she slept, she let out a fiery yawn that bathed the land in an orange, ethereal glow.

It was this moment when Sweetie and I realized that as travelers and adventurers, we were offered rare privileges in seeing magical events like these.

El Nido Palawan Island Hopping Tour D

Since Sweetie and I virtually do not have a nightlife, we turned in early to prepare for a nice adventure and early morning exercise the next day, an ascent to the summit of Taraw Peak. See you at the summit!


Scrambling Up the Ragged Taraw Peak: Morning Exercise in Mother Nature’s Gym

$
0
0

Taraw Peak El Nido

“Mag exercise tayo tuwing umaga, tuwing umaga, tuwing umaga” (Let’s exercise in the morning) so goes the popular Filipino novelty song. Indeed, doing exercises in the morning can definitely energize you. That fresh energy helps you get going all through the day. And we all know the awesome benefits of regular exercise: a fit body, perfect metabolism, resistance to ailments, positive disposition in life, and many others.

So what’s your morning exercise? Jogging, running, brisk walking, calisthenics, or marital arts? In our daily lives, Sheila and I wake up early and go to the gym to lift weights. But if we have a lovely cliff or a lofty mountain right in our backyard, you can bet that climbing it will be our regular morning exercise!

When we learned that El Nido has a limestone monolith right in the vicinity of the poblacion, we immediately knew that our dream of climbing a huge rock as a morning exercise will finally come true! The imposing million-year-old limestone monolith looms over the poblacion, and we saw it as Mother Nature’s gym. We simply just have to climb it.

So, we invited the Amor sisters and fellow climbers Agnes, Sam, and Reynen with us on this adventure—and morning exercise. Being adrenaline junkies like us, they enthusiastically agreed.

See that gigantic monolith we circled in red? That is Taraw Peak, one of the highest points in El Nido. When we made our itinerary many months ago, we made sure to include climbing this peak in our adventure.

Taraw Peak El Nido

Here’s another view of the mighty limestone monolith from street level. Wow, that’s one high climb, don’t you think? Most probably, it towers more than a hundred meters. It’s difficult to imagine that this monolith and the surrounding crags were all beneath the sea’s surface millions of years ago.

Climbing Taraw Peak was a welcome, physically engaging activity during our island hopping tour in which we simply sat down in the boat, swam in cool waters, and basked in the sun.

Taraw Peak El Nido

We started our climb very early on Day 2 of our El Nido sojourn. Our guide, a young local who introduced himself as DJ, met us in Arkitel. Around 5:30AM, we reached the base of the monolith after winding through the narrow alleys of the rural community, most of it still fast asleep.

Taraw Peak El Nido

Along the way, we had to skirt through a stagnant pool of water. This way is a little bit tricky as the rocks are slippery; just one slip and you’ll fall through that dirty water.

Taraw Peak El Nido

As we went deeper into the rock-filled jungle, the barely recognizable trail started to go steeply up. We had to be careful because the rocks were sharp, mossy, and wet from the morning dew.

Taraw Peak El Nido

We reached this little nook where someone constructed a bench made of tree branches. Perhaps this is a resting place for woodcutters who frequent the area or for tourists like us who wish to go up the summit of Taraw Peak. We rested here for a bit; it was a welcome rest as our feet were getting sore from balancing over the sharp rocks.

Our guide, DJ, is the cool guy wearing a white and orange shirt.

Taraw Peak El Nido

After 5 minutes, we scrambled up the trail again. Check out the steepness of that trail.

Taraw Peak El Nido

If jogging, cycling, doing aerobics, and yoga are other people’s morning exercises, climbing is ours! Oh, if only there was a climbing venue (e.g., a crag, a mountain, or a monolith) in our backyard . . .

As you may have noticed, I was wearing a headlamp. That’s because we climbed the area before sunrise.

Taraw Peak El Nido

One of the highlights of this adventure was climbing one of the two vertical cliffs along the trail. Yes, vertical! 90 degrees of pure adrenaline-pumping climb! But don’t worry. Although the idea of climbing vertically seemed terrifying, we found the climb enjoyable and easy since there were plenty of handholds and footholds to secure us.

Check out those ladies’ happy faces. I took the shot from the top to show you just how steep this wall is.

Taraw Peak El Nido

Once everyone got over the vertical wall, we scrambled up another set of huge boulders. Although the rocky trail was steeper, it was relatively easy to navigate it after the gentle light of dawn started to penetrate the forest canopy, making it easier for us to see the path.

Taraw Peak El Nido

Just a few minutes after the boulder-filled terrain, we tackled the second highlight of the trail, an even taller 90-degree wall which we have to climb! Whew!

Taraw Peak El Nido

Happy, excited—and pretty climbers! Trekking on wild trails and scrambling vertical cliffs like these and perhaps coupled with a bit of technical rock climbing are our idea of tropical mountaineering.

Taraw Peak El Nido

Tall, ragged, gray limestone walls like these indicate that we were nearing the summit.

Taraw Peak El Nido

Whew! Let’s rest for awhile, shall we? Check out the photo below: can you see how sharp these rocks are? Climbers had to be really careful here to avoid injuries.

Also, behind and beside that rock outcropping where the Amor sisters were posing is a sheer drop of more than a hundred feet!

Taraw Peak El Nido

Our resting area has a “hole” in the canopy where we glimpsed a view of Bacuit Bay and Cadlao Island.

Taraw Peak El Nido

Not all sections of the trail were ascending, thank heavens. At times, we scrambled down a relatively comfortable descent although we still had to be careful with our steps.

Taraw Peak El Nido

Too soon, it was another steep ascent on sharp rocks, fallen trees, and jutting roots. No worries though because DJ said we were almost at the summit.

Taraw Peak El Nido

Almost there! But we still need to be careful and not let our excitement get the better of us. The rocks here were extremely sharp, and there were crevices that were several feet deep.

Taraw Peak El Nido

Then suddenly, seemingly without even a subtle hint, we were at the top of El Nido! We looked at our watches; it took us almost an hour to reach the glorious summit of Taraw Peak!

Taraw Peak El Nido

That’s the southwestern view of the crag-filled town. The way to the summit where we came from lay behind those jagged rocks.

Taraw Peak El Nido

What a splendid view of the azure Bacuit Bay! Indeed, our sweat, cuts, tired feet, and scrapes were all worth it!

Taraw Peak El Nido

Agnes, Sam, and Reynen let out a huge whoop of delight upon seeing the one-of-a-kind beauty of the bay and upon reaching the top of El Nido. Special congratulations to Reynen; this was her first time to scramble up a monolith.

Taraw Peak El Nido

That’s the southwestern side of El Nido. If you check out the lower center of the photo, you would see a white ferry docked at El Nido’s pier. Although El Nido is remote, there are a number of ferries servicing routes from Manila, Busuanga, Coron, and Sabang.

From this vantage point, verdant Cadlao Island and a few islands behind it are very prominent.

Taraw Peak El Nido

Be careful, Sweetie! From this point, you can just see how small the summit area is. Around those jagged rocks are very treacherous drops that are hundreds of feet deep.

Moving around on the summit area is quite safe; there are plenty of handholds and footholds. However, it pays to take extra care. After all, showing your utmost respect for Mother Nature almost always ensures your survival and your pleasant experience in enjoying her wonders.

Taraw Peak El Nido

Enjoying the view, Sweetie? The entirety of the charming El Nido Poblacion can be witnessed here. This was taken around 6:30 AM, and the sleepy town was still waking up. Here and there, we could hear the drone of motorcycles revving up. We could smell the fragrant, mouthwatering scent of a hot breakfast being prepared.

Taraw Peak El Nido

After half an hour at the summit, we started our descent; we need to be back in Arkitel at around 8AM to prepare for our next island hopping tour.

Yes, we know what you’re thinking after seeing the photo below. Really scary, isn’t it? Indeed, it is!

Taraw Peak El Nido

Getting down the vertical wall was much more challenging than ascending it!

Taraw Peak El Nido

It was definitely an adrenaline-quaking adventure even as we negotiated the last sections of the trail!

Taraw Peak El Nido

Thank you very much, Agnes, Sam, and Reynen for joining us. Congratulations, Reynen, for your first successful scrambling adventure. And thank you too to our wonderful and friendly guide DJ who safely showed us the way up the mighty Taraw Peak.

Indeed, climbing Taraw Peak was a one-of-a-kind experience. Not only did we engage in a healthy, energizing, and ideal morning exercise but we also had the privilege to witness sleepy El Nido and the surrounding magnificent Bacuit Bay from a place that is nearer to the clouds.

Taraw Peak El Nido

Tips to follow


El Nido, Palawan Island Hopping Adventure – Tour A: Poetry of the Sea

$
0
0

El Nido Palawan Island Hopping Tour A

By now, we all know that Mother Nature has wonders that defy imagination. In many cases, the word “beautiful” does not even cut close to the actual adjective that describes her wonders. The best photos and the most eloquent poems often don’t do justice to the magnificence of such places.

However, Mother Nature does not wait for anyone. Silently and unobtrusively, she strides forward. And with each stride, her wonders disappear little by little through erosion, earthquakes, flooding, man-made causes, and others. In time, these wonders may disappear off the face of the Earth.

That’s why while we’re still alive, we strive to keep on her heels. If that’s a bit too metaphorical, let’s say this in a simple way: we grab every opportunity to travel so we can experience her wonders before they (or we) disappear! That’s one of the reasons we wanted to tick off El Nido in our bucketlist.

After descending Taraw Peak, we ate a heavy but quick breakfast, changed into our rashguards and swimsuits, and headed towards El Nido’s beach to wait for our boat. The water was so inviting that I immediately dove in!

The fine-sand shore not only serves as a picturesque beachfront for restaurants and accommodation establishments but also for numerous dive shops that offer scuba diving adventures around the marine-rich underwater world of Bacuit Bay.

El Nido Palawan Island Hopping Tour A

We boarded our boat 30 minutes past 8AM and headed to our first destination of Tour A. Unlike the morning before which was a bit cloudy, the weather this time was really sunny and nice! The colors of Bacuit Bay came to life.

El Nido Palawan Island Hopping Tour A

Small Lagoon

Our first destination for the day was a mysterious, beautiful place called Small Lagoon. On our way, we were mesmerized at the sight of many of the islands’ imposing sea cliffs. Just check how small the boat is in the photo below.

El Nido Palawan Island Hopping Tour A

After half an hour of cruising, we arrived and cast anchor in this extremely majestic lagoon surrounded by high, ragged limestone cliffs. Look at just how clear and clean the water is. It’s like liquid glass!

Is this Small Lagoon? No, it’s not. It’s simply the “parking area” for boats loaded with tourists who want to visit Small Lagoon.

El Nido Palawan Island Hopping Tour A

Behind those wall of razor-sharp rocks is the enchanting Small Lagoon, one of the highlights of El Nido. Again, check out the clear water; the pure white sand below gives the water its characteristic light green color.

El Nido Palawan Island Hopping Tour A

To get to the Small Lagoon, people need to swim through this small hole that Mother Nature carved in the rock wall.

El Nido Palawan Island Hopping Tour A

Unfortunately, our trusty Nikon AW100 waterproof camera started to develop problems. The lens fogged heavily, but unlike in the past in which the haze dissipated in a few minutes, the fog didn’t disappear this time.

To make matters worse, Sweetie and I were the only ones who brought a waterproof camera (a foggy one, that is) inside the Small Lagoon. Sadly, we don’t have a clear photo of the place. Below is the clearest foggy photo we have of Small Lagoon.

But you know? This might be a way of telling you that you should go there to witness its beauty yourself. After all, in all our adventures, no photo of ours can compare with the real thing, place, or adventure.

El Nido Palawan Island Hopping Tour A

Big Lagoon

Disappointed that our waterproof camera conked out on us (good thing though we brought a backup camera), we left Small Lagoon with heavy hearts. You have to understand how we felt; that camera, which was given by someone very dear and special to us, is the lifeblood of Adrenaline Romance.

However, the exquisiteness of Bacuit Bay caressed our spirits and soothed us as if Mother Nature said, “It’s going to be alright.”

El Nido Palawan Island Hopping Tour A

Our next stop was another amazing natural formation the locals call Big Lagoon. To get to Big Lagoon, we slowly cruised down this canyon of limestone walls. Just like in Small Lagoon, the seabed is made of pure, white sand.

El Nido Palawan Island Hopping Tour A

At the end of the canyon, the color of the water abruptly shifts from white-green to aquamarine to a deep hue of blue. We were now at the gate of Big Lagoon.

El Nido Palawan Island Hopping Tour A

Simply wow! Just look at this incredible wonder of nature! Protected and hidden by high, ragged limestone cliffs filled with razor-sharp rocks, the majestic and extremely deep Big Lagoon resembles a lake in the middle of a secluded lagoon.

El Nido Palawan Island Hopping Tour A

For the Duders, this was their first time to go on a true backpacking trip. And they were just delighted with the experience.

Lilian posed in front of the boat as we circled around the enchanting Big Lagoon. The lagoon is also dotted with cool rock outcroppings.

El Nido Palawan Island Hopping Tour A

That’s the beautiful sea canyon where we came from. Water from Bacuit Bay feeds through Big Lagoon through this canyon. It’s wide enough to accommodate around three boats side by side.

El Nido Palawan Island Hopping Tour A

Secret Lagoon

After exiting Big Lagoon, we cruised towards our next destination, another place of secrets. On the way, we saw luxurious, exclusive resorts like these in some of the islands. These prestigious, ultra high-class resorts are reserved for the super rich and super powerful.

You want to know how exclusive? Well, these resorts actually choose their customers. Yes, they have the final say on who can book with them!

El Nido Palawan Island Hopping Tour A

After awhile, our boat slowed down as we approached a gigantic sea cliff. Yes, you guessed it: there must be something going on in there, considering there were several boats parked in front of the cliff.

El Nido Palawan Island Hopping Tour A

See that structure perched high up on the rock wall? That is a shelter for daredevil (licensed and authorized) locals who harvest the nests of swifts. These nests are then processed into the prized and super expensive bird’s nest soup.

It made us wonder: how do these daring locals manage to go up there?

El Nido Palawan Island Hopping Tour A

Look at how clear the water is! We could even see individual rocks! No one could resist jumping into that clean, clear, cool water!

El Nido Palawan Island Hopping Tour A

The sloping shoreline allowed our boat to dock near the beach. One by one, we disembarked from the boat and headed towards a small beach.

El Nido Palawan Island Hopping Tour A

Well, it’s not really small. Opposite the imposing rock cliff we saw earlier was this long, idyllic stretch of beach.

El Nido Palawan Island Hopping Tour A

“No, not that way. It’s this way,” Guide Gilbert called us. We thought the Secret Lagoon was somewhere beyond that long beach. Well, it wasn’t; it’s on the other side of that huge rock wall.

El Nido Palawan Island Hopping Tour A

To access the Secret Lagoon, we need to crawl through a small hole.

El Nido Palawan Island Hopping Tour A

Yes, that hole! It was fairly easy to crawl through there.

El Nido Palawan Island Hopping Tour A

That’s the picture-perfect Secret Lagoon, a small pool of water surrounded by very high cliffs. Just like in Secret Beach, the air here is pretty cool; the high cliff traps the air that is cooled by the water in the lagoon.

Wow, it’s like being in your private natural pool!

El Nido Palawan Island Hopping Tour A

Hey, where did the other boats go? Hehehe! Well, when we checked our watches, it was almost lunch time! Those boats must have left to take their passengers to the various lunch sites in Bacuit Bay.

We boarded the boat and prepared to head to our next destination where a sumptuous lunch will be served.

El Nido Palawan Island Hopping Tour A

Shimizu Beach

Along the way, we passed by Shimizu Beach, another destination included in Tour A. Look at that pure white sand! Look at that gorgeous cliff! Look at those swaying palms! Now, that’s a perfect beach!

According to Guide Gilbert, Shimizu Beach was named in honor of a late Japanese diver/explorer who discovered a gorgeous dive site there.

El Nido Palawan Island Hopping Tour A

Our stomachs started to rumble! It’s time to go to Mother Nature’s lunchroom, a blissful place with a surprisingly menacing name.

El Nido Palawan Island Hopping Tour A

Silently, Mother Nature waits for us,
To listen to the sweet murmurs of her brooks,
To play with the denizens of her sea,
To contemplate our existence on her cloud-capped mountains,
She beckons us to find the answers
And that is why we must joyfully heed her call


El Nido Palawan Island Hopping Adventure – Tour B: The Symphony of Bacuit Bay

$
0
0

El Nido Palawan Tour B Island Hopping

Just like a beautiful song, each of Mother Nature’s wonders contain different chords. And in each chord are notes, carefully and meticulously chosen for their harmonic affinity. Each note has its own timber, pitch, and tone, each contributing to become a mesmerizing harmony that captivates the imagination and touches the soul. The beautiful, mystical islands of Bacuit Bay in El Nido are Mother Nature’s notes in this particular song.

Our destination and lunch area was in another destination called Snake Island (yes, it does have a menacing name). Along the way, we passed by another luxurious, exclusive resort in El Nido. Staying for one night here must cost a hand and foot.

Sheila and I are not really sticklers on luxurious travel, but we definitely would not turn the other way around if someone offers us to stay in such a first-class, five-star resort. Hehehe!

El Nido Palawan Tour B Island Hopping

In contrast, we saw this tiny fishing community at the edge of the mainland. The disparity between ultra-rich resorts and poor fishing villages like these may seem miles apart. However, they share the same incredible beauty and tranquility that are common characteristics of Bacuit Bay.

El Nido Palawan Tour B Island Hopping

Snake Island

Finally, we approached the sandy shore of the majestic Snake Island. Now, you may ask why it is called Snake Island. Are there lots of snakes that live in those mangroves? Is there a giant serpent hiding in some dark, sand hole?

El Nido Palawan Tour B Island Hopping

Empty boat? Hey, where did everybody go? Anyway, just check out that stunning scenery! Bet you want to wake up, live, and work in a place like this!

El Nido Palawan Tour B Island Hopping

Oh, there you are, guys! Wait, where are you going? The beach is on the other side!

El Nido Palawan Tour B Island Hopping

Well, Guide Gilbert led us to a trail that goes up to a viewing deck, a small open space with a sunny ledge that offers a great view of Snake Island.

El Nido Palawan Tour B Island Hopping

Now, that’s Snake Island! That is beyond gorgeous, isn’t it?

Snake Island derives its name from that long, pure white sandbar which resembles a snake. Shoreward and seaward currents push the sand under the sea’s surface to form this sandbar. The long sandbar connects the mainland and the islet where we docked our boat.

The island itself, officially called Vigan Island, contains no artificial structure except for a small “shed” on the viewing deck and a small hut that acts as a shelter for Snake Island’s caretaker.

El Nido Palawan Tour B Island Hopping

At the other side of Snake Island is this dazzling aquamarine bay. Just look at how crystal clear that water is! Guide Gilbert said that several sea turtles frequent that side of the island.

El Nido Palawan Tour B Island Hopping

The noontime sun quickly burned us into a crisp and wrung our sweat out like sponges. So, while the guides prepared our lunch, we dipped into the cool water of Snake Island to ward off the heat.

El Nido Palawan Tour B Island Hopping

Let’s go to the other side of the sandbar. That green side is actually the Palawan mainland. In fact, we could hear the faint drone of motorcycles when we reached the mangroves at the other side of the sandbar.

El Nido Palawan Tour B Island Hopping

After frolicking in the crystal clear water and hiding in the mangroves, Ma’am Helen and the boatmen called us. It was time for the most awaited part of the day, a delectable, traditional yet simple lunch in a secluded island!

El Nido Palawan Tour B Island Hopping

Cudugnon Cave

After taking our lunch (burping all the way! Compliments to the cook!), we boarded our boat and headed to the next destination. on our way, we came face-to-face with a thunderstorm. Some of our friends expressed concern about the weather phenomenon; thunderstorms are often accompanied by heavy rain and strong winds. And in the open sea, bad weather can be treacherous.

But Guide Gilbert and the boatmen assured us that everything would be okay and that the storm was just passing by. They were right.

El Nido Palawan Tour B Island Hopping

The cruise to our next destination took less than 30 minutes. We docked at the beautiful white-sand beach of Cudugnon Point, but that beautiful shore was not the highlight of this place. The highlight was Cudugnon Cave, a sacred place behind the rock walls that surround the beach.

El Nido Palawan Tour B Island Hopping

We waded into waist-deep, surprisingly warm water and entered a space between two rock outcroppings. At this point, we can’t help but think: why so many of El Nido’s and Bacuit Bay’s wonders are concealed by Mother Nature.

El Nido Palawan Tour B Island Hopping

To access the cave’s main chamber, we need to crawl through another tiny opening in the rock wall.

El Nido Palawan Tour B Island Hopping

Cudugnon Cave’s Visitor’s Lobby, as we call it, is immense and reasonably protected from the sea outside. We joined other guests who were here earlier.

El Nido Palawan Tour B Island Hopping

We climbed up a sandy, slippery slope and entered the cave’s palatial main chamber. This chamber was moist when we came in here due to the rain that was coming in from the opening above the cavern.

Guide Gilbert said that thousands of years ago, Cudugnon Cave was a sacred burial site. In other words, this cave was actually used as a natural catacomb. Naturally, it is presently an important anthropological site.

El Nido Palawan Tour B Island Hopping

The glistening, slimy rock formations looked so utterly alien.

El Nido Palawan Tour B Island Hopping

Ancient Palawenos and settlers from Borneo placed their deceased loved one’s bones in natural holes like these. Symbolically, it’s returning to Mother Nature’s bosom after spending a finite life here on earth.

Unfortunately, according to Guide Gilbert, the bones and burial jars that dated back to the Sung Dynasty were extracted by archaeologists; the artifacts are now displayed in some museum out there. For us, that’s a serious disrespect to the dead and tantamount to grave robbery.

El Nido Palawan Tour B Island Hopping

Cathedral Cave

After exploring Cudognon Cave, we went back to our boat and cast off. The ominous thunderstorm finally passed and dissipated, revealing the blue afternoon sky. We cruised to our next destination, Pinasil Island, that large, dome-shaped rock outcropping at the right of the photo below.

El Nido Palawan Tour B Island Hopping

The foremost feature of Pinasil island is that dark foreboding hole at the center of the outcropping. At this distance, the cavern does not look impressive.

El Nido Palawan Tour B Island Hopping

But up close, the story dramatically changes. Aptly called Cathedral Cave, this colossal cavern has an opening higher albeit narrower than that of the Puerto Princesa Underground River.

Surrounded by high rocky cliffs that feature weird stalactites, Cathedral Cave can definitely be considered one of El Nido’s most awesome wonders.

El Nido Palawan Tour B Island Hopping

The dark interior of the cave was so high and large that we reckon it could easily swallow an entire church. We couldn’t even see its vaulted ceiling.

Also, notice the lovely greenish blue water. Looks very conducive for swimming, right? But swimming here is tantamount to suicide. That’s because the cave is home to several species of extremely aggressive, territorial, and venomous sea snakes.

Those blue ropes you see attached at the entrance of the cavern are anchor points for boats.

El Nido Palawan Tour B Island Hopping

On both sides of Cathedral Cave are gorgeous, overhanging cliffs that are perfect for deep water soloing (rock climbing without a rope. If the climber falls, he falls into the sea). Yes, they’re ideal for DWS if not for the poisonous snakes slithering below you.

According to Guide Gilbert, Pinasil Island is frequented by busyadors, or gatherers of swallows’ nests. The dried nest of the swallow, made of the bird’s dried saliva, is the main ingredient of the exotic bird’s nest soup.

El Nido Palawan Tour B Island Hopping

Pinagbuyutan Island

After taking pictures of Cathedral Cave, we announced that we wanted to take one final dip before heading home. Guide Gilbert then steered our boat towards the next destination, Pinagbuyutan Island.

Along the way, we witnessed massive sea cliffs that displayed interesting streaks of very pale red. Perhaps these cliffs are rich in iron deposits.

El Nido Palawan Tour B Island Hopping

Half an hour later, we saw where we’re headed—that dome-shaped island that is dominated by extremely high cliffs. That’s Pinagbuyutan Island, and it resembles the famous Rock of Gibraltar.

El Nido Palawan Tour B Island Hopping

Just check out that stretch of white-sand beach and those immense cliffs! What a paradise! If we have the capability to buy this island, we’re pretty sure we’d convert it to a rock climbing mecca.

El Nido Palawan Tour B Island Hopping

Everyone got out of the boat to enjoy a last dip. Just look at that amazing vista!

El Nido Palawan Tour B Island Hopping

Worried that the hot sun might burn you into a crisp? Well, just stay and wade under the shade of this nice tree whose broad canopy extends over the shoreline.

El Nido Palawan Tour B Island Hopping

A small hut serves as a shelter, umbrella, and a dressing room for those visiting the island. When we went Pinagbuyutan Island, there were three Korean ladies just enjoying the peace of the area.

El Nido Palawan Tour B Island Hopping

Are we in a seaside golf course? Well, no, but it does seem like it! Pinagbuyutan Island has patches of grass and coconut mangroves. Interestingly, the air here was quite chilly.

El Nido Palawan Tour B Island Hopping

After an hour of frolicking around and playing water games, we finally headed back to the town of El Nido. Everyone fell silent as they contemplated on our awesome two-day adventure. In fact, Muffins considered changing careers from being a writer to being a tour guide.

El Nido Palawan Tour B Island Hopping

Seven Commandos

On our way, we passed by the Seven Commandos Beach, another popular stop in an El Nido Tour B island hopping package. Pressed for time, we didn’t anchor on the beach.

As majestic as the scenery is, we didn’t find Seven Commandos enticing; it looks like the once-pristine beach is heavily commercialized. However, other accounts mentioned that the sand here is spectacularly white, and that there is a nice snorkeling area. If you were able to visit the Seven Commandos beach, do tell us what’s nice there.

El Nido Palawan Tour B Island Hopping

We found some accommodation establishments erected in Seven Commandos. They look expensive. Booking in one of the rooms inside must put a hole in one’s pocket.

El Nido Palawan Tour B Island Hopping

Ipil Beaches

Now, that’s more like it! That secluded beach is called Ipil Beach and is located in the same island as Seven Commandos. If you want some time for yourself, then Ipil Beach is the right destination. Just look at that thick forest cover and those massive cliffs!

El Nido Palawan Tour B Island Hopping

If somehow Ipil Beach is filled with people, then you can head out to an adjacent beach called, well, Ipil Beach 2! Ipil Beach 1 and 2 are separated by a natural jumble of water-borne rocks.

Check out the cliff. Can you see the entrance to a cave high up the rock wall?

El Nido Palawan Tour B Island Hopping

At last, we saw the town of El Nido and realized that it was the end of another great adventure. Seeing the rustic town left us all with a bittersweet feeling: we felt extremely happy, satisfied, and privileged to be able to visit and experience the majesty of Bacuit Bay. However, we also felt sad knowing that it would be a few more years before we can set foot in this magical place again.

El Nido, we’re going to miss you.

El Nido Palawan Tour B Island Hopping

After taking a refreshing shower and packing our bags, we rode Lester’s van which took us back to Puerto Princesa.

Along the way, we saw another spectacle, a majestic sunset which highlighted a huge mountain and a vast bay. It was then that we realized we will come back to this place. We need to come back to this place. Mother Nature is singing, telling us that there are still many more wonders and adventures to explore in El Nido.

We will heed her song. How about you?

El Nido Palawan Tour B Island Hopping

Special Thanks

Thank you very much, Ma’am Helen and Lester. Both of you are awesome guides! You never left us, you kept us safe, and you made sure all our concerns are addressed. Both of you have the ideals that other guides should strive to achieve.

El Nido Palawan Tour B Island Hopping

A very special thanks to Ma’am Mylene, the proprietor of Victoria Guest House and Cottages. She skillfully arranged everything for us—our accommodations in Puerto Princesa and El Nido, transportation, meals, permits, and guides. Ma’am Mylene, your service is exemplary and beyond compare, and we are actually honored to be your guest.

El Nido Palawan Tour B Island Hopping

Tips to follow


Guest Post: Top Five Places in the Philippines to Retire

$
0
0
(Photo credits: Aleksandr Zykov / Flickr) It is never too early to make retirement plans in order to prepare yourself for in terms of financing and security. Typically, retirement is associated with an escape from the hustle and bustle of city life, and retirees always think of living somewhere peaceful and close to Mother Nature. […]
Viewing all 334 articles
Browse latest View live